Honda Lawn Mower Engine Parts: Match the Engine and Mower Model
Honda lawn mower engine parts are easiest to match when you identify the engine model, type code, and mower model before ordering. That small bit of checking helps you buy the right spark plug, air filter, carburetor, blade adapter, recoil starter, or gasket instead of a part that almost fits.
Have you ever held two air filters side by side and wondered why one costs more but looks nearly identical? Has a replacement carburetor arrived with the right bolt pattern but the wrong throttle linkage?
I once ordered a recoil starter by mower model alone, then found that the engine had a different mounting pattern. The box sat on my bench while the mower stayed useless, and the return process took longer than the repair. That mistake is common, not foolish.
I wrote this guide for anyone trying to repair a Honda-powered walk-behind mower without getting buried in part numbers. You’ll learn how to identify the engine, match common replacement parts, spot bad listings, and decide when a repair is worth your time.
Get the match right and you can save a trip to the store, avoid repeated disassembly, and bring the mower back without a sputtering engine or loose hardware. Get it wrong and you may damage a thread, create a fuel leak, or spend twice for the same repair.
This article takes about 12 minutes to read, and it gives you a practical path from identification to installation:
- You’ll know where to find the Honda engine code.
- You’ll match common parts by engine family and mower details.
- You’ll avoid common mistakes with carburetors, spark plugs, and recoil starters.
- You’ll know which repairs need extra care or professional help.
Honda Lawn Mower Engine Parts: How to Match the Correct Part
Honda lawn mower engine parts should be matched by the engine model and type code first, then checked against the mower model, serial range, and part description. A mower may carry a familiar brand name while using different Honda engines across several production runs.
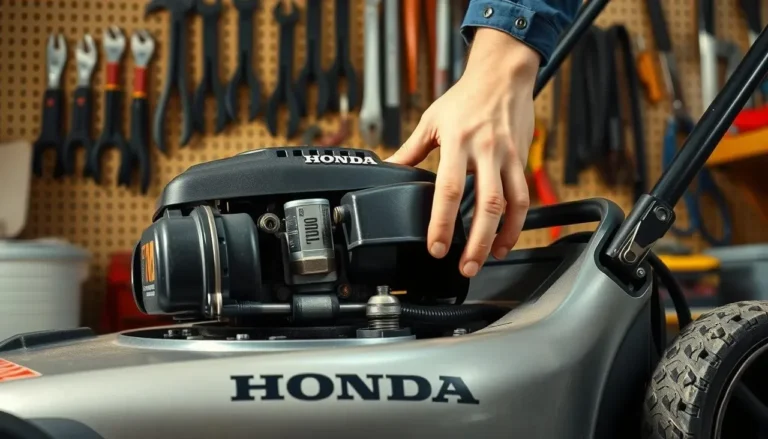
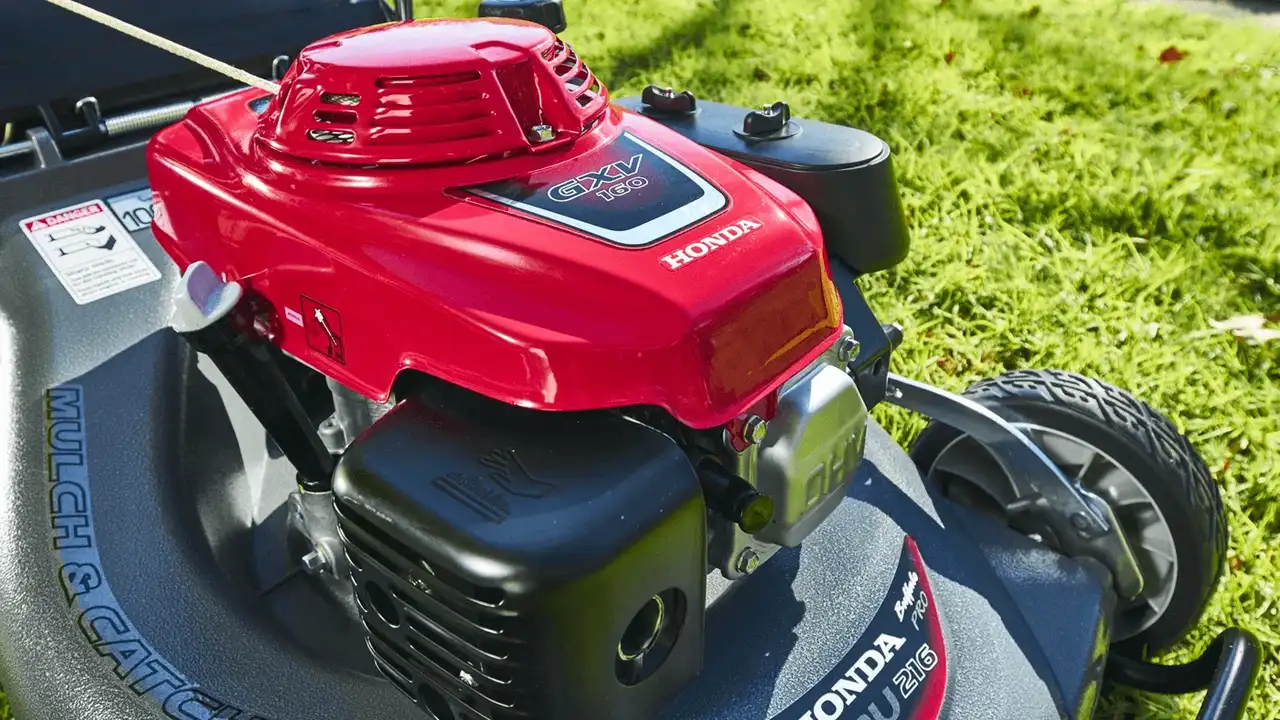
Start with the engine itself. Look for a stamped or printed identification code on the engine shroud, near the fuel tank, beside the crankcase, or close to the recoil starter housing. Honda engine identification commonly includes a model name such as GCV160, GCV170, GCV190, or GCV200, followed by a type code and a serial number.
The engine model identifies the basic engine family. The type code identifies a particular version, which can affect the carburetor, control bracket, air cleaner, flywheel, ignition coil, and other parts.
Write down every visible character before searching for a replacement. One missing letter can send you toward a part for a similar engine that uses a different cable bracket or mounting hole.
The mower model still matters. Deck size, drive system, blade arrangement, and control cables belong to the mower, not always the Honda engine. A self-propelled mower can use the same engine as a push mower while needing different cables, blade hardware, or belt parts.
Use this order when identifying a replacement:
- Clean dirt from the engine label or stamped code with a dry brush.
- Record the engine model, type code, and serial number.
- Record the mower brand and complete mower model.
- Photograph the old part from several angles.
- Compare mounting holes, wire connectors, gaskets, shafts, and cable brackets.
- Check the seller’s fitment notes before placing the order.
A listing that says “fits Honda 160cc engines” is not enough by itself. Engine displacement can point you in the right direction, but it doesn’t prove that the fuel passage, air filter housing, crankshaft length, or control linkage matches.
The safest match combines three clues: the Honda engine code, the physical shape of the old part, and the mower’s own model information. If one clue conflicts with the others, stop before ordering and check the parts diagram or ask a dealer to confirm the number.
For a wider look at deck hardware, handles, wheels, cables, and non-engine components, Honda lawn mower parts should be matched by mower model and serial number rather than engine size alone.
Common Honda engine families and their parts
Honda’s residential walk-behind mower engines often use the GCV family, while older or heavier-duty machines may use other engine families. The family name gives you a starting point, not a complete part number.
The table below shows the kind of match you should make before buying. Part numbers can change by type code and production range, so the table is a guide for identification rather than a replacement for exact fitment.
| Engine information | Parts often checked | Details that can change the match |
|---|---|---|
| GCV160 | Air filter, spark plug, carburetor, recoil starter | Type code, auto choke design, control bracket |
| GCV170 | Air filter, carburetor, ignition parts, starter parts | Air cleaner shape, emissions setup, cable routing |
| GCV190 | Spark plug, carburetor, flywheel, recoil starter | Type code, mower application, shaft and control layout |
| GCV200 | Air filter, carburetor, ignition coil, gaskets | Production version, connector style, shroud design |
| GX-series engine | Filters, carburetor parts, recoil starter, seals | Engine type, commercial application, shaft dimensions |
The phrase OEM, meaning original equipment manufacturer, usually refers to a part made for the original equipment design. An aftermarket part can work well, but quality and fit vary more between sellers.
I’d choose an OEM or high-quality equivalent for a carburetor, ignition coil, or flywheel because a poor match can cause hard starting or unsafe operation. A basic paper air filter is less complicated, but the filter still needs the correct shape and sealing edge.
How to Identify Honda Lawn Mower Engine Parts
Correct identification depends on the part’s job, not just its appearance. A spark plug transfers ignition energy, a carburetor meters fuel, and a recoil starter turns the crankshaft, so each part needs different measurements and clues.
Spark plugs and ignition parts
A spark plug must match the engine’s thread size, reach, heat range, and terminal style. The plug already installed may be the wrong replacement, so copying its number without checking the engine code can pass an old mistake to the next repair.
Remove the spark plug boot, the rubber connector that covers the plug terminal, only after the engine is cool. Dirt around the plug can fall into the cylinder, so brush the area clean before loosening the plug.
A plug with the wrong reach can sit too far into the combustion chamber or fail to reach the proper position. A damaged plug, cracked porcelain insulator, or badly worn electrode deserves replacement rather than a quick cleaning.
If the plug is fouled, check the cause instead of treating the plug as the whole problem. A rich fuel mixture, restricted air filter, stale gasoline, oil entering the cylinder, or repeated flooding can foul a new plug in short order.
The plug gap is the distance between the center and ground electrodes. Use the engine’s specified gap rather than bending the electrode by guesswork, and tighten the plug firmly without leaning on the wrench with all your strength.
The full plug replacement process has its own small traps, so change a Honda mower spark plug only after confirming the correct plug and engine code.
Air filters and pre-cleaners
An air filter keeps dust from entering the engine. A restricted filter reduces airflow, while a poorly sealed filter can let fine grit pass into the cylinder and speed up wear.
Honda walk-behind engines may use a paper filter, a foam pre-cleaner, or both. A pre-cleaner is the washable foam layer that catches larger dust before air reaches the paper element.
Match the filter by housing shape and sealing surface. Two filters can have the same length and width but different tabs, thicknesses, or rubber edges, which can leave a gap around the intake.
Replace a paper filter when it’s dirty, crushed, oily, or difficult to clean without damaging the media. Wash a foam pre-cleaner with mild soapy water, let it dry fully, then apply the light amount of filter oil called for by the engine design.
Never run the engine without its air filter assembly installed. A short test can pull dust straight through the intake, especially on a dry lawn or gravel driveway.
Carburetors and fuel-system parts
A carburetor mixes gasoline with air and sends the mixture into the engine. Honda carburetors can look alike while differing in jet size, choke design, fuel inlet direction, gasket shape, and throttle linkage.
Before buying one, compare:
- The number and position of mounting holes.
- The intake gasket shape and bolt spacing.
- The fuel-line nipple size and location.
- The throttle or governor linkage attachment.
- The air cleaner mounting pattern.
- The presence of a primer bulb or automatic choke.
A replacement carburetor may arrive with a bowl, gasket, float, and needle, but the contents vary by seller. Read the package details instead of assuming every part shown in a photograph is included.
Fuel work needs extra care. Work outdoors or in a well-ventilated place, keep gasoline away from flames and hot surfaces, and let the engine cool completely before disconnecting a fuel line. Do not smoke near the mower, and keep a suitable container ready for drained fuel.
Turn off the fuel valve if the mower has one. If no valve exists, clamp the fuel line with a proper fuel-line clamp, not locking pliers that can crush the hose.
When you remove a carburetor, photograph the governor spring and linkage before taking them loose. A spring installed in the wrong hole can make the engine race, surge, or fail to respond correctly.
A detailed carburetor match matters more than a bargain price, so replace a Honda mower carburetor only after comparing the linkage and gasket arrangement with the original.
Recoil starters and pull cords
The recoil starter is the spring-loaded assembly that turns the engine when you pull the starter rope. A replacement starter must match the mounting pattern, starter cup engagement, rope exit position, and housing shape.
A broken rope doesn’t always mean the whole recoil assembly needs replacement. If the pulley, spring, and housing are sound, a new rope may solve the problem.
Before opening a recoil starter, wear eye protection and keep your fingers away from the spring. The recoil spring stores energy and can snap the pulley around if the tension releases suddenly.
If you only need a rope, secure the pulley before removing the old cord. Count the pulley turns needed to create spring tension, then test the rope travel gently before pulling hard.
The rope diameter matters. A rope that’s too thick can bind in the housing, while a rope that’s too thin may wear quickly or slip through the handle knot.
A complete starter is often easier for a first-time repair, but a rope-only repair costs less when the old pulley rotates smoothly. The practical choice depends on the condition of the spring and housing, not just the broken cord.
For the repair sequence and starter choices, replace a Honda mower pull cord with the engine stopped, the spark plug boot removed, and the recoil spring controlled.
Gaskets, seals, and small hardware
A gasket fills a joint between two metal or plastic surfaces. Intake gaskets, carburetor gaskets, muffler gaskets, and crankcase seals are not interchangeable, even when their outside shape looks close.
Never reuse a torn intake gasket or one that has been crushed unevenly. A small air leak can create a lean mixture, causing surging, hard starting, or an engine that dies when the blade engages.
Match bolts by diameter, thread pitch, and length. A bolt that’s too long can contact internal parts, while a bolt that’s too short may loosen from vibration.
Keep removed washers and spacers in a small tray or labeled bag. Mower repairs often involve parts that look unimportant until the blade adapter sits too high or a pulley rubs against the deck.
A Reliable Honda Mower Parts Buying Process
The best purchase process starts with identification and ends with a physical comparison before installation. Rushing straight from a symptom to a shopping cart is how “almost right” parts pile up in a garage.
Use the old part as evidence
Take photos before removing anything. Include the part installed, the cable route, the spring position, the connector, and the surrounding hardware.
Write down the symptoms as well. “Starts only with fresh fuel” points in a different direction from “has no spark,” and “rope pulls normally but engine won’t turn” suggests a different inspection than a jammed recoil starter.
A parts diagram can help you identify a gasket, washer, spring, or spacer that doesn’t have a clear name. Diagrams also show how parts fit together, which is handy when a repair leaves you with one mysterious washer on the bench.
Compare part details before checkout
Check these details in the listing:
- Exact engine model and type code.
- Compatible serial range, if provided.
- Dimensions and mounting-hole spacing.
- Included gaskets, seals, springs, or hardware.
- Return conditions for electrical and fuel parts.
- Seller photos that show the actual connector or linkage.
A generic title can be misleading. “160cc carburetor” might cover several designs, and “Honda-compatible” can mean the part fits only one style of intake or control system.
For tune-up items, a matched kit can save time, but only when the kit lists your engine code. Honda mower tune-up kits may bundle a filter, plug, oil, and other service parts, yet a kit for the wrong engine can leave you with a filter that won’t seal.
Test fit before final assembly
Place the new part beside the old part and compare the features that matter. A carburetor’s fuel inlet may point in a different direction, or a recoil starter’s rope opening may sit a half-inch away from the mower shroud opening.
Do not force a part into place. If a bolt hole needs prying into alignment, the part may be wrong, a gasket may be out of position, or a bracket may still be attached to the old component.
A clean fit should feel calm and ordinary. When a repair starts requiring bending, drilling, grinding, or extra washers, stop and verify the match.
Parts that need extra caution
Some repairs can create a safety problem if the part is wrong or installed poorly:
- Flywheel and ignition parts: incorrect fit can affect ignition timing or damage the crankshaft key.
- Blade adapters: incorrect height or bore fit can let the blade loosen.
- Governor parts: wrong spring placement can cause dangerous engine speed.
- Fuel components: leaks can reach hot engine surfaces.
- Muffler hardware: loose fasteners can create hot exhaust leaks.
- Electrical switches: a bad connection can prevent the engine from stopping.
Disconnect the spark plug boot before working near the blade, flywheel, or ignition system. Treat the blade as sharp even when the engine cannot start, because rotating the blade by hand can move linked parts.
Do you need a professional for every Honda mower engine repair? No, but a technician is the right choice when the crankshaft is damaged, the flywheel won’t release, the engine runs uncontrollably fast, or fuel continues leaking after a correct installation.
I once chased a rough-running engine by replacing a carburetor, only to find that a tiny intake gasket had folded during installation. The new carburetor was fine, but the folded gasket let air sneak past the joint; that little paper edge caused the whole headache.
Troubleshooting Honda Lawn Mower Engine Parts
A symptom points toward a system, not always one failed part. Check the simple causes first, then test one change at a time so you don’t lose track of what fixed the mower.
| Symptom | Parts to inspect first | What the result may suggest |
|---|---|---|
| Engine won’t start | Spark plug, fuel line, air filter, carburetor | No spark, blocked fuel, restricted air, or poor fuel metering |
| Engine starts and dies | Carburetor, fuel cap vent, air filter | Fuel restriction, stale fuel, or limited airflow |
| Engine surges | Intake gasket, carburetor, governor spring | Air leak, fuel mixture problem, or linkage issue |
| Pull rope won’t move | Recoil starter, blade, flywheel area | Starter jam, blade obstruction, or internal engine resistance |
| Rope pulls but engine doesn’t turn | Starter cup, recoil pawls, flywheel | Starter engagement problem |
| Oil leaks near the blade | Crankshaft seal, sump gasket, overfilled oil | Seal damage, gasket failure, or excess oil |
| Engine vibrates after blade work | Blade, adapter, crankshaft | Bent blade, wrong adapter, or shaft damage |
Start with fuel quality and basic controls. Old gasoline can create sticky deposits in small passages, while a closed fuel valve, engaged safety control, or blocked air filter can mimic a failed carburetor.
If the engine has no spark, inspect the plug, boot, ignition coil wire, and stop-switch wire. Keep hands clear of the blade and flywheel while testing, and follow the mower’s shutoff arrangement so the engine cannot start unexpectedly.
If the engine starts but hunts up and down, inspect the intake gasket and governor linkage before adjusting anything. Bending a governor spring or changing a factory setting can make the problem worse and may allow excessive engine speed.
A mower that smokes blue may have oil entering the combustion area, while black smoke often points toward excess fuel or restricted air. Replacing a spark plug can mask the symptom for a few minutes, but it won’t correct the cause.
Pro Tip: Put each removed part in a labeled cup, such as “air cleaner,” “carburetor,” or “starter.” Small washers and spacers are easy to mix up when several repairs happen in one afternoon.
Maintenance That Protects Replacement Parts
Routine maintenance helps new parts last longer because dirt, stale fuel, and loose hardware are common sources of repeat failure. A mower that gets clean fuel and a clear air path is much easier to diagnose.
Use fresh gasoline stored in a clean, approved container. If the mower sits for long periods, follow the engine maker’s storage instructions for fuel treatment or draining the carburetor.
Check the air filter before each mowing season and more often in dusty conditions. Clean grass clippings from the cooling fins and engine shroud so heat can escape.
Inspect the spark plug periodically for a worn electrode, cracked ceramic, heavy carbon, or an oily coating. A plug that looks abnormal gives you information about the engine, not just the plug.
Keep the mower deck free of packed grass. A heavy mat can strain the blade system, make the engine labor, and hide loose blade hardware.
Tighten visible fasteners during seasonal service, but don’t over-tighten small bolts. Aluminum engine threads can strip when a short bolt gets far too much force.
A simple service routine works well:
- Clean the mower before inspection.
- Check the air filter and spark plug.
- Inspect fuel lines and the carburetor area for dampness.
- Check the starter rope and handle.
- Inspect the blade, adapter, and mounting hardware.
- Run the engine briefly and listen for changes.
The goal isn’t to replace parts on a calendar. The goal is to catch wear before a small issue turns into a damaged engine or an unsafe blade assembly.
Important Tip: Never store gasoline in an open container near a furnace, water heater, pilot light, or other ignition source. Fuel vapor can travel farther than the liquid makes it seem.
When to Repair or Replace A Honda Mower Engine
A repair makes sense when the engine has good compression, the crankshaft is straight, and the replacement part costs much less than another mower. A complete engine replacement may make more sense when the block, crankshaft, or internal bearings are damaged.
Repair costs depend on the part and the amount of labor involved. A spark plug or air filter is a small service job, while a carburetor, recoil assembly, flywheel, or crankshaft seal takes more time and carries a greater risk of installation errors.
Use these questions before buying:
- Does the engine turn smoothly by hand with the spark plug removed?
- Is the crankshaft straight and free from deep scoring?
- Does the mower deck, transmission, and drive system still work?
- Can the exact engine code and part match be confirmed?
- Will the repair restore a mower that has other serious problems?
A mower with a sound deck and transmission can be worth repairing even when the engine needs several parts. A mower with rusted deck metal, worn wheels, damaged controls, and an uncertain engine may not justify a large repair bill.
I’d repair a clean, solid mower with a known carburetor or starter problem. I wouldn’t spend heavily on an engine that has a bent crankshaft and a cracked deck, because the replacement parts would only polish a much bigger problem.
Signs a part is probably not the real problem
A new part may not solve the issue when:
- The fuel tank contains old or contaminated gasoline.
- The engine has low compression.
- The blade is bent or installed incorrectly.
- The stop-switch wire is grounded.
- The governor linkage is disconnected.
- The intake gasket is leaking.
- The mower is being started with the safety handle released.
Troubleshoot in a clean order. Confirm the controls, fuel, air, and ignition before ordering a major component.
FAQs About Honda Lawn Mower Engine Parts
How do I find the correct Honda lawn mower engine parts?
Find the engine model, type code, and serial number on the engine label or stamped area. Match those details with the mower model, old-part photos, mounting pattern, gasket shape, and seller fitment notes before ordering a replacement.
Are Honda GCV160 and GCV190 parts interchangeable?
No, Honda GCV160 and GCV190 parts are not automatically interchangeable. Some service items may look similar, but carburetors, air filters, ignition parts, recoil starters, and gaskets can differ by engine model, type code, and mower application.
Can I use aftermarket parts on a Honda lawn mower?
Yes, aftermarket parts can work on a Honda lawn mower when the part matches the exact engine and mower application. Choose a reputable seller, compare dimensions and connectors, and avoid listings that provide only a broad displacement claim without fitment details.
How do I know if a Honda mower carburetor is bad?
A Honda mower carburetor may be faulty when fresh fuel, a clean air filter, and a sound spark plug still leave the engine hard to start, surging, flooding, or dying under load. Check for blocked passages, damaged gaskets, stuck float parts, and fuel leaks before replacement.
Should I replace a Honda mower spark plug every year?
No, a Honda mower spark plug doesn’t always need yearly replacement if the plug remains clean, correctly gapped, and free from damage. Replace the spark plug when the electrode is worn, the ceramic is cracked, the plug is fouled, or starting problems point to weak ignition.
Is the mower model enough to order an engine part?
No, the mower model alone may not identify the correct engine part. One mower series can use different Honda engines or production versions, so the engine model and type code should confirm parts such as carburetors, filters, ignition coils, and recoil starters.
Make the Part Match Before the Repair Starts
Honda lawn mower engine parts become much less frustrating when you treat identification as part of the repair, not as paperwork after the fact. Record the engine code, photograph the old component, compare the mounting details, and check the mower model before spending money.
My practical preference is to pause for five minutes before ordering rather than lose an afternoon returning the wrong part. Start with the label on the engine, confirm the physical match, and only then take the wrench to the mower.