Honda Battery Lawn Mower Troubleshooting: Power, Lights and Charging
Honda battery lawn mower troubleshooting usually starts with four checks: battery charge, battery fit, safety controls, and blade movement. A full battery won’t help if the charger, interlock switch, control handle, or blade area has a problem.
Did the mower run fine last week, then go silent after a short charge? Are the indicator lights flashing in a pattern that feels like a secret code, while the grass keeps getting taller?
I once chased a “dead battery” problem that turned out to be a packed wad of wet grass under the deck. The motor protection had stopped the mower, and I had wasted time testing the charger before cleaning the blade area. That mistake is common, not dumb.
I wrote this guide for anyone who wants a clear test order without guessing, swapping parts at random, or buying a battery that may not fix anything.
A good diagnosis can save you a battery purchase, prevent damage to the charger, and get the mower cutting again with less fuss. A rushed diagnosis can leave you with a second dead battery, a damaged connector, or a mower that stops every few minutes.
This takes about 11 minutes to read, and you’ll learn how to:
- Check a Honda battery mower safely before testing power.
- Tell a weak battery from a charger or connection fault.
- Read common light behavior without treating every flash pattern as universal.
- Fix stopping, starting, blade, and overheating problems in the right order.
- Decide when cleaning is enough and when a repair shop should take over.
Honda Battery Lawn Mower Troubleshooting Starts with A Safe Test Order
The safest troubleshooting order is battery, charger, connections, controls, blade area, and motor load. Testing those areas in sequence keeps a small fault from looking like a major electrical failure.
Start with the mower switched off, the battery removed, and the blade completely stopped. Wear gloves before reaching near the deck, and never use your hand to check whether a blade is free.
Use this order:
- Check the battery charge. Put the battery on its proper Honda charger and let the charger finish its normal cycle. A battery that has sat empty for a long period may not recover normally.
- Inspect the battery fit. Slide the battery into the compartment until the latch fully engages. A battery that looks seated but rocks slightly can lose contact under vibration.
- Inspect the contacts. Look for grass, dust, moisture, bent terminals, discoloration, or melted plastic around the battery and mower connectors.
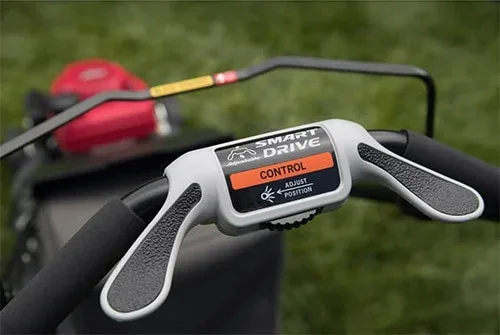
- Check the safety controls. Confirm that the handle control, bail lever, start button, and any required key or safety switch move through their full range.
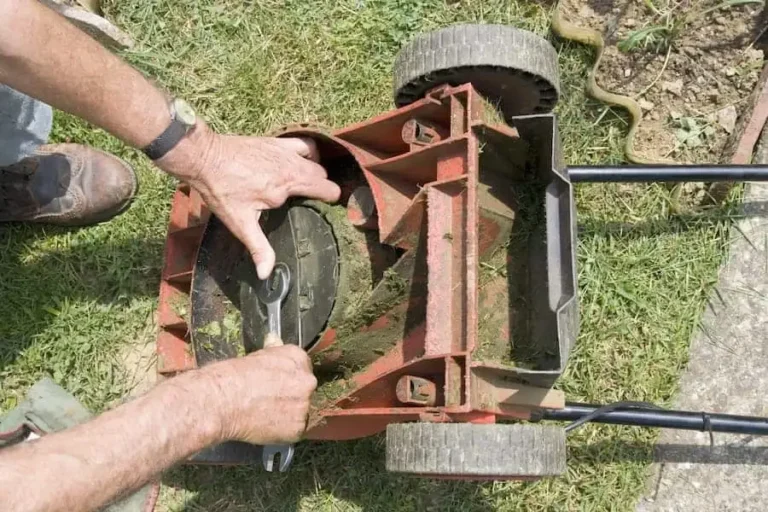
- Clear the deck. Remove packed grass, sticks, twine, and leaves around the blade and discharge opening.
- Test on light grass. Start on a small, dry patch instead of forcing the mower straight into thick, wet growth.
- Watch what happens under load. A mower that starts but slows in heavy grass may have a load problem rather than a starting problem.
A battery mower needs enough electrical power to start the motor and enough reserve to keep the motor turning when the blade meets resistance. Wet grass, a low cutting height, a dull blade, or a clogged deck can raise that load quickly.
If the mower makes no sound at all, focus on the battery, control circuit, interlock, and connections first. If the motor runs but the blade turns slowly, focus on deck drag, blade condition, motor load, and battery performance.
What the basic symptoms usually point to
The same symptom can have more than one cause, so treat this table as a starting point rather than a parts-ordering list.
| Symptom | Likely causes | First useful check |
|---|---|---|
| No lights and no motor | Empty battery, poor contact, failed charger, control fault | Charge the battery and inspect the latch and terminals |
| Lights work but motor won’t start | Safety handle, start control, blade obstruction, fault lockout | Remove the battery, clear the deck, then test the controls |
| Motor starts and stops | Overload, wet grass, blocked deck, low battery, overheating | Raise cutting height and clear the underside |
| Charger shows a fault light | Battery temperature, poor contact, charger issue, damaged battery | Reseat the battery and inspect the charger contacts |
| Mower flashes lights | Model-specific alert, battery fault, control fault, overload | Record the exact pattern and check the model manual |
| Short runtime | Battery age, thick grass, low cutting height, dull blade | Test in dry grass at a higher height |
| Burning smell or hot plastic | Loose connection, damaged terminal, motor strain | Stop using the mower and inspect it after cooling |
The charger and battery should be treated as a matched pair. A charger made for a different battery family may fit physically and still be wrong electrically, so don’t mix chargers just because the plug or rails look similar.
Pro Tip: Take a quick photo of the battery lights and mower lights before removing anything. A flash pattern can disappear after a reset, and the photo gives you something useful to compare with the model instructions.
A battery that shows full charge but drops out as soon as the blade starts may have lost usable capacity. A voltage reading by itself can mislead you because a weak battery can show a normal resting voltage and still collapse under motor load.
Honda batteries can also protect themselves when too hot or too cold. Bring a battery indoors and let it return to a normal room temperature before charging, especially after mowing in direct sun or storing the mower in an unheated shed.
Battery, Charger, and No-Start Problems
A Honda battery mower that won’t start needs a separation test: determine whether the fault follows the battery, the charger, or the mower. That single habit prevents many unnecessary part purchases.
Begin with a visual inspection. Stop using the battery if the case is swollen, cracked, leaking, badly dented, or unusually hot, and keep damaged lithium-ion batteries away from metal tools and loose hardware.
Never open a lithium-ion battery pack or try to repair its internal cells. A qualified service center should handle a battery that smells sweet or sharp, gets hot while sitting unused, or shows melted plastic around the terminals.
For a normal battery, follow these steps:
- Remove the battery from the mower and inspect the case, latch, and contacts.
- Plug the correct charger into a known-good outlet.
- Place the battery on the charger firmly, without forcing the rails or terminals.
- Watch the first minute of the charge cycle.
- Let the charger complete its normal process.
- Reinstall the battery and confirm that the mower recognizes it.
- Test the mower with the blade area clear and the cutting height raised.
If the charger shows no light, test the wall outlet with another small appliance, then inspect the charger cord and plug for cuts or crushed spots. A silent charger can be the problem, but a battery with a protection fault can also stop a normal charger from beginning its cycle.
If the charger reports a fault, remove the battery for a few minutes and inspect the contacts. Do not scrape terminals with a knife or spray liquid into the battery compartment, because a roughened contact can create more heat and a wet connector can cause a second fault.
The phrase cordless mower won’t start covers a wider group of control and battery checks, while the symptom here is narrowed to the battery-powered system. The distinction matters because a mower with working lights has already passed part of its power path, while a completely dark mower has not.
How to separate battery trouble from mower trouble
The cleanest test uses a known-good compatible battery, if one is available. Install it only after checking that the mower is dry, the blade is clear, and the terminals are not damaged.
- If the second battery works, the original battery or its charge cycle is the likely problem.
- If neither battery works, the mower controls, interlock, wiring, or motor may be at fault.
- If the original battery works in another compatible tool, focus on the mower and its battery compartment.
- If the charger rejects both compatible batteries, check the charger and outlet before blaming the mower.
Don’t borrow a battery from a different product family just because the battery slides into place. Similar rails don’t prove matching electronics, and a wrong battery can damage the tool or create a safety risk.
I once tested a mower with a battery that had been left in a damp shed, and the terminals had a faint gray film that was easy to miss. Cleaning the outside contacts and drying the compartment fixed the intermittent start problem, which saved me from chasing a motor fault that wasn’t there.
A mower that starts and quits after several seconds deserves a different test. Heavy grass, a jammed blade, or a deck packed tight with clippings can trip the motor’s protection system, and repeated restart attempts can make the battery and motor hotter.
The related symptom mower keeps stopping usually points toward load, airflow, battery reserve, or overheating checks. Raise the cutting height, mow more slowly, and clear the deck before testing again.
If the motor stops on clean, dry grass with a sharp blade and a fully charged battery, stop repeated testing. A control board, motor sensor, or internal connection may need service.
Battery charging habits that prevent repeat faults
Charge the battery in a dry, ventilated place away from direct heat. Let the battery cool after demanding work before putting it straight on the charger.
Store the battery according to the instructions for the exact model, not by a generic lawn-care rule. Some battery systems prefer partial storage charge, while others use a different recommendation, so the battery label and manual matter here.
Avoid these habits:
- Leaving the battery in a hot mower under direct sun.
- Carrying the battery by the terminals.
- Using compressed air close to sensitive connectors.
- Storing a wet battery in a sealed plastic box.
- Forcing a battery into a dirty or misaligned compartment.
- Running the mower until it shuts off every time.
Important Tip: Mark the battery with the date you put it into service. Runtime naturally changes with age, and a simple date helps separate normal wear from a sudden charger or mower fault.
Flashing Lights, Stalling, and Cutting Performance
Flashing lights are alerts, not universal error codes. The meaning depends on the exact mower, battery, charger, and flash pattern, so count the flashes and note whether the light is red, green, amber, steady, or alternating.
A single brief flash during startup may be normal system activity. Repeating flashes during a no-start condition may point to a battery connection, control lockout, temperature condition, overload, or electronic fault.
The useful details are:
- Which light is flashing?
- How many flashes occur before the pause?
- Does the pattern repeat?
- Does the pattern change when the battery is removed and reinstalled?
- Does the mower start after the blade area is cleared?
- Does the charger show a different pattern from the mower?
The phrase cordless mower flashing lights is useful because light meanings can change by model generation. Don’t copy a code from a similar-looking mower and assume the same code means the same thing.
A reset can clear a temporary overload, but a reset doesn’t repair the cause. Remove the battery, let the mower cool, clear the deck, and inspect the blade before trying again.
Why a battery mower stops in thick grass
An electric mower draws more power as the blade meets more resistance. Wet grass bends instead of cutting cleanly, clings to the deck, and can make the motor work much harder than dry grass at the same height.
Use this sequence:
- Turn off the mower and remove the battery.
- Wait for all movement and sound to stop.
- Put on gloves and tip the mower only as the manual allows.
- Clear the underside, discharge channel, and blade area.
- Check that the blade turns freely without scraping.
- Raise the cutting height by one or two settings.
- Mow at a slower walking pace.
- Cut only a portion of the grass width in very thick growth.
A dull blade creates a ragged cut and raises motor load. A bent blade can create vibration, which adds stress to the spindle and makes the mower feel weak even with a good battery.
If the mower bogs down only in tall grass, the machine may be working normally under more load than the battery system can sustain. If the mower bogs down on short, dry grass, inspect the blade, deck, wheel height, battery reserve, and motor condition more closely.
Never keep pulling the control handle while the blade is jammed. The motor may try to restart as soon as the obstruction shifts, and that can turn a simple cleaning job into a hand injury.
Charger lights and battery temperature alerts
A charger may flash red because the battery is too hot, too cold, not seated correctly, damaged, or outside the charger’s expected condition. The same red light can mean different things across product families.
The phrase charger flashing red describes the charger symptom, but the exact meaning still belongs to the charger and battery instructions for your model. Remove the battery, let it reach room temperature, inspect the contacts, and retry once.
If the red flash returns on a cool, clean, compatible battery, don’t keep cycling the charger all day. Repeated attempts won’t restore a failed cell or repair a damaged terminal.
A steady green light doesn’t prove that the mower will deliver normal runtime. The charger may have finished its job while the battery has reduced capacity, or the mower may have a separate load problem.
Choosing the right cut and mowing pace
Cut no more than about one-third of the grass height in a single pass when conditions are heavy. That rule reduces motor load and leaves fewer clumps under the deck.
A higher setting is easier on the battery and motor. Lower settings can work well on short, dry grass, but they become punishing when the lawn is damp or overgrown.
Pay attention to sound. A healthy motor usually has a steady tone, while repeated surging, grinding, scraping, or a sharp electrical smell calls for a stop and inspection.
Repairs, Model Differences, and Long-Term Prevention
Most homeowner fixes involve cleaning, charging, reseating, cooling, or changing mowing conditions; electrical, motor, and battery-pack repairs belong with qualified service personnel.
A clean battery compartment and sharp blade can solve many frustrating symptoms. That doesn’t mean every no-start condition is simple, and forcing a repair can turn a replaceable connector into a damaged control board.
Check the warranty and model instructions before removing covers. Opening a battery pack, bypassing an interlock, soldering a high-current connector, or testing live wiring around a moving blade is not a sensible home repair.
When a repair shop makes sense
Arrange professional service when any of these conditions appear:
- The battery case is swollen, cracked, leaking, or hot while idle.
- The charger cord or housing is damaged.
- The mower smells like burning plastic or electronics.
- A terminal is melted, loose, or discolored.
- The blade spindle feels rough or has side play.
- The mower flashes a fault after basic cleaning and cooling.
- The motor surges on a clear deck with a known-good battery.
- The same fault returns immediately after a reset.
Take the battery, charger, and mower together when possible. A technician can compare the parts as a system instead of guessing from one component.
I wouldn’t spend money on a motor before checking the blade and deck. A packed underside can make a sound electric mower act sick, and five minutes of safe cleaning may reveal the whole problem.
Battery mower model differences
Honda battery mower features can vary by model family, battery platform, control layout, and production period. A review of the Honda HRN-BV model can help you compare that mower’s controls and limits with the type of work you expect to do.
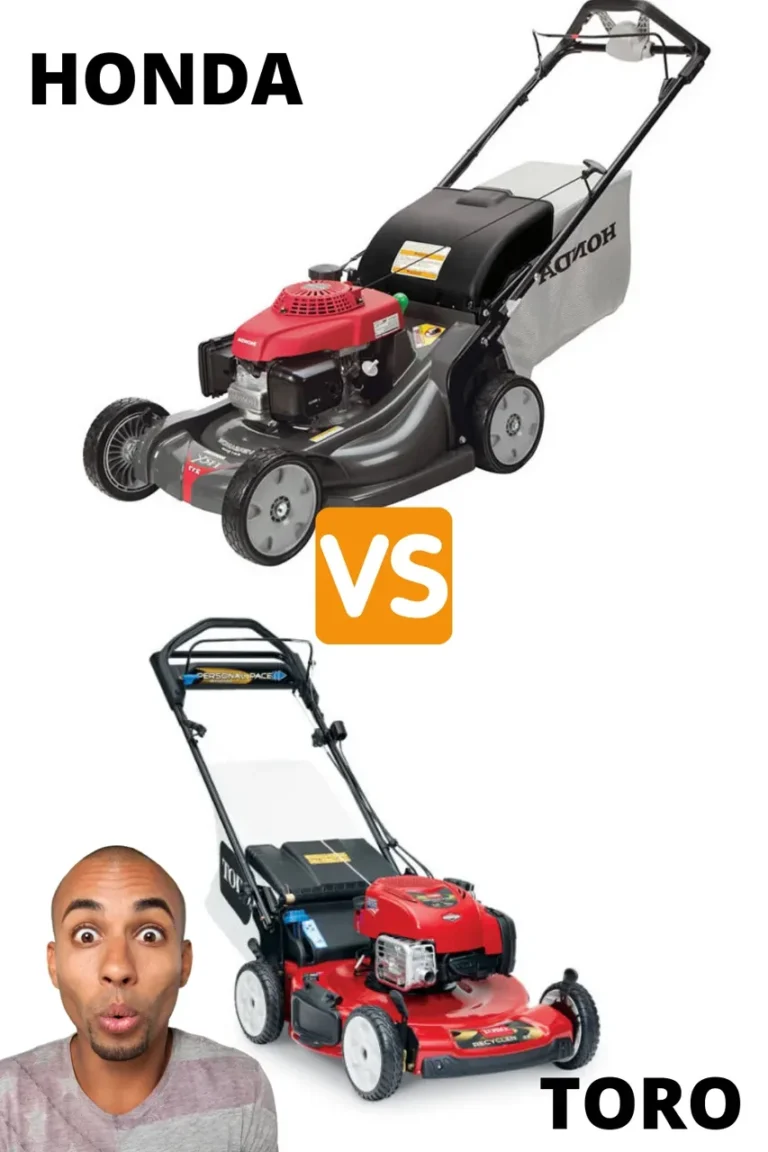
The Honda HRX-BE model belongs in a separate comparison because mower design, drive features, cutting controls, and battery behavior can differ. A mower that handles a small, regularly cut lawn may feel underpowered in thick, wet growth even if the mower itself is operating correctly.
Don’t judge battery performance by lawn size alone. Grass height, moisture, slope, blade sharpness, wheel speed, cutting width, and the number of passes all change energy use.
A short mowing session with a clean deck can use less battery than a longer session through tall wet grass. That’s why runtime complaints need the mowing conditions written down, not just a guess about minutes.
A simple prevention routine
Before each mowing session, check that the battery is seated, the deck is clear, the blade area has no visible obstruction, and the cutting height matches the grass. After mowing, remove the battery and brush away loose clippings before they become damp and packed.
Once in a while, inspect the blade edge, wheel movement, handle controls, charger cord, and battery contacts. Keep the mower dry during storage, and don’t leave the battery in a freezing or overheated location.
Pro Tip: Mow when the grass is dry if the forecast allows. Dry clippings shed more easily, the blade meets less drag, and the battery usually delivers steadier performance.
What not to do during troubleshooting
Some shortcuts create more trouble than they solve. Don’t bypass the safety handle, hold down a start button with tape, run the mower with a missing guard, or test a jammed blade while the battery is installed.
Don’t spray lubricant into electrical connectors or wash the battery compartment with a hose. Water and high-current contacts make a poor team.
Don’t assume a new battery is the answer because the old one is a few seasons old. A worn battery is possible, but a dirty connector, failed charger, overloaded blade, or control fault can produce the same complaint.
- Start with the battery, charger, contacts, controls, and deck in that order.
- Flashing lights need the exact model and pattern, not a guess from another mower.
- A clean deck, sharp blade, dry grass, and higher cutting height reduce motor load.
- Stop using damaged batteries, hot connectors, or a mower with a burning smell.
FAQs About Honda Battery Lawn Mower Troubleshooting
Why won’t my Honda battery lawn mower start?
A Honda battery lawn mower may not start because the battery is empty, poorly seated, too hot, damaged, or blocked by a safety control. Remove the battery, inspect the contacts, charge it with the correct charger, clear the blade area, and confirm the handle and start controls move fully.
Why does my Honda battery lawn mower keep stopping?
A Honda battery lawn mower keeps stopping when thick or wet grass overloads the motor, the blade area is blocked, the battery lacks usable capacity, or the mower overheats. Raise the cutting height, clear the deck safely, let the mower cool, and test again on dry, short grass.
What do flashing lights mean on a Honda cordless mower?
Flashing lights on a Honda cordless mower mean the mower or battery has reported a condition that depends on the model and flash pattern. Count the flashes, note the color and pause, then match the pattern with the instructions for that exact mower and battery system.
Why is my Honda mower battery charger flashing red?
A Honda mower battery charger flashing red may indicate a hot or cold battery, poor contact, an incompatible battery, or a battery or charger fault. Remove the battery, let it reach room temperature, inspect the terminals, reseat it once, and stop repeated charging attempts if the warning returns.
Can a bad blade make a battery mower shut off?
Yes, a dull, bent, damaged, or blocked blade can make a battery mower shut off by raising motor load. Remove the battery before inspection, clear packed grass, check for scraping or vibration, and replace a damaged blade rather than trying to straighten it by hand.
How long should a Honda mower battery last while mowing?
Honda mower battery runtime depends on battery capacity, grass height, moisture, blade condition, cutting width, slope, and mowing pace. A battery that lasts normally on short dry grass but fails in tall wet grass may be facing heavy load rather than battery failure.
A Reliable Fix Starts with the Simple Checks
Honda battery lawn mower troubleshooting becomes much less frustrating when the symptoms are separated before parts are replaced. Charge and seat the battery, inspect the contacts, clear the deck, check the controls, and test under light mowing conditions.
My practical opinion is to stop after one careful reset if the same fault returns. A persistent light code, hot connector, damaged battery, burning smell, or unexplained shutdown deserves qualified service, not another round of guessing.
Start with the battery and deck today, record the light pattern if one appears, and keep the exact model information nearby. That small bit of discipline can save money, protect your hands, and get you back to a clean cut without turning a mower problem into a bigger repair.