Honda Lawn Mower Parts: Find the Right Part by Model and Serial Number
The right Honda lawn mower parts depend on the mower model, engine identification, deck setup, and sometimes the serial number, not just the Honda name on the machine. Match those details before ordering, then compare the part number, dimensions, connection points, and revision shown for your mower.
Have you ever ordered a blade that looked right online but left the grass ragged? Or found a replacement cable that was an inch too short after pulling the old one apart?
I learned that lesson during a rushed repair when I grabbed a drive cable by appearance alone. The cable fit the handle, but the lower end landed in the wrong place, and I lost an afternoon taking the mower apart twice. That’s a common mistake, not a dumb one.
I wrote this guide for homeowners, weekend mechanics, and anyone staring at a parts diagram with a little bit of confusion. The goal is to help you identify the mower first, choose the right Honda lawn mower parts second, and avoid spending money on a part that nearly fits.
When you get the match right, the mower starts more easily, cuts cleanly, and stays safe under load. When you skip the identification step, you can end up with poor cutting, slipping drive parts, fuel leaks, electrical problems, or a repair box full of expensive surprises.
This takes about 14 minutes to read, and you’ll come away with a practical way to:
- Find the model and serial information on a Honda mower.
- Tell engine parts apart from chassis and deck parts.
- Match blades, belts, wheels, cables, filters, and batteries.
- Decide when a genuine Honda part or a quality replacement makes sense.
- Diagnose common fit and performance problems before ordering again.
Honda Lawn Mower Parts: How to Match the Right Part
Honda lawn mower parts are easiest to match when you identify the complete machine before searching for a replacement. Start with the mower model code, record the serial number, identify the engine family, and compare the requested part with the mower’s diagram or parts list.
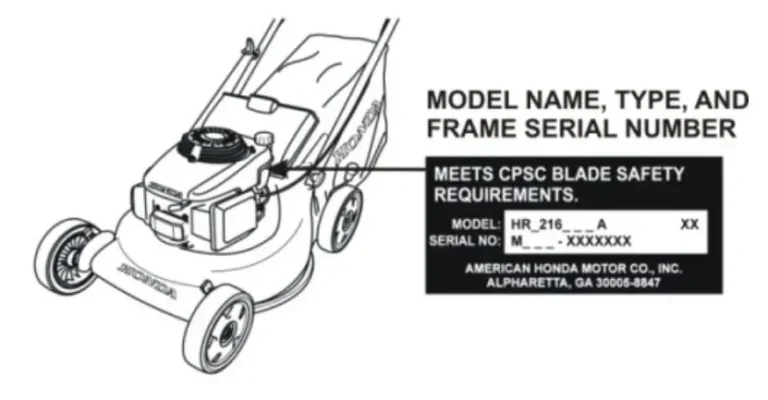
The model number identifies the mower design, while the serial number narrows the machine to a production range or revision. Two mowers can look almost identical and still use different blade adapters, wheels, cables, carburetor parts, or control brackets.
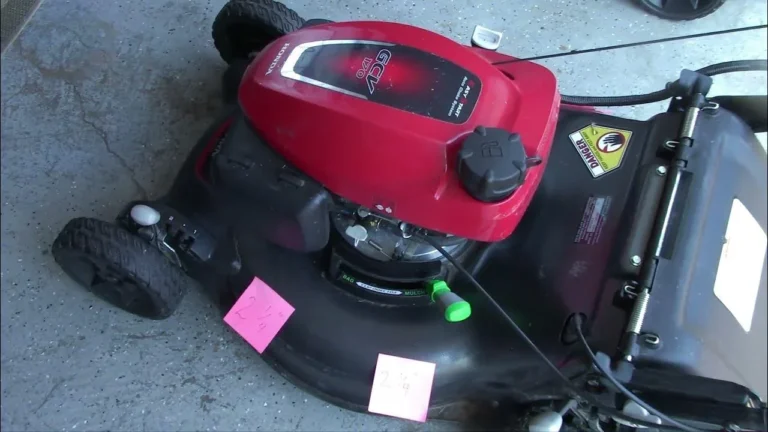
Look for the model label on the rear of the deck, near the handle, beside the discharge opening, or on the upper frame. The label can be dirty, sun-faded, or partly hidden by a grass bag, so wipe the area with a dry cloth before reading it.
The engine may carry a separate identification stamp on the crankcase, recoil housing, or engine shroud. Honda engine markings can help with filters, spark plugs, carburetor components, ignition parts, and other motor-specific repairs, but an engine number alone may not identify the mower chassis.
Use This Identification Order
Follow the same order every time. It takes a few minutes and saves far more time than guessing from a product photo.
- Clean the identification areas. Remove packed grass and dust without spraying water into the engine, control housing, or electrical connections.
- Write down the mower model. Copy every letter, number, dash, and suffix exactly as shown.
- Record the serial number. A blurry photo is useful, but a written backup prevents a wrong character from sending you toward the wrong diagram.
- Record the engine model. Use the engine marking for motor parts, not as a substitute for the mower model.
- Measure the old part when safe. Blade length, belt width, wheel diameter, cable housing length, and filter dimensions can expose a bad listing.
- Compare the mounting details. Count holes, compare bolt spacing, inspect shaft shape, and check connector style before placing the order.
- Confirm the revision. A part listing may apply only before or after a certain serial range.
A part number is stronger evidence than a picture. Photos can hide a small change in a pulley offset, spring shape, hole pattern, or electrical connector, while a correct part number ties the item to a defined application.
A mower model also has a deck configuration, meaning the way the blade, discharge chute, bagger, guard, and deck housing are arranged. A replacement blade that fits the crankshaft may still be wrong for the deck because its lift wings, center hole, or length can create poor airflow or unsafe clearance.
| Part type | Information to match | Extra check before purchase |
|---|---|---|
| Blade | Mower model, blade part number, length, center hole | Blade thickness, lift direction, bolt and washer |
| Drive belt | Mower model, transmission style, belt number | Width, length, pulley path, tensioner position |
| Control cable | Mower model, control function, cable number | Housing length, end fittings, routing |
| Wheel | Model, wheel position, diameter | Axle bore, bearing or bushing, tread style |
| Air filter | Engine model, filter number | Foam, paper, or combination design |
| Spark plug | Engine family and plug specification | Thread size, reach, gap, heat range |
| Battery | Electrical system and mower model | Voltage, terminal layout, charger compatibility |
| Bag or chute | Deck model and collection system | Mounting tabs, opening shape, latch position |
The question worth asking before every order is simple: does the listing identify your exact mower, or does it only say “fits many Honda mowers”? A broad fit statement can be useful for common hardware, but it isn’t enough for a blade, belt, cable, clutch part, or electrical component.
Pro Tip: Photograph the model label, serial label, old part, and mounting area before disassembly. Put the photos in a folder with the mower model so next year’s repair doesn’t turn into a scavenger hunt.
If the model label has disappeared, measure and photograph everything you can, then compare the frame layout, deck shape, handle controls, wheel arrangement, and engine markings. A parts counter or qualified small-engine technician may identify the machine from those details, but ordering by color or handle shape alone is a roll of the dice.
A model search also needs careful spelling. A single letter can separate a self-propelled mower from a push model, or a newer revision from an older one. Don’t leave out suffixes, letters after a dash, or characters printed in a second line.
Main Honda Lawn Mower Parts and What to Check
The main Honda lawn mower parts fall into five groups: cutting components, drive components, engine service parts, chassis hardware, and electrical or control parts. Each group has different fit checks, so the safest search starts with the job the part performs.
Cutting Parts Need More Than A Length Measurement
Blades are the most common replacement item, but length alone doesn’t prove a match. A blade also has a center hole, outer hole pattern, thickness, lift profile, rotation direction, and deck clearance.
The blade adapter connects the blade to the crankshaft and may include a pulley, washer, key, or special mounting arrangement. If the adapter has wear, replacing only the blade can leave movement, vibration, or a loose fit.
A blade with too little lift may leave clumps because the deck loses the airflow needed to move clippings into the bag. A blade that is too long can strike the deck, while an incorrect center hole can wobble even when the bolt seems tight.
For the correct cutting setup, compare the old blade with the mower diagram and confirm:
- Blade length from tip to tip.
- Center hole shape and diameter.
- Outer mounting holes and spacing.
- Lift wing direction.
- Blade thickness.
- Washer, bolt, and adapter arrangement.
- Deck clearance with the blade installed.
The cutting system also includes the grass bag, bag frame, discharge guard, mulch plug, and chute. A bag that looks close may fail to latch, block airflow, or sit too low against the ground.
The detailed differences between blade shapes, grass collection parts, and mounting hardware are covered in Honda cutting parts. That comparison helps when the mower cuts unevenly, leaves a windrow, or fills the bag poorly after a blade change.
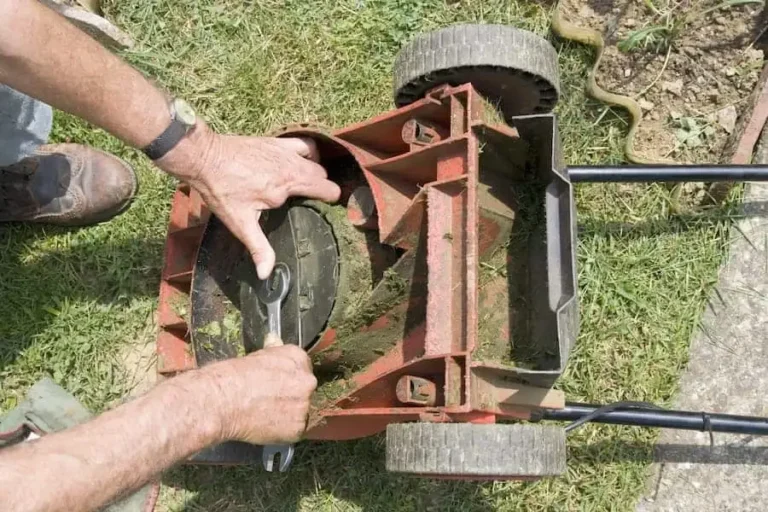
Before touching a blade, remove the spark plug wire and secure it away from the plug. On electric-start or battery-equipped machines, disconnect the battery when the service procedure calls for it, and wear gloves because a dull blade can still open your hand quickly.
Important Tip: Never hold a mower blade with bare fingers while loosening the bolt. Use a block or approved blade holder to stop rotation, and keep your hand away from the blade edge.
My worst blade-related shortcut was cleaning packed grass under a deck without properly securing the mower. The blade shifted when I brushed the housing, and the sudden scrape against the deck made me jump backward into a stack of empty bags. Nothing serious happened, but the scare cured me of rushing that job.
Drive Parts Must Match The Mower’s Propulsion System
A self-propelled mower uses a group of parts that transfer engine power to the wheels. That group can include a drive belt, transmission, pulley, wheel gear, cable, spring, lever, and wheel assembly.
The drive cable carries movement from the handle control to the transmission or engagement arm. A cable can look correct but fail because the housing is too long, the inner wire has the wrong end fitting, or the routing puts a sharp bend near the handle.
A worn drive belt can squeal, slip, crack, or throw itself off a pulley. Grass and dirt around the transmission pulley can create the same symptom, so clean the area before deciding that the belt is the only problem.
Wheel problems deserve a close look. A worn gear inside a drive wheel may cause one side to turn while the other side slips, while a damaged axle bushing can make the wheel wobble even with a good tire.
Check these details before ordering a drive component:
- Push or self-propelled mower design.
- Front-wheel, rear-wheel, or variable drive arrangement.
- Cable routing and end fittings.
- Belt width, length, and rib pattern.
- Pulley size and alignment.
- Wheel diameter and internal gear.
- Transmission or gearbox identification.
- Left and right wheel position.
The parts used to move a self-propelled mower are covered in Honda drive system parts. That subject deserves its own check because belts, cables, and wheels can share a similar symptom while needing completely different repairs.
If the drive engages late, inspect cable slack and the engagement arm before buying a transmission. If the mower moves but struggles uphill, check the belt, pulley condition, wheel gears, and drive control adjustment in that order.
Could a new cable fix a mower that won’t move? Yes, if the old cable is stretched, broken, kinked, or disconnected, but a new cable won’t repair a worn transmission or stripped wheel gear.
Keep your fingers clear of pulleys and wheels during testing. Stop the engine, remove the spark plug wire, and wait for all moving parts to stop before checking belt alignment or pulling debris from the drive area.
Engine Parts Need The Engine Identification
Engine parts require the engine model, not only the mower’s deck model. Air filters, spark plugs, carburetor gaskets, fuel lines, recoil components, ignition coils, and muffler hardware can change between engine families.
The air filter protects the engine from dust and fine grass particles. A dirty filter can cause hard starting, black smoke, weak power, or an engine that dies when the throttle opens, but a filter that does not seal correctly can let dirt bypass the filter media.
A spark plug must match thread size, reach, heat range, and terminal style. The plug gap also matters, and the correct gap should come from the engine specification or service information rather than a guess based on another mower.
Fuel-system parts need extra care because old gasoline can soften hoses, clog small passages, and leave sticky residue in a carburetor. Replace cracked fuel lines with tubing rated for small-engine fuel, and keep fuel away from hot surfaces and open flames.
The engine parts covered in Honda engine parts include the items that need the closest engine-model match. A mower chassis can remain the same while the engine supplier, carburetor design, air-filter shape, or ignition setup changes.
A repair often fails because the owner orders a carburetor by engine horsepower instead of model code. Horsepower descriptions are too broad for accurate fit, and the throttle linkage or fuel inlet may land in a different position.
Use this quick engine check:
- Photograph the engine label and recoil housing.
- Write down the full engine model and type markings.
- Compare the air-filter housing shape.
- Check fuel-line size and inlet direction.
- Match the throttle and choke linkage.
- Replace gaskets when the old gasket is crushed, torn, or hardened.
- Test for leaks before starting the engine.
Drain fuel in a well-ventilated area before opening the fuel system. Never smoke, run the engine indoors, or pour gasoline near a water heater, furnace, pilot light, or hot exhaust.
Batteries And Electrical Parts Need A System Match
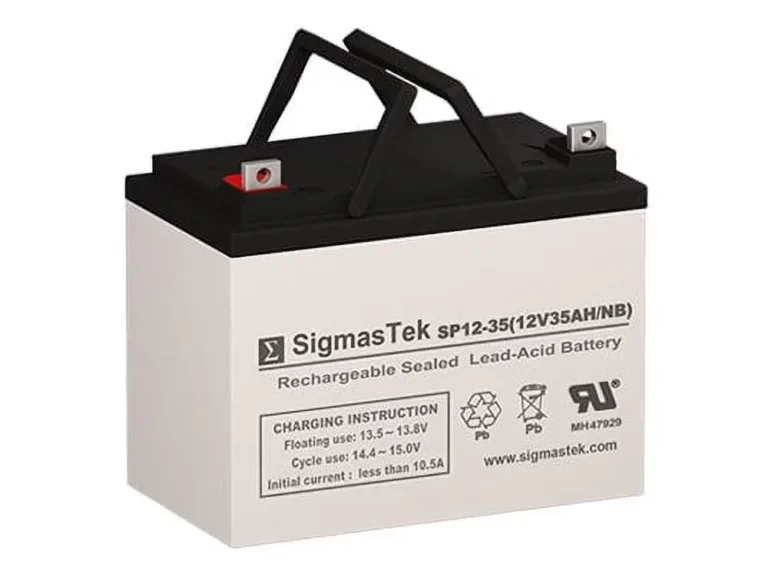
Battery-powered or electric-start Honda mowers can use a battery system that differs from a small engine’s starting battery. Voltage, physical size, terminal type, charger design, and control electronics all matter.
A battery with the correct voltage can still be wrong if the terminal layout reverses polarity or the case does not lock into the tray. A charger from another system may connect physically but deliver the wrong charging pattern.
The battery replacement details in Honda battery replacement are useful when a mower has a weak start, a short run time, a flashing indicator, or a battery that refuses to charge. Match the battery and charger as a set unless the manufacturer’s parts information confirms compatibility.
Before removing a battery, switch the mower off and follow the machine’s battery disconnect procedure. Keep metal tools away from both terminals, and stop if the battery case is swollen, cracked, leaking, or hot.
Electrical problems can come from a loose connector, corroded terminal, damaged fuse, failed switch, or weak battery. Replacing the battery without checking the connection can waste money and leave the same fault sitting under a new plastic case.
Chassis, Handle, And Control Parts
The mower chassis includes the deck, handle, height-adjustment levers, control bail, throttle controls, wheel brackets, guards, and fasteners. These parts often suffer from bent metal, rust, impact damage, or repeated folding rather than normal engine wear.
A control bail must return freely and stop the engine or blade system as designed. A bent handle can place stress on the cable, while a replacement cable routed outside the original path can snag when the handle folds.
Height-adjustment parts need the correct side and position. A left-side lever may look like a right-side lever, but the stop points and spring direction can differ.
Check the deck for cracks around wheel brackets and handle mounts. A small crack can spread under vibration, especially when the mower hits a curb or hard object.
How to Buy and Install Honda Mower Parts Without Regret
The safest purchase process is to identify the part by function, confirm the model and serial range, compare the old part, and inspect the new part before installation. A low price means little if the part creates another failure or takes three hours to return.
Genuine, OEM-Style, And Aftermarket Parts
A genuine part comes through the brand’s approved parts channel and normally carries the manufacturer’s part number. An OEM-style part is made to match a known design, while an aftermarket part comes from another supplier and may use different materials, packaging, or fit tolerances.
I’d choose a genuine blade adapter, safety control component, belt with a precise fit, or unusual transmission part when the price difference is reasonable. I’m more open to a quality aftermarket air filter, spark plug, wheel, or common fastener when the dimensions and specifications match.
That choice depends on the part’s job. A decorative handle grip has little effect on safety, while a control cable, blade bolt, or brake-related component deserves a much stricter fit check.
The label “replacement” doesn’t tell you enough. Read the application list, part number, dimensions, included hardware, and return terms before ordering.
A Simple Buying Checklist
Use this checklist on your phone while shopping:
- Full mower model copied from the label.
- Mower serial number recorded.
- Engine model recorded for engine parts.
- Old part photographed from several angles.
- Part number compared against a diagram or trusted listing.
- Dimensions checked where relevant.
- Mounting holes and connectors compared.
- Left or right position confirmed.
- Hardware included or listed separately.
- Return policy checked before payment.
If a listing gives no part number and only says “universal,” slow down. Universal parts can work for simple items such as some fuel-line clamps or handle grips, but they are a poor bet for parts that control blade speed, drive engagement, fuel delivery, or electrical charging.
Accessories That Can Actually Help
Accessories can make a mower easier to use, but compatibility still comes first. Grass bags, mulch plugs, side-discharge chutes, storage covers, blade-balancing tools, and maintenance kits need to match the deck or engine arrangement.
Useful upgrades can include a replacement bag with a stronger frame, a blade-removal tool, a spark-plug socket, a fuel shutoff valve where approved, or a storage cover that keeps dust and moisture off the machine. A cover doesn’t replace dry storage, though, and trapping moisture under a cover can encourage rust.
The compatibility questions around bags, covers, mulching pieces, and maintenance add-ons are addressed in Honda mower accessories. That information helps separate a useful add-on from a part that only fits a similar-looking deck.
I wouldn’t buy an accessory just because it carries the same brand name. A grass bag built for another deck can block the discharge opening, while a mulch plug that sits loosely can allow clippings to escape near your feet.
What A Repair Usually Costs
Part prices vary by model, material, availability, and whether hardware comes with the part. Labor can cost more than the part on an older mower, especially when rusted bolts, seized pulleys, or damaged threads slow the repair.
| Repair area | Lower-cost part examples | Higher-cost concerns |
|---|---|---|
| Cutting | Blade, bolt, washer, grass bag | Adapter, spindle-related hardware, damaged deck |
| Drive | Cable, belt, wheel | Transmission, pulley assembly, multiple wheel gears |
| Engine service | Filter, plug, gasket | Carburetor, ignition coil, recoil assembly |
| Fuel system | Hose, clamp, shutoff part | Tank damage, contaminated carburetor, leaking fitting |
| Electrical | Fuse, connector, battery | Charger, control board, wiring harness |
| Chassis | Grip, spring, fastener | Deck, handle assembly, height-adjustment mechanism |
A part that costs a few dollars may still require a full teardown, so compare the repair time with the mower’s condition. If the deck is cracked, the engine smokes heavily, and the drive system is worn, replacing one small part may only postpone a larger decision.
Installation Mistakes That Cause Repeat Repairs
The most common mistake is installing the right part in the wrong orientation. Blade lift wings, belt routing, spring direction, wheel gear placement, and cable end fittings all have a correct position.
Take a photo before removing a belt, spring, or cable. Mark the routing with masking tape, and place bolts in a small tray rather than scattering them across the driveway where one disappears into the grass.
A second mistake is tightening everything before checking movement. Move the handle control, rotate the wheel by hand, turn the height lever, or operate the cable through its full range before starting the engine.
A third mistake is reusing damaged hardware. A rounded blade bolt, stretched spring, cracked pulley, or flattened washer can undo a new part quickly.
Use the following installation sequence:
- Shut down the mower and disconnect the spark plug wire or battery as appropriate.
- Clean the repair area so dirt doesn’t fall into the engine or transmission.
- Photograph the original routing and orientation.
- Compare the new part with the removed part.
- Install hardware by hand first to avoid cross-threading.
- Confirm free movement before final tightening.
- Tighten fasteners to the service specification.
- Reconnect safety components.
- Test the mower in a clear area at low load.
- Stop immediately if there is vibration, scraping, fuel odor, smoke, or unusual noise.
Never bypass a safety control to make a mower run. A disabled operator-presence control, missing discharge guard, or improvised blade fastener can turn a minor repair into a serious hazard.
Troubleshooting After A Part Change
A mower that still behaves badly after a new part may have a second fault or an incorrect installation. Don’t keep buying parts until the symptom points to a cause.
| Symptom after repair | Likely area | First check |
|---|---|---|
| Strong vibration | Blade, adapter, mounting hardware | Blade balance, correct washer, bent adapter |
| Poor bag filling | Blade lift, bag, chute | Blade type, blocked passage, torn bag |
| Drive slips | Belt, pulley, wheel gear | Belt routing, tension, worn gear |
| Cable feels loose | Cable routing or adjustment | Housing seating and control-arm travel |
| Engine surges | Air filter, fuel system, governor link | Filter seal, fuel quality, linkage movement |
| Battery dies quickly | Battery, charger, connection | Voltage match, terminals, charging behavior |
| Wheel wobbles | Axle, bushing, wheel | Fastener tightness and worn bore |
If a new blade causes vibration, stop using the mower. Check that the blade is installed upside down, the adapter is damaged, the bolt washer is missing, or the blade is bent.
If an engine starts and then dies, inspect fuel flow and air intake before ordering a second carburetor. A blocked cap vent, dirty filter, stale fuel, or loose linkage can mimic a carburetor fault.
A mower that cuts unevenly may need deck cleaning, a blade replacement, wheel-height adjustment, or a check for a bent deck. Changing the blade alone won’t level a deck that has been bent by an impact.
When A Professional Should Handle The Repair
A qualified small-engine technician is the safer choice for a cracked fuel tank, repeated fuel leaks, damaged electrical wiring, severe vibration, a seized blade bolt, a bent crankshaft, or a suspected transmission failure.
Stop the repair if a fastener won’t move without heat near fuel, if a battery is swollen or leaking, or if the deck has a crack near the blade path. A cheap repair can become a dangerous one when force, heat, or improvised tools enter the picture.
Important Tip: Run repaired equipment outdoors, away from doors and windows, and keep hands, feet, clothing, and pets clear of the discharge area. A mower can throw stones and metal fragments farther than the repair bench suggests.
Identification Problems And Model Confusion
When the label is missing, start with the machine rather than an online picture. Note the deck width, wheel position, drive control, handle design, engine markings, discharge setup, and any remaining stickers.
The process described in identifying a Honda mower can help separate the mower model from the engine model and production details. That distinction matters because a mower may carry a Honda engine while the chassis uses a different identification system.
Don’t rely on the color of the deck or the shape of the fuel tank. Manufacturers reuse visual details across several model families, and replacement parts often change during production.
If two candidate parts look identical, compare the mounting dimensions and part number. When those details still disagree, pause the order and ask a parts specialist to verify the serial range.
Key Takeaways:
- Match the mower model and serial number before searching for parts.
- Use the engine model for filters, plugs, carburetor parts, and ignition components.
- Check blade holes, lift, belt routing, cable fittings, and wheel position, not just appearance.
- Disconnect the spark plug wire or battery before working near moving parts.
- Stop using the mower if a new part creates vibration, scraping, fuel odor, or electrical heat.
FAQs About Honda Lawn Mower Parts
How do I identify the correct Honda lawn mower parts?
Start with the mower model and serial number on the frame or deck label, then record the engine model for engine-related components. Match the part number, mounting details, dimensions, and serial range shown in the parts information. A picture or general fit statement isn’t strong enough for blades, belts, cables, batteries, or fuel-system parts.
Can I use aftermarket Honda lawn mower parts?
Yes, aftermarket Honda lawn mower parts can work when the application, dimensions, materials, and safety function match the original design. Quality varies, so check the manufacturer’s part number, return policy, and included hardware. Genuine parts are often the safer choice for blade adapters, safety controls, unusual transmission parts, and components with tight fit requirements.
Are Honda mower engine parts interchangeable between models?
No, Honda mower engine parts aren’t automatically interchangeable between models. Air filters, carburetors, spark plugs, ignition coils, gaskets, and recoil assemblies can differ by engine family and production revision. Use the full engine model and type markings, then compare the part number before ordering.
Similar horsepower does not prove compatibility.
How often should Honda lawn mower parts be replaced?
Replacement timing depends on wear, storage, mowing conditions, and maintenance. Blades need attention when they are cracked, badly worn, bent, or difficult to balance, while air filters and spark plugs follow the engine maker’s service schedule. Belts, cables, wheels, and bags should be replaced when damage or poor operation appears, not only after a fixed number of seasons.
Why does my Honda mower still vibrate after a blade replacement?
A Honda mower can still vibrate after a blade replacement because the blade may be bent, installed upside down, mounted with the wrong washer, or attached to a damaged adapter. A bent crankshaft or packed debris can cause the same symptom. Stop the engine, disconnect the spark plug wire, and inspect the mounting system before running the mower again.
Should I replace a Honda mower part or buy another mower?
Replace a Honda mower part when the deck, engine, and main structure remain sound and the repair has a clear cause. Consider another mower when several major systems are worn, the deck is badly cracked, or repair labor approaches the value of a dependable replacement. A clean repair history and available parts can make an older mower worth keeping.
Make the Next Part Order Count
The best way to buy Honda lawn mower parts is to slow down before the order, not after the wrong box arrives. Write down the mower model, serial number, and engine marking, then compare the part number and physical details with the old component.
My practical preference is to spend a few extra minutes on identification and buy a properly matched part rather than chase the lowest price. That small habit protects the cutting system, drive system, engine, and your time.
Start with one clear photo of the mower label and one photo of the part you need. From there, verify the fit, follow the safety steps, and install only after the new part matches the old one in every detail that matters.