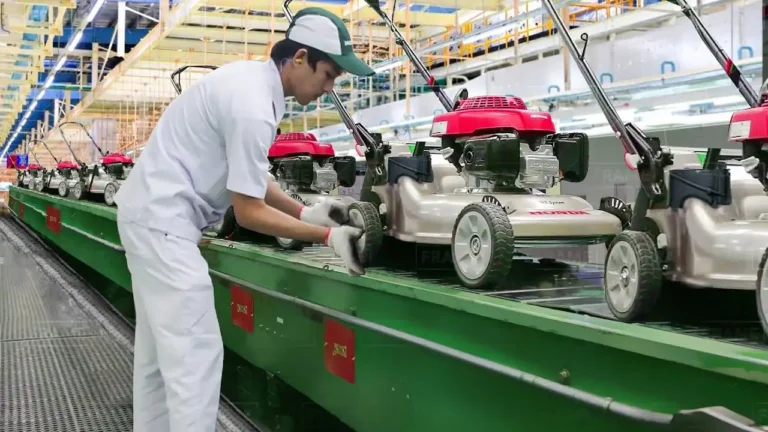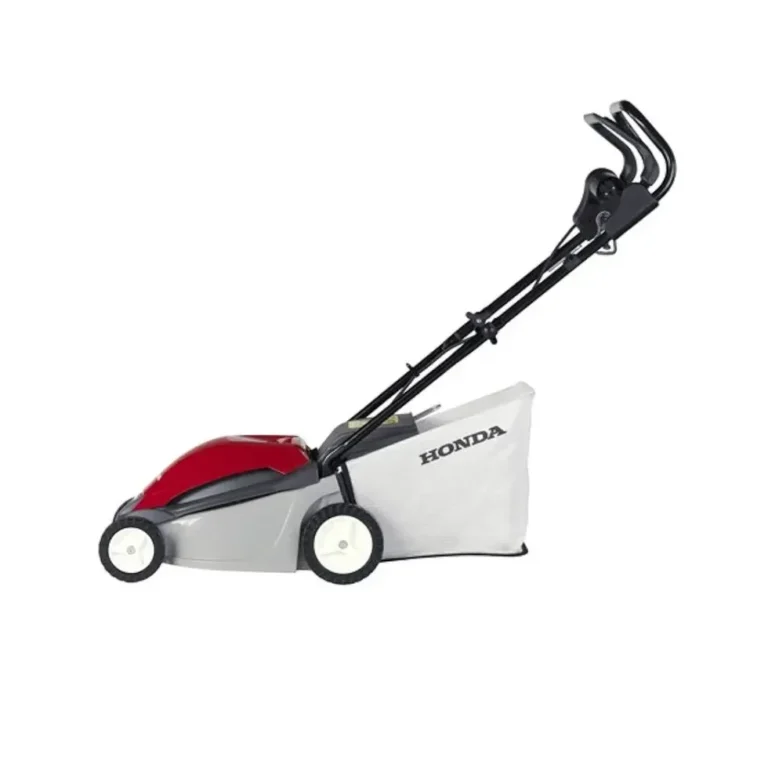
Honda Lawn Mower Battery Replacement: Match the Correct Battery System
Honda lawn mower battery replacement usually means matching the mower’s exact model, battery voltage, chemistry, physical size, and terminal layout before buying. A gas mower with electric start often uses a small 12-volt starter battery, while a cordless mower may use a separate high-voltage lithium-ion system.
Have you bought a battery that fit the tray but left the cable too short? Or has your electric-start mower clicked once, then gone quiet after sitting in the shed all winter?
I once replaced a starter battery by matching the picture on a parts shelf instead of reading the old battery label. The case looked right, but the terminal position forced the cable against the frame, and I had to pull the battery back out with cold fingers. That’s a common mistake, not a dumb one.
I wrote this guide for anyone standing beside a Honda mower with a dead battery, a blurry model sticker, or a parts listing full of confusing numbers. You’ll get a practical way to identify the correct battery and replace it without guessing.
A correct match can give you reliable starting, fewer damaged cables, and a battery that fits securely instead of rattling around. A poor match can cause slow cranking, charging trouble, melted connectors, or wasted money.
This guide takes about 12 minutes to read. You’ll learn how to:
- Identify the Honda mower model and battery system.
- Match voltage, capacity, case size, and terminal style.
- Remove and install a starter battery safely.
- Test charging problems before blaming a new battery.
- Choose between a dealer battery, aftermarket replacement, and charger.
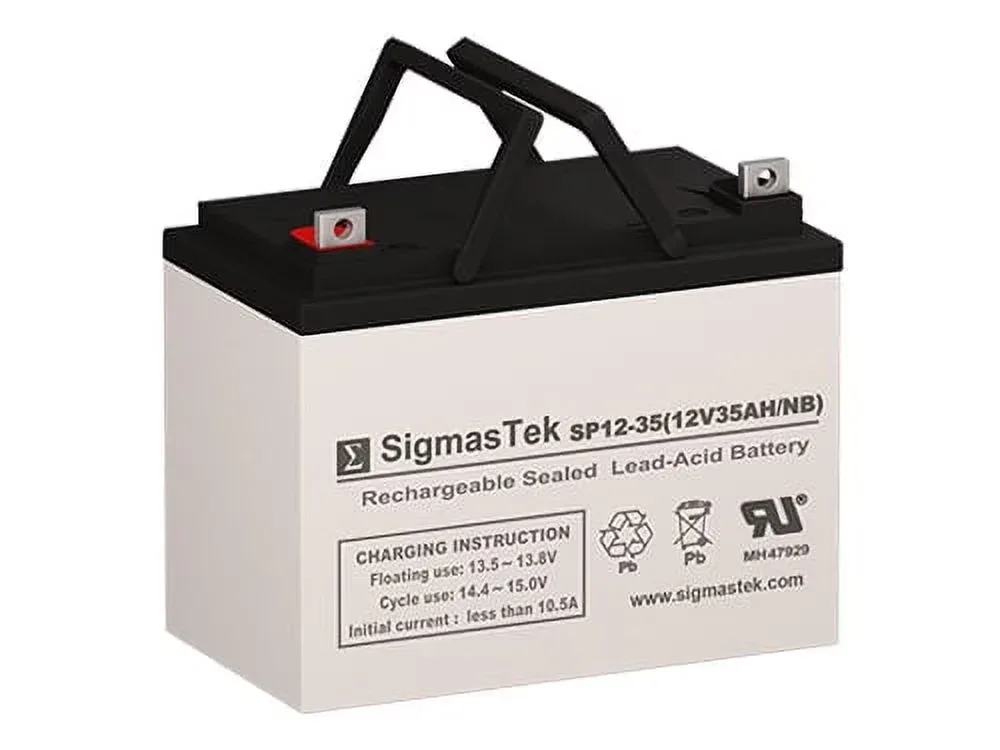
Honda Lawn Mower Battery Replacement Starts with the Mower Model
The correct Honda mower replacement battery is the one that matches the mower’s model, voltage, battery chemistry, dimensions, terminal position, and charging system. A battery that shares only the same voltage may still be the wrong part.
Start by finding the model code on the mower deck, frame, or rear housing. Honda model codes often include a family name such as HRX, HRR, HRS, or another series followed by letters and numbers. Write down every character, including the suffix, because electric-start and recoil-start versions can use different parts.
Next, locate the battery and read its label. Record these details before removing anything:
- Nominal voltage, commonly 12 volts for a gas mower starter battery.
- Amp-hour rating, shown as Ah or sometimes mAh.
- Battery chemistry, such as sealed lead-acid or lithium-ion.
- Length, width, and height.
- Positive and negative terminal locations.
- Terminal style, connector shape, and cable arrangement.
- Any part number printed on the case.
A mower battery is more than a box with two posts. The terminal polarity tells you where positive and negative connections sit when the battery is viewed from a particular side, while the amp-hour rating describes how much stored energy the battery can provide over time.
Your old battery might read 12V 4Ah, while another battery with the same dimensions reads 12V 7Ah. A higher Ah rating may work in some systems, but only if the battery fits, the charging circuit supports it, and the connector and mounting method match. Don’t treat a bigger number as a free upgrade.
Honda gas mowers with electric start generally use the battery to spin a starter motor. The mower’s engine then runs from gasoline, while the battery is recharged by the mower’s charging circuit when the engine operates.
Honda cordless mowers use a different setup. A high-voltage traction battery powers the blade motor and drive system, so a 12-volt starter battery is not a substitute. Some Honda-branded cordless systems use a 58-volt class battery, and those packs require matching electronics, connectors, and chargers.
That distinction matters if you search for Honda lawn mower parts by appearance alone. The model and serial information narrows the search far better than a photo of a battery tray.
The Fastest Identification Method
Use this order when you’re in a hurry:
- Turn the mower off and remove the ignition key, if equipped.
- Disconnect the spark plug wire on a gasoline mower before working near the starter or blade area.
- Photograph the battery label, cable ends, and mounting strap.
- Record the mower model and serial number.
- Measure the old battery in inches.
- Compare the replacement listing with the mower manual or parts diagram.
- Confirm the battery charger or charging system before placing the order.
If the label has faded, measure the battery and inspect the connector closely. A small molded plug, spade terminal, or ring terminal can matter just as much as the case dimensions.
| Detail to Match | What It Tells You | Why It Matters |
|---|---|---|
| Voltage | Electrical pressure, such as 12V or 58V | Wrong voltage can damage the mower or prevent operation |
| Ah rating | Stored energy capacity | Affects starting reserve or run time |
| Chemistry | Lead-acid or lithium-ion construction | Determines charging method and safe handling |
| Case size | Physical fit in the tray | Prevents movement, crushed wires, or a blocked cover |
| Polarity | Positive and negative side locations | Keeps cables from crossing or reaching incorrectly |
| Terminals | Posts, tabs, plugs, or rings | Must connect firmly to the mower harness |
| Charger type | Required charging profile | Protects the battery from overcharging or undercharging |
- Match the mower model before matching the battery photo.
- A 12-volt starting battery and a high-voltage drive battery serve different jobs.
- Voltage, connector style, polarity, and chemistry all matter.
- A battery that moves inside the tray can damage wires even when the mower starts.
How to Confirm the Honda Battery System Before Buying
The battery system becomes clear when you identify whether the mower uses a gasoline starter battery, a removable cordless pack, or an accessory battery for another function. The mower’s engine type and charger arrangement usually reveal the answer.
A gasoline mower with a fuel tank, engine oil filler, and electric-start button may use a 12-volt battery. Some models use a rechargeable sealed battery mounted under a cover, while others place the battery near the handle, rear housing, or engine compartment.
A cordless mower has no gasoline engine and normally uses a removable battery pack. The pack may slide into a rail, lock into a molded compartment, or connect through large power contacts. Its charger is designed for that battery family, not for a small starter battery.
The phrase interchangeable battery can cause trouble because it may refer to two different questions. A battery can be physically interchangeable across mower models yet still require a compatible charger, software, connector, and discharge rating.
Are Honda lawn mower batteries interchangeable across every Honda mower? No. Interchangeability depends on the battery platform, voltage class, connector, charger, and mower electronics, so a battery from one family shouldn’t be forced into another.
The same caution applies to battery packs with similar labels. Two packs may both say 58V but use different rail shapes, communication pins, or charging controls. The label alone doesn’t prove compatibility.
If your mower is an electric-start gas model, the search for Honda electric-start mower battery replacement should include the full model code and battery specifications. Generic searches often return batteries for cordless machines, riding mowers, or unrelated equipment.
Read The Label Before You Read The Listing
Battery listings often lead with a phrase such as “fits Honda mower,” but the useful details are usually lower on the page. Check the specification section for dimensions, terminal type, polarity, Ah rating, and chemistry.
A replacement can be acceptable when the rated capacity is slightly different, but the mower manufacturer’s specification should guide the choice. Don’t install a lead-acid battery where the mower calls for lithium-ion, and don’t connect a lithium charger to a lead-acid battery.
Pro Tip: Put a strip of masking tape on the old battery and write the model code, voltage, Ah rating, and purchase date. The note stays useful long after the printed label gets dusty.
The serial number can help separate production changes within one model family. A parts catalog may list a different connector or tray for an earlier production run, so the serial range can save you from ordering a battery that looks almost right.
When a listing says “replacement for” several batteries, compare the original part number rather than trusting the brand name. Aftermarket sellers may group similar case sizes together even when the connectors differ.
My second mistake happened during a winter service job when I threw the old battery away before photographing the cable ends. The replacement had the right voltage and a snug case, but the positive terminal sat on the opposite side, so the harness barely reached. Five minutes of planning would have beaten an hour of rearranging brackets and muttering at a stubborn plastic cover.
What The Main Battery Numbers Mean
Voltage must match the mower system, while amp-hour capacity and cold-cranking performance must suit the starter and charging circuit. A larger number is not automatically better.
- Voltage: The electrical level the mower is designed to use.
- Ah: The amount of energy stored under a stated test condition.
- CCA: Cold-cranking amps, a measure used mainly with starting batteries.
- Reserve capacity: How long a battery can support a load under a specified test.
- Cycle life: The number of charge and discharge cycles a rechargeable battery may provide under stated conditions.
Small lawn mower batteries may not always publish CCA, especially sealed lead-acid units. If CCA is listed, use it as a comparison point, not as permission to install any battery with a higher rating.
A battery with more Ah can be physically larger or take longer to recharge. A battery with less Ah may crank briefly but lose voltage sooner, especially after repeated starts or long storage.
You also need to think about the mower’s charging voltage. The engine may recharge a starter battery through a regulator or alternator, but that system is not the same as a bench charger designed for a removable lithium pack.
How to Replace A Honda Mower Starter Battery Safely
Replace a Honda gas mower starter battery with the engine stopped, the spark plug wire disconnected, and the negative cable removed before the positive cable. Safety starts before your hand reaches the terminal.
Park on a level surface away from fuel spills and open flames. Wear eye protection, remove rings and metal jewelry, and keep tools from touching both battery terminals or a terminal and the mower frame.
A sealed battery reduces spill risk, but it can still release gas during charging or suffer a short-circuit. Don’t smoke near the battery, don’t test a spark across the terminals, and don’t puncture, crush, or open the case.
Follow these steps:
- Shut down the mower. Remove the key and let hot engine parts cool.
- Disconnect the spark plug wire. Pull the boot from the plug and position the wire so it can’t snap back.
- Photograph the cable layout. Capture the positive and negative connections before loosening anything.
- Remove the negative cable first. Keep the cable from touching the terminal again.
- Remove the positive cable second. Use the correct size wrench and avoid twisting the terminal.
- Release the strap, bracket, or cover. Support the battery instead of pulling on its wires.
- Lift out the old battery. Keep it upright and place it in a tray that can handle a used battery.
- Clean the tray and cable ends. Brush away dry corrosion, then wipe away residue with a clean cloth.
- Place the new battery in the same direction. Confirm that the cables reach without stretching.
- Connect the positive cable first. Tighten the fastener until secure, but don’t crush the terminal.
- Connect the negative cable second. Keep the wrench away from the frame while tightening.
- Reinstall the hold-down and cover. The battery shouldn’t slide when you gently move the mower.
- Reconnect the spark plug wire. Confirm that the boot is fully seated.
- Test the starter. Use a short crank and stop if the cable heats, sparks, or smells burnt.
The reason for removing the negative cable first is simple: the mower frame is usually connected to the negative side. If a wrench touches the frame while loosening the negative terminal, the circuit isn’t completed through the battery in the same way it would be if you started on the positive side.
Safety Problems That Need A Professional
Stop the job and arrange qualified service when you find a swollen battery, cracked case, melted cable, heavy acid residue, or a battery that becomes hot during charging. A damaged charging system can ruin a replacement battery or create a fire risk.
Don’t bypass a blown fuse with foil or a larger fuse. Don’t jump a battery with a car running at high engine speed, and don’t connect a charger by guessing which terminal is positive.
If the mower still has a fuel leak, repair that problem before battery work. Gasoline vapor and electrical sparks are a bad combination, and no battery replacement is worth taking that chance.
Battery Disposal And Storage
Used lead-acid batteries should go to a battery retailer, recycling center, or local hazardous-waste program that accepts them. Don’t place one in ordinary household trash.
Store a removed battery upright in a cool, dry place away from children and metal objects. A lithium-ion pack should be stored according to its manual, with the correct charge level and temperature limits.
For seasonal storage, clean the battery area, protect the terminals, and use a charger designed for the exact battery chemistry. A maintenance charger can help some lead-acid systems, but it must be approved for the battery type and voltage.
Troubleshooting After Battery Replacement
A new battery that fails to start the mower points to a connection, fuse, starter, switch, or charging problem, not always a defective battery. Start with simple checks before buying another part.
Use this sequence:
- Confirm the battery is installed in the correct direction.
- Check that positive and negative cables are on the correct terminals.
- Inspect the cable ends for looseness, green corrosion, or heat damage.
- Check the main fuse and safety interlock conditions.
- Confirm the blade control and brake handle are in the required position.
- Test the battery voltage with a digital multimeter.
- Test charging voltage only if the manual gives a safe procedure.
- Stop if a cable heats rapidly or the starter smells burnt.
A fully charged 12-volt lead-acid battery often measures near 12.6 volts at rest, though the exact reading changes with temperature, charge state, battery age, and the time since charging. A reading near 12.0 volts suggests a low state of charge, but voltage alone cannot prove that the battery can crank the engine.
A load test checks how well the battery holds voltage while supplying current. A battery may show a decent resting voltage and still collapse under starter load because one internal cell has weakened.
If the starter clicks once, inspect the cable connections and battery charge first. Repeated clicking can also point to a worn starter solenoid, a weak ground connection, or an engine that is difficult to turn.
If the starter spins slowly, check for corroded terminals, a loose ground, thick oil in cold weather, or a dragging starter motor. A replacement battery won’t fix a cable that has turned green inside its insulation.
If the mower starts with a jump but the new battery goes flat again, test the charging system. The engine may not be sending enough charge, or a parasitic draw may be draining the battery while the mower sits.
A parasitic draw is electrical current used while the mower is switched off. Faulty accessories, stuck relays, wired-in hour meters, or damaged harnesses can slowly drain a battery over days or weeks.
The best order is battery, cables, fuse, starter circuit, then charging system. Jumping straight to another battery can turn a small wiring problem into a pile of unnecessary purchases.
Choosing the Right Replacement and Charger
The best replacement battery is the approved type that fits securely, connects without adapters, and works with the mower’s charging method. A cheap battery becomes expensive when it needs a special bracket or fails after a short season.
A genuine Honda battery can be the easiest choice when the model is uncommon or the cable arrangement is difficult to match. A reputable aftermarket battery can work well when the specifications, warranty, chemistry, and terminal layout match the original.
I’d choose the battery with the clearest specifications over the one with the lowest price. A listing that hides the dimensions or shows only a stock photo leaves you guessing, and guessing is how the wrong terminal ends up pressed against the frame.
When comparing options, look for:
- Exact mower model compatibility.
- Matching voltage and chemistry.
- Correct case dimensions.
- Correct terminal style and polarity.
- A secure hold-down method.
- A clear warranty and return policy.
- A charger suited to the battery.
Don’t add an adapter unless the mower manufacturer allows that arrangement. An adapter may create a loose connection, reverse the cable path, defeat a temperature sensor, or leave live contacts exposed.
A charger for a 12-volt sealed lead-acid battery is not automatically safe for a 12-volt lithium battery. Battery chemistry controls the charging profile, cutoff behavior, and protection system.
| Replacement Choice | Best Fit | Main Advantage | Main Concern |
|---|---|---|---|
| Genuine Honda battery | Unusual model or exact dealer support | Strong fit and parts identification | May cost more |
| Quality aftermarket lead-acid battery | Matching gas mower starter system | Often easy to source | Specifications can vary |
| Lithium conversion battery | Only when specifically approved | Lower weight in some setups | Charger and electronics may not match |
| Original cordless battery pack | Matching Honda battery mower platform | Correct communication and charger fit | Not interchangeable across every platform |
| Universal battery with an adapter | Rare approved applications | May solve a discontinued-part problem | Loose fit, wiring, and warranty risks |
A battery replacement should never be judged by weight alone. Some lithium packs weigh less than lead-acid batteries, but the mower must be built to manage the pack’s voltage, current, temperature, and charging controls.
Common Honda Battery Replacement Mistakes
Most battery replacement problems come from skipping identification, polarity, charging, or mounting checks. The repair feels simple, so people rush the one step that matters most.
Avoid these habits:
- Ordering by the mower brand without the model code.
- Matching case size while ignoring terminal position.
- Installing a higher-voltage battery because it fits.
- Using a car battery as a jump source without care.
- Charging lithium-ion and lead-acid batteries with the same charger.
- Leaving the hold-down strap loose.
- Reversing the cable order during removal.
- Throwing away the old battery before recording its label.
- Assuming a new battery fixes every no-start problem.
- Storing a removable pack in heat, rain, or freezing conditions.
Can a battery with a higher Ah rating improve starting? Sometimes, but only when the battery fits and the mower’s charging system can support it. In many small mower applications, a correct standard replacement is a better choice than chasing the largest capacity.
What if the old battery has no readable label? Use the mower model, serial range, case measurements, connector, terminal position, and manual specification together. One clue alone may point to the wrong family.
A battery that rattles during mowing deserves attention right away. Vibration can loosen terminals, wear insulation, and break internal plates, turning a small fit problem into an intermittent starting fault.
Important Tip: After installation, gently tug each cable near the terminal and move the battery by hand. Nothing should shift, scrape, or pull tight when the cover is installed.
FAQs About Honda Lawn Mower Battery Replacement
What battery does a Honda electric-start lawn mower use?
A Honda electric-start gas mower commonly uses a 12-volt rechargeable starter battery, but the amp-hour rating, dimensions, terminal style, and chemistry vary by model. The mower model code and original battery label should confirm the correct part before purchase. Some Honda cordless mowers use a separate high-voltage lithium-ion pack.
Can I use any 12-volt battery in a Honda mower?
No, a 12-volt label alone isn’t enough. The replacement must match the mower’s chemistry, physical size, terminal polarity, connector, capacity, and charging system. A battery can show the correct voltage yet fail because the cables don’t reach, the charger is wrong, or the hold-down cannot secure the case.
How do I know if my Honda mower battery is bad?
A Honda mower battery may be bad when it loses charge quickly, cranks slowly after a full charge, drops sharply under load, or shows swelling or leakage. Test the resting voltage and cable connections first. A failed starter, fuse, ground cable, or charging circuit can create similar symptoms.
Should I disconnect the battery when storing a Honda mower?
Disconnecting the negative cable can reduce slow drain on some gas electric-start mowers, but follow the mower manual if accessories or alarms are installed. A removable cordless battery should be stored according to its battery instructions. Keep every battery dry, protected from extreme heat, and away from metal objects.
Can a Honda mower charge a replacement battery?
A Honda gas mower can recharge its approved starter battery through its built-in charging circuit, but charging performance depends on engine speed, wiring, regulator condition, and battery type. A cordless mower requires its matching charger. Never assume that running the mower will safely charge a different battery chemistry.
How long does a Honda lawn mower battery last?
A Honda mower battery often lasts several seasons, though storage temperature, charging habits, vibration, use frequency, and battery chemistry change the result. A battery that sits discharged for months can fail sooner than one kept at the proper storage charge. Replace the battery when testing confirms weak capacity or damage.
Make the Replacement A Match, Not A Guess
Honda lawn mower battery replacement is a small repair with a surprisingly large number of details. The safest path is to identify the mower model, record the old battery specifications, compare the connector and mounting layout, then confirm the charging system before ordering.
I’d rather spend a few extra minutes measuring the battery than spend another afternoon returning the wrong part. Install the correct battery with the negative cable removed first, secure the case firmly, test the starter briefly, and investigate the charging system if the battery goes flat again. That approach saves money, protects the wiring, and gets the mower back to work without turning a simple fix into a headache.