Honda Lawn Mower Cutting Parts: Blades and Grass Collection
Honda lawn mower cutting parts mainly include the blade, blade bolt, blade adapter, mower deck, discharge chute, grass bag, and bag frame. The right replacement depends on your exact Honda model, deck size, blade shape, mounting hole, and collection system.
Have you bought a blade that looked right but left uncut strips across the lawn? Is the grass bag filling halfway, falling off, or spraying clippings around your shoes?
I once rushed a blade replacement before a weekend mowing job and grabbed a part that matched the deck width but not the mounting pattern. The mower started, but the blade sat wrong, rattled like a coffee can full of bolts, and cost me an afternoon to correct. That mistake is common, not dumb.
I wrote this guide for homeowners who want a clean cut without sorting through a pile of confusing part numbers. You’ll learn how the cutting system fits together, how to identify the right Honda parts, and how to replace worn pieces safely.
Get the choice right and you’ll gain an even cut, better bag filling, less vibration, and fewer trips across the same patch of grass. Choose by appearance alone, and you can damage the blade adapter, clog the deck, or create a serious safety risk.
This takes about 12 minutes to read, and the useful part is practical rather than fancy:
- Match a replacement blade to the Honda model and deck.
- Tell a standard, high-lift, mulching, and twin-blade setup apart.
- Check the grass bag, frame, chute, and discharge door for fit.
- Replace cutting parts in the right order.
- Fix common problems such as stripes, clumping, and vibration.
Honda Lawn Mower Cutting Parts: What You Need
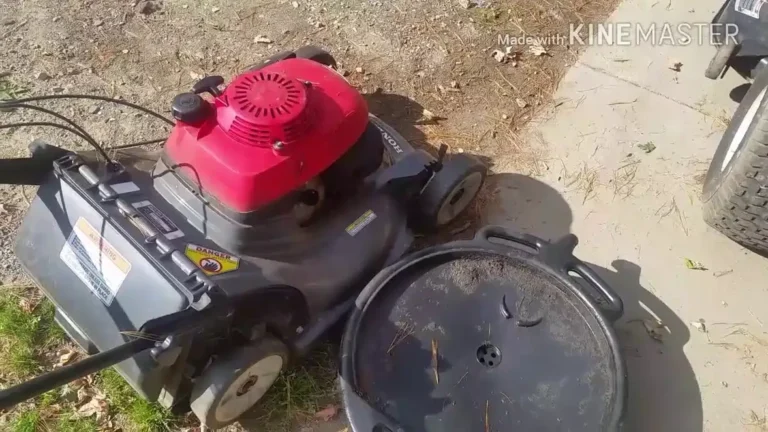
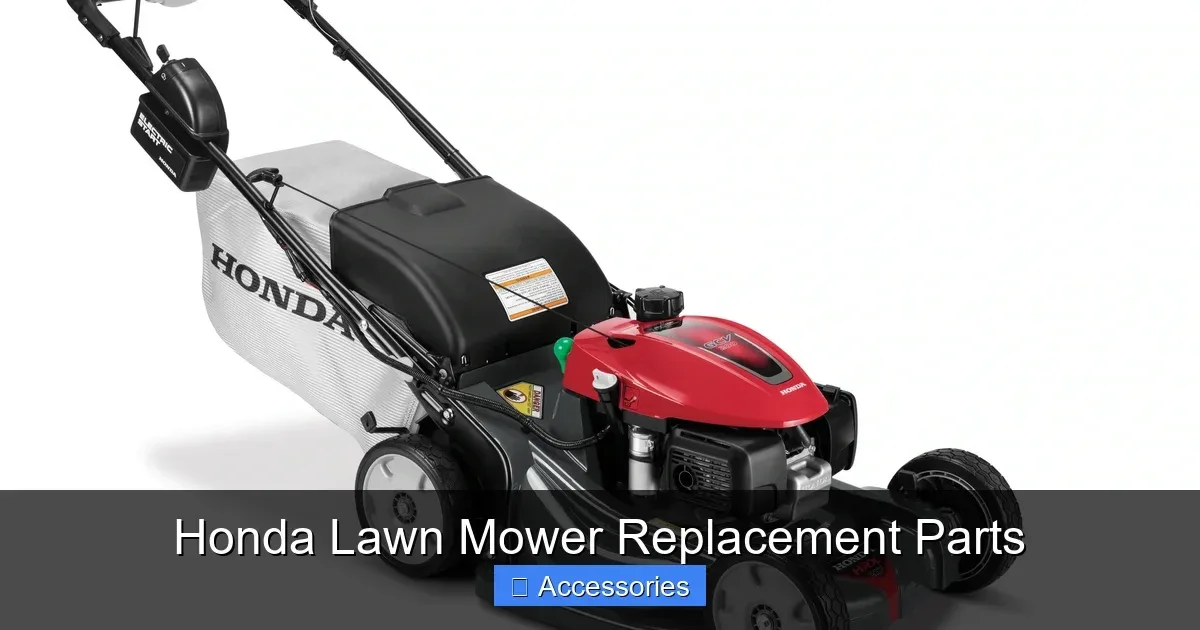
Honda lawn mower cutting parts work as one system, so a correct blade must match the deck, spindle, adapter, and grass collection setup. A Honda walk-behind mower may use a standard blade, a mulching blade, a high-lift blade, or a paired blade system, depending on the model and deck design.
The blade does the cutting, while the spinning blade creates airflow that lifts grass and moves clippings toward the side discharge or grass bag. The blade adapter connects the blade to the engine crankshaft, and the blade bolt holds the assembly in place.
The mower deck controls the space around the blade. A damaged deck, bent baffle, or packed underside can ruin the cut even when a brand-new blade is installed.
Grass collection parts usually include:
- Grass bag: Holds clippings after they leave the deck.
- Bag frame: Supports the bag and connects it to the mower.
- Discharge chute: Directs clippings into the bag or away from the deck.
- Rear door: Covers the opening when the bag isn’t fitted.
- Mulch plug: Blocks the discharge path so clippings stay under the deck for finer cutting.
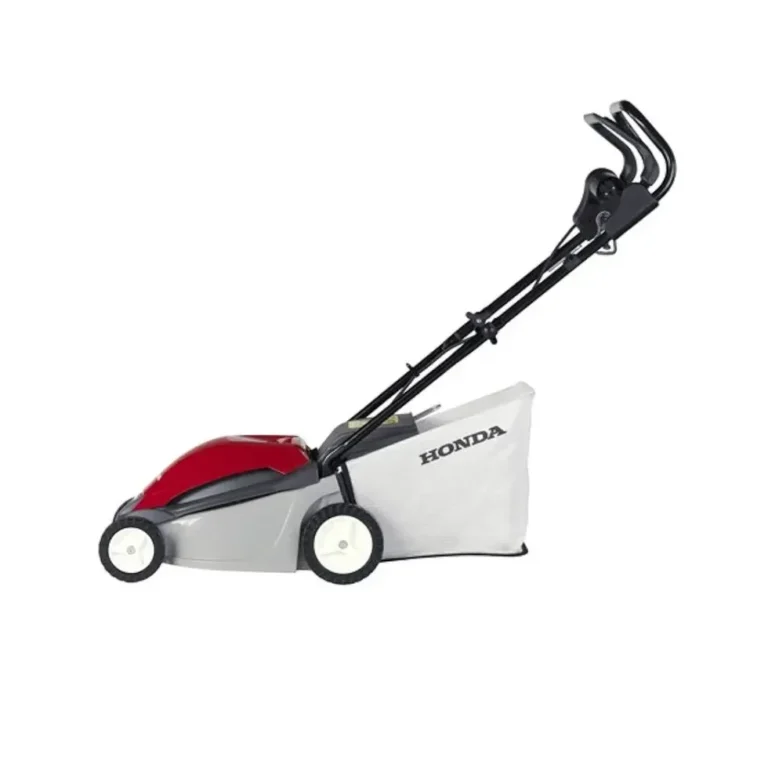
- Side-discharge cover: Closes the side opening when the mower is set up for bagging or mulching.
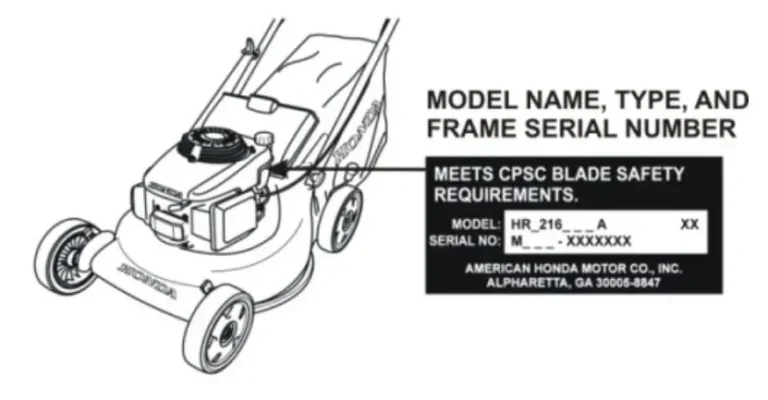
The exact model code matters more than the word “Honda” printed on the engine. The code may be printed on the mower deck, near the rear discharge opening, beside the handle, or on a product label.
Honda model identification also helps with non-cutting parts, including cables, wheels, handles, and engine components. If you’re sorting through the wider system, Honda lawn mower parts by model can help you start with the model and serial information instead of guessing from a photo.
How To Match A Blade Correctly
- Turn off the engine and remove the spark plug wire before touching the blade area. On electric-start models, remove the battery key or disconnect the battery according to the mower instructions.
- Clean the model label and write down the full mower model, deck size, and serial information.
- Check the replacement blade length, width, thickness, center hole, outer mounting holes, and lift direction.
- Compare the blade with the old part only after removal. A worn blade can look shorter or twisted, so the model data remains the better guide.
- Confirm whether the mower uses a standard, mulching, high-lift, or twin-blade arrangement.
- Inspect the blade adapter and bolt before installing the new cutting part.
Blade length is measured from one cutting tip straight across to the opposite tip, not around the curve. A blade that is only slightly too long can contact the deck, while a blade that is too short can leave uncut grass along the edges.
The center hole and locating tabs matter just as much. A blade can appear to fit on the bolt and still move sideways if the adapter does not lock into the blade correctly.
What happens if the blade fits the bolt but not the adapter? The blade may shift during operation, and that movement can loosen the bolt, damage the adapter, or send vibration through the crankshaft.
Blade Types And Their Jobs
A standard blade is made for ordinary side discharge or basic bagging. A mulching blade has a different lift and cutting profile that keeps clippings under the deck longer, giving the grass more chances to break into smaller pieces.
A high-lift blade creates stronger upward airflow for bagging. That airflow can fill the bag more completely, but it may also raise dust and demand more engine power in tall, wet grass.
A low-lift blade produces less upward airflow. It can be useful in dry conditions or on a mower designed to limit dust, but it usually isn’t the best pick for a full grass collection setup.
A twin-blade mower uses two shorter blades instead of one long blade. The pair must be installed in the correct position, and the blade timing or overlap must match the deck design.
| Cutting part | Main job | Best clue for replacement | Common problem |
|---|---|---|---|
| Standard blade | Cuts and moves grass to discharge | Model and deck match | Ragged tips or strips |
| Mulching blade | Cuts clippings smaller under the deck | Mulch setting and blade profile | Clumping in wet grass |
| High-lift blade | Pushes clippings into the bag | Bagging setup and lift fins | Dust, engine strain |
| Blade adapter | Centers and drives the blade | Matching crankshaft and blade | Wobble or slipping |
| Blade bolt | Holds the blade assembly | Correct thread and washer setup | Loosening or damaged threads |
| Grass bag | Collects discharged clippings | Matching frame and opening | Poor fill or falling bag |
| Mulch plug | Blocks the discharge path | Exact deck opening | Clogging or unsafe fit |
I’d choose the manufacturer-matched blade when the mower is still in good shape. A cheaper universal blade can work on some machines, but the small differences in lift, thickness, and mounting holes aren’t worth a damaged adapter.
Pro Tip: Take a clear photo of the model label and the underside of the deck before shopping. The photo can save you from ordering a blade that matches the engine but not the cutting deck.
Choosing and Replacing Honda Mower Blades
The safest blade replacement starts with a model check, a disabled engine, and a careful inspection of the mounting hardware. A sharp, correctly balanced blade cuts cleanly, while a bent or poorly fitted blade can shake the mower and leave a rough lawn.
Before turning the mower over, empty the fuel tank if the owner’s instructions call for that position, or tilt the mower with the air filter and carburetor side facing upward. Gasoline can reach the wrong areas when a mower is tipped carelessly.
Wear work gloves when handling the blade, but don’t treat gloves as armor. A dull blade still has sharp corners, and a slipped wrench can hurt your hand before the blade even moves.
Tools And Parts For The Job
You’ll usually need:
- A replacement blade matched to the mower model.
- Work gloves and eye protection.
- A socket or wrench that fits the blade bolt.
- A block of wood or blade-holding tool.
- A torque wrench if the mower instructions specify a blade-bolt setting.
- A wire brush or stiff nylon brush.
- A replacement blade bolt or washer if either part is worn.
A torque wrench measures tightening force, usually in pound-feet. The correct setting varies by Honda model, so use the mower manual or the specification printed for that exact machine rather than borrowing a number from a different deck.
Do you need a new blade bolt every time? No, not when the bolt threads, head, washer, and flange remain in good shape, but a rounded head or stretched-looking thread deserves replacement.
Safe Blade Removal And Installation
- Park the mower on a flat surface, shut off the engine, and let hot parts cool.
- Disconnect the spark plug wire and secure it away from the plug.
- Remove the battery key or battery connection if the mower has electric starting.
- Prevent fuel leakage before tilting the mower.
- Block the blade so it can’t turn while you loosen the bolt.
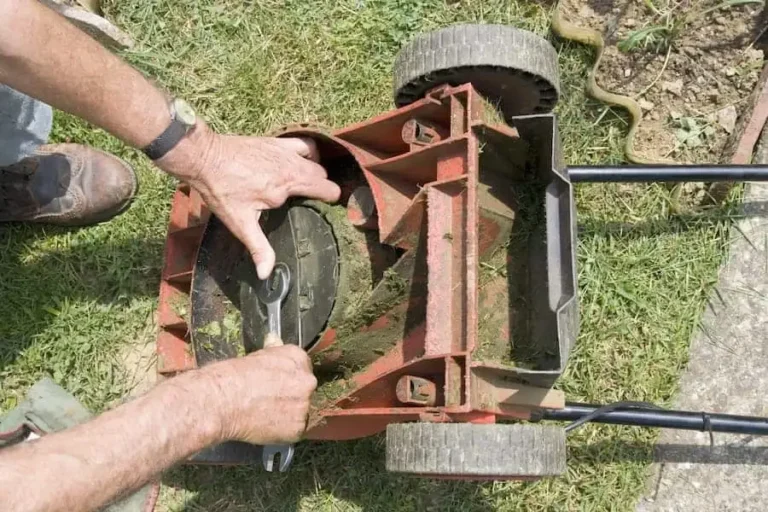
- Remove the bolt, washer, blade, and adapter pieces in order.
- Brush away packed grass and inspect the deck, spindle area, and blade adapter.
- Install the new blade with the cutting edges facing the direction of rotation.
- Fit the washer and bolt in the same order specified for the mower.
- Tighten the bolt to the model’s stated torque.
- Rotate the blade by hand to check clearance before reconnecting the spark plug wire.
- Start the mower outdoors and listen for unusual vibration or scraping.
The cutting edge usually faces the direction of rotation, while the raised lift section points toward the deck cavity. Many blades have a stamped word or symbol showing which side faces the grass, but markings differ, so the shape matters more than a stamp alone.
A backward blade can still spin, which makes the mistake easy to miss. The mower may cut poorly, clog underneath, and throw clippings in strange directions.
I once found a mower that had been fitted with the blade upside down after the owner complained that the grass looked shredded. The blade wasn’t broken, but the lift side was working against the airflow, and the deck was packed with damp clippings. The fix took minutes once the blade orientation was corrected, yet the lawn had already taken a beating.
For a closer walkthrough of order, orientation, and tightening, replace Honda mower blades safely belongs in your notes before the wrench comes out.
Are Honda Blades Interchangeable?
Honda mower blades are not automatically interchangeable, even when two mowers have the same deck width. Fit depends on the model family, blade length, center hole, mounting holes, adapter shape, thickness, lift profile, and clearance inside the deck.
A 21-inch blade from one Honda mower may not fit another 21-inch machine. Deck width tells you only part of the story, much like knowing a truck has 17-inch wheels without knowing the bolt pattern.
A replacement blade should match all of these points:
- Exact or approved model application.
- Correct cutting diameter.
- Correct center hole and mounting pattern.
- Correct blade thickness.
- Proper lift direction.
- Adequate clearance from the deck, baffles, and discharge parts.
- Compatibility with bagging, mulching, or side discharge.
If you want to compare possible swaps, check Honda blade interchangeability before ordering. Fitment charts are more useful than a listing that says “fits most Honda mowers.”
When To Replace A Blade
A blade needs replacement when it is bent, cracked, deeply gouged, badly rusted, or worn past a safe sharpening shape. A few light nicks can often be sharpened, but grinding away large amounts of metal can change balance and blade strength.
A blade may need attention when:
- Grass tips look torn and brown after mowing.
- Uncut strips remain even after overlapping passes.
- The mower vibrates more than it used to.
- The blade has a visible bend.
- The cutting edge is rounded and heavily worn.
- The blade bolt or adapter shows damage.
- The mower leaves clumps despite dry grass and a clean deck.
A blade should be balanced after sharpening. One side that is heavier can make the mower shake, wear the spindle, and tire your hands.
I prefer replacing a badly battered blade rather than trying to rescue it with aggressive grinding. The blade is a working safety part, not a place to squeeze every last season out of old steel.
Grass Bags, Chutes, and Collection Problems
A Honda grass collection system works only when the bag, frame, rear door, chute, and blade airflow match the mower deck. A good blade can still leave the bag half empty if the fabric is clogged or the discharge opening is blocked.
Grass bags have a mesh or woven body that allows air to pass while clippings stay inside. Dust, sap, and fine dry grass can seal those openings, reducing airflow until the mower begins to leave clumps.
The bag frame must hold the bag at the correct height and angle. A bent frame can leave a gap under the rear door, place pressure on the chute, or let the bag drag against the grass.
How To Fit The Bag
- Shut off the engine and disconnect the spark plug wire before working near the discharge opening.
- Confirm that the bag frame is fully seated in the bag sleeve or mounting pockets.
- Lift the rear door only as far as the mower design allows.
- Hook the frame onto the correct mounting points.
- Let the rear door rest against the bag frame or bag collar as designed.
- Check that no part of the bag sits inside the blade path.
- Pull gently on the frame to test that the bag stays attached.
- Start mowing with the bag partially empty until the fit proves secure.
The rear door should close over the discharge opening when the bag is removed. Never mow with a missing or damaged door, chute, or discharge cover unless the mower’s design specifically allows that configuration.
If the bag keeps slipping, the frame may be bent, the mounting hooks may be worn, or the bag may be the wrong size. The fabric can look close enough while the collar shape remains wrong.
For the attachment sequence and fit checks, put the bag on a Honda mower using the frame and rear-door arrangement made for that model.
Why The Bag Won’t Fill
A grass bag that won’t fill usually has an airflow problem, a worn blade, a blocked chute, or grass that is too wet and tall. The engine can run normally while the collection system quietly loses performance.
Check these areas in order:
- Clean the bag fabric with a firm brush and let it dry.
- Clear packed grass from the deck and discharge chute.
- Confirm that the blade is installed with the lift fins facing upward.
- Check that the blade is sharp and not bent.
- Mow dry grass at a steady pace.
- Avoid cutting more than about one-third of the grass height at a time.
- Empty the bag before clippings press tightly against the opening.
Why does a clean bag matter so much? The mower needs air to carry clippings through the chute, and a sealed bag acts like a clogged vacuum filter.
Wet grass is especially troublesome because it sticks to the deck and chute. If the mower leaves a long green rope inside the discharge path, stop the engine, disconnect the spark plug wire, and clear the blockage with a tool, never your hand.
Mulching, Bagging, Or Side Discharge
Bagging removes clippings from the lawn and gives a tidy finish. Mulching returns finely cut pieces to the turf, while side discharge spreads longer clippings across the grass for later breakdown.
| Mowing setup | Best condition | Parts needed | Trade-off |
|---|---|---|---|
| Bagging | Tall growth or a clean appearance | Bag, frame, chute, suitable blade | More emptying and cleanup |
| Mulching | Regular mowing on dry grass | Mulch plug and suitable blade | Can clog in wet or tall grass |
| Side discharge | Fast cutting in open areas | Side cover removed or opened as designed | Clippings remain on the lawn |
| High-lift bagging | Dry grass needing strong collection | High-lift blade and matching bag system | More dust and engine load |
A mulching blade isn’t a magic cure for mowing too low. Cutting too much grass at once overloads the deck and creates wet clumps, even with the right blade.
I’d use bagging when the lawn is tall or covered in leaves, then switch to mulching during regular dry-weather mowing. That choice reduces deck buildup and saves time emptying the bag.
Finding The Best Replacement Blade
The best blade for a Honda mower is the one that matches the exact model and the job you do most often. A model-matched original or approved replacement usually gives the safest fit, while a compatible aftermarket blade can be reasonable when dimensions, mounting, and lift profile all match.
When comparing blade options, check:
- Exact model compatibility.
- Blade length and thickness.
- Center-hole and mounting-hole design.
- Standard, mulching, or high-lift profile.
- Coating and corrosion resistance.
- Included hardware.
- Return policy if fitment is uncertain.
A polished listing photo doesn’t tell you enough. The blade’s measurements and application data matter far more than a shiny finish.
For a side-by-side buying approach, compare the best Honda mower blades by model match, cutting purpose, and collection needs. I’d rather pay a little more for a verified fit than save a few dollars and spend Saturday correcting a vibration problem.
Important Tip: Keep the old blade until the new blade has been installed and checked. The old part provides a useful shape comparison, and returning a wrong part is easier when the original is still available.
Troubleshooting A Rough Cut
Most mowing problems come from blade condition, incorrect height, clogged airflow, excessive speed, or a damaged deck. Replacing the blade can help, but the mower still needs a clean underside and a sensible mowing pattern.
Use the symptoms below as a starting point:
| Symptom | Likely cause | First action |
|---|---|---|
| Torn, brown grass tips | Dull blade | Sharpen or replace the blade |
| Uncut strip between passes | Bent blade, wrong overlap, deck issue | Inspect blade and overlap |
| Heavy vibration | Bent blade, imbalance, damaged adapter | Stop and inspect before mowing |
| Bag fills poorly | Clogged bag or chute | Clean airflow path |
| Clumps under deck | Wet grass or cutting too much | Mow dry, raise height, slow down |
| Engine bogs down | Tall grass, high-lift load, packed deck | Raise height and clean deck |
| Blade scrapes deck | Wrong blade or bent deck | Stop immediately and check clearance |
| Bag falls off | Wrong frame or worn mount | Confirm model fit and mounting points |
A rough cut can also come from mowing too fast. The blade needs time to lift and cut the grass, so walking quickly through thick growth often leaves ragged patches.
Try raising the cutting height by one notch and making a slower pass. If the cut improves, the mower may be fine and the original setting was simply too aggressive for the grass conditions.
Do you still have vibration after installing a balanced blade? Stop using the mower and inspect the blade adapter, crankshaft, spindle area, and deck for impact damage. A hard hit against a hidden stump can bend parts that a new blade won’t fix.
Never reach under the deck while the spark plug wire is connected. Some mower designs can rotate the blade from stored energy or movement at the crankshaft, and a stopped engine does not make the cutting area harmless.
Buying and Storing Cutting Parts
Good parts buying starts with identification, not blade length alone. Write the complete model and serial information down before searching, then match the cutting part to the mower’s collection or discharge setup.
Keep these details with the mower:
- Full model code.
- Serial number range if listed.
- Deck width.
- Blade type.
- Bag and frame style.
- Mulching or side-discharge parts.
- Bolt, washer, and adapter arrangement.
Store spare blades flat in a dry area with the cutting edge protected. Don’t toss loose blades into a shed corner where they can rust, cut a hand, or become impossible to identify.
Grass bags should be emptied and dried before storage. A damp bag can develop mildew, stiffen the fabric, and lose airflow before the next mowing season.
A small parts box helps keep blade bolts, washers, mulch plugs, and adapter pieces together. Label the box with the mower model, since a handful of similar-looking hardware can create a frustrating puzzle later.
Pro Tip: Buy one spare blade when the mower is running well, then store it in its packaging. You’ll have a known-good replacement ready after hitting a hidden rock or wearing down the working blade.
- Match every cutting part to the complete Honda mower model, not just deck width.
- Check the blade adapter, bolt, washer, and deck before fitting a new blade.
- Use the correct blade profile for bagging, mulching, or side discharge.
- Clean the bag and chute because airflow controls grass collection.
- Disconnect the spark plug wire before working near the blade.
FAQs About Honda Lawn Mower Cutting Parts
What Honda lawn mower cutting parts wear out first?
The blade usually wears first because it contacts grass, dirt, and hidden debris. The blade bolt, adapter, grass bag, and discharge chute can last longer, but impact damage, rust, packed clippings, and rough storage can shorten their service life.
How do I know which Honda mower blade to buy?
Use the complete Honda mower model, deck width, blade length, mounting holes, center hole, thickness, and blade type. A model-matched part is safer than choosing by length alone because two blades with the same length can use different adapters or lift profiles.
Can I use a mulching blade for bagging?
Sometimes, but the mower and blade must be approved for that setup. A high-lift blade often moves clippings into a bag more effectively, while a mulching blade is shaped to keep grass under the deck longer for repeated cutting.
Why does my Honda mower leave grass behind?
A dull or backward blade, clogged deck, blocked chute, wet grass, fast walking speed, or low engine speed can leave grass behind. Inspect the blade orientation and deck first, then mow dry grass more slowly at a higher cutting height.
How often should Honda mower blades be sharpened?
Sharpening depends on mowing frequency, lawn size, soil contact, and hidden debris. Inspect the blade whenever the cut gets rough or vibration changes, and replace the blade if it is cracked, bent, deeply gouged, or too thin to balance safely.
Is a Honda grass bag interchangeable between mower models?
Honda grass bags are not automatically interchangeable because the frame, collar, hooks, rear door, and discharge opening can differ. A bag may look similar yet fail to seal or stay attached, so match the complete bag-and-frame assembly to the mower model.
A Cleaner Cut Starts with the Right Match
Honda lawn mower cutting parts are easier to choose once the blade, adapter, deck, chute, and bag are treated as one working system. The model number comes first, then the blade profile, mounting pattern, collection setup, and condition of the supporting hardware.
My practical choice is a model-matched blade and bag assembly, especially if the mower has any vibration or fit problem. Start by recording the model information, inspect the old parts, and replace one worn component at a time so you know what fixed the trouble.
The next step is simple: disconnect the spark plug wire, clean the deck, and write down every marking you can find before ordering. A few careful minutes there can give you a smoother cut, a fuller bag, and a mower that behaves itself instead of rattling across the lawn.