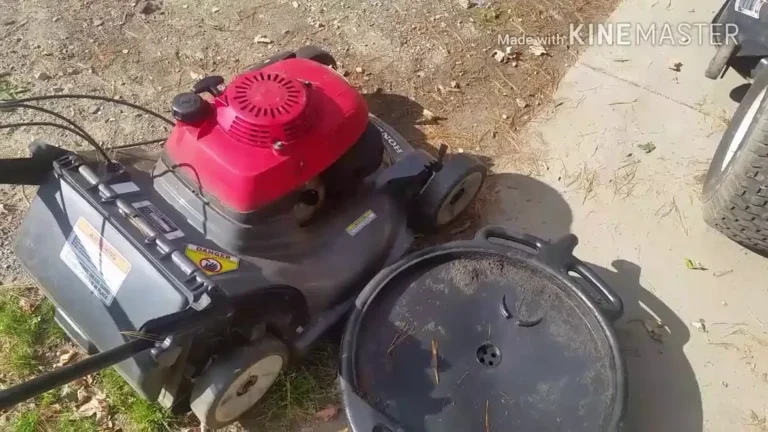
How to Fix a Self-Propelled Honda Lawn Mower: Drive Diagnosis
Most self-propelled Honda lawn mowers can be fixed by checking the drive-control cable, transmission, belt, wheels, and Smart Drive control in that order. Start with the engine off and the spark-plug wire disconnected, then find where power stops reaching the drive wheels.
Does the mower start and cut grass normally but refuse to move, or does the drive system pull weakly and quit under load? Maybe the mower creeps forward after you release the control, or one rear wheel seems to drag like somebody dropped an anchor.
I once chased a weak drive problem by adjusting the cable again and again, only to find a packed wad of wet grass around the transmission pulley. The mower had plenty of engine power, but the drive belt couldn’t grip through the mess, and I had wasted a good afternoon. This is a common mistake, not a dumb one.
I wrote this guide for homeowners who want a clear repair path before buying parts or hauling a heavy mower to a shop. The goal is to help you separate a simple adjustment from a worn belt, damaged wheel, stuck cable, or failing transmission.
If you diagnose the right part, you can restore steady forward speed, stop unwanted movement, and avoid replacing a transmission that only needed a cleanout or cable adjustment. If you skip the basic checks, you can pinch a finger, damage a belt, or spend money on a part that was never bad.
This takes about 12 minutes to read, and you’ll finish with:
- A step-by-step drive diagnosis that starts with safe checks.
- Clear signs of a loose cable, worn belt, bad wheel, or transmission trouble.
- Adjustment methods for Honda Smart Drive and standard self-propelled controls.
- Repair choices, typical costs, and the point where professional help makes sense.
- A practical test routine that tells you whether the mower is ready for grass again.
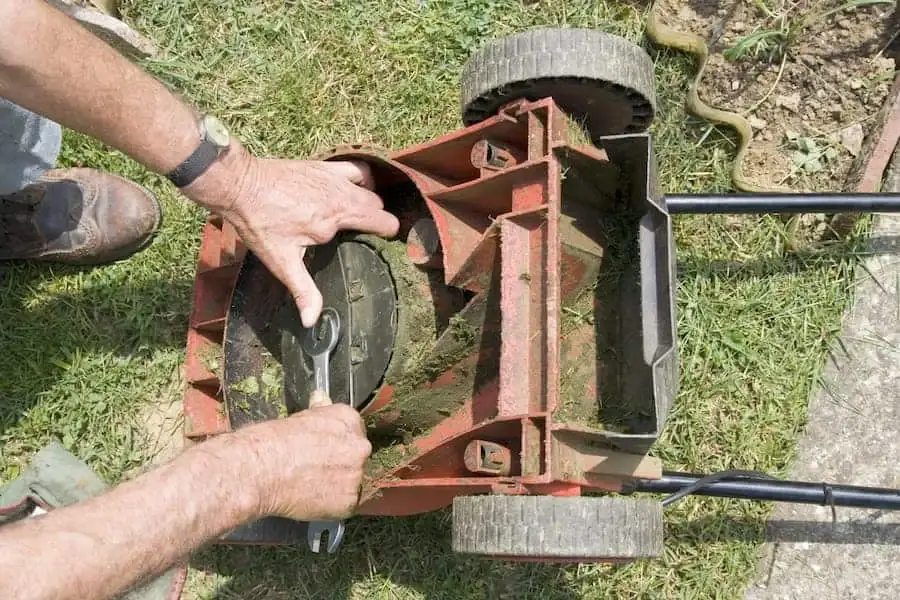
How to Fix A Self Propelled Honda Lawn Mower
To fix a self-propelled Honda lawn mower, inspect the control cable first, then check the drive belt, pulley, wheels, transmission, and axle before adjusting or replacing anything. A mower that moves slowly, refuses to move, or keeps moving after release usually gives you a useful clue through its exact symptom.
Park the mower on a flat surface, shut off the engine, remove the ignition key if the model has one, and wait for every moving part to stop. Disconnect the spark-plug wire and secure it away from the plug before reaching near the blade, belt, pulley, or drive housing.
Use this order:
-
Confirm the engine isn’t the real problem.
A mower that bogs badly while cutting may lack engine power rather than drive power. Check the air filter, fresh fuel, blade condition, and engine speed before blaming the transmission. -
Check the drive control.
On a Honda Smart Drive model, squeeze and release the handle control several times with the engine off. The control should move smoothly and return without sticking.On a bail-style drive system, the drive bail should pull the cable without excessive slack.
-
Inspect the cable and cable end.
Look for a kinked outer housing, crushed section, loose mounting clip, frayed inner wire, or cable end that has slipped from its bracket. A cable that moves but doesn’t fully move the transmission arm can create weak drive or no drive. -
Lift the rear wheels safely and test them by hand.
Keep the spark-plug wire disconnected. Turn each wheel forward and backward, checking for rough spots, grinding, wobble, or a wheel that locks in one direction. -
Inspect the belt and pulleys.
Remove the drive-cover screws only after the mower is secure and the plug wire is out of the way. Look for a belt that is cracked, glazed, stretched, oily, shredded, or sitting outside the pulley groove. -
Check the transmission and axle.
A transmission that receives full cable movement but turns the axle weakly may have worn internal gears, a damaged pulley, or a problem with the axle drive mechanism.
A normal drive test gives you a smooth control, full movement at the transmission arm, a belt that stays seated, and rear wheels that turn together without grinding. A Honda HRR216 that is difficult to pull backward needs a different clue than a mower that won’t move forward, since a locked rear-wheel mechanism can mimic a transmission failure.
A quick symptom map can keep the diagnosis from turning into a parts-shopping spree:
| Mower symptom | Most likely area | First check | Usual repair direction |
|---|---|---|---|
| No forward movement | Cable, belt, pulley, transmission | Watch the transmission arm while squeezing the control | Adjust cable, replace belt, or repair drive unit |
| Slow drive on flat grass | Loose cable, worn belt, slipping pulley | Check cable travel and belt condition | Adjust cable or replace worn drive parts |
| Weak drive only uphill | Belt, pulley, transmission wear | Inspect for belt glazing and slipping | Replace belt or inspect transmission |
| One rear wheel skips | Wheel gear, axle, debris | Turn wheel by hand and inspect teeth | Clean, replace wheel, or repair axle |
| Mower keeps moving after release | Stuck cable or control | Release control with engine off | Free or replace cable and control |
| Hard to pull backward | Wheel lock, drive gear, transmission | Pull backward with control released | Inspect rear-wheel drive parts |
| Grinding from rear housing | Gear, bearing, pulley, or axle | Rotate wheels and inspect noise source | Replace damaged component |
| Drive works intermittently | Loose cable, belt, debris, worn pulley | Check fasteners and belt seating | Secure, clean, adjust, or replace |
Check the control cable before buying parts
The drive cable transfers your hand movement to the transmission or drive-control arm. Too much slack prevents full engagement, while too little slack can keep the drive partially engaged after you release the control.
Watch the cable end while moving the control. The inner wire should travel promptly, and the transmission arm should reach its stop without the cable housing sliding around in its bracket.
If the arm moves only partway, adjust the cable tension using the model’s cable adjuster. Make small changes, usually one or two turns at a time, then test the control again.
Don’t tighten the cable until the drive is always engaged. A mower that keeps pulling after you let go can surprise you near a fence, curb, or flower bed, and the extra tension can wear the clutch or transmission.
Pro Tip: Mark the original position of the cable adjuster with a small piece of tape before changing it. If the adjustment makes the problem worse, you can return to the starting point.
A cable with rust inside the housing, a frayed wire, or a sharp bend usually needs replacement rather than lubrication. Spraying oil into a sealed cable may make the control feel better for a short time, but it won’t repair broken strands or a crushed housing.
Inspect the drive belt and pulleys
A drive belt carries engine power to the transmission pulley. Belt trouble often shows up as slow movement, slipping under load, squealing, or a mower that drives briefly and then stops.
Before removing the belt cover, disconnect the spark-plug wire and keep hands away from the blade. If the mower must be tipped, follow the owner’s manual position so fuel and oil don’t run into the air filter or muffler.
Look for these signs:
- Cracks across the belt ribs.
- Shiny, glasslike belt surfaces caused by slipping.
- Frayed edges or missing chunks.
- Oil or grass packed into the pulley groove.
- A belt hanging loose instead of sitting deep in the groove.
- A pulley that wobbles or resists turning.
A belt can look acceptable while still being stretched enough to slip. Pressing on the belt with your finger isn’t a precise test, so compare its tension with the routing shown for your exact model.
The idler pulley keeps the belt tight when the drive control engages. A seized idler pulley can burn the belt, while a weak spring can leave the belt loose and cause poor hill climbing.
Clean packed grass with a wooden stick or stiff brush after the plug wire is disconnected. Don’t put fingers under a pulley or near the blade just because the engine is off. A stored blade can still move if the mower shifts.
Test the wheels, axle, and transmission
The transmission sends rotating power to the rear axle, while the wheel gears transfer that power to each wheel. A broken wheel gear can make the mower act like the transmission is bad.
Lift the rear of the mower only with a stable support rated for the mower’s weight. Never trust a thin branch, loose bucket, or unstable jack, because a falling mower can cause serious hand and foot injuries.
Turn the rear wheels by hand. Compare the left and right sides:
- A healthy wheel usually turns smoothly with similar resistance.
- A wheel that wobbles may have a worn bushing or axle.
- A wheel that grinds may have damaged teeth or a failing bearing.
- A wheel that turns freely while the other barely moves may have a stripped gear.
- A wheel that locks backward can point to a wheel-lock mechanism or transmission issue.
On many Honda systems, the drive transmission is not meant to be opened casually. Small springs, washers, gears, and seals can come out in an order that is hard to remember, and a wrong reassembly can create more trouble than the original fault.
I’d repair or replace an outside drive part before opening a transmission. A cable, belt, wheel, pulley, or mounting bracket is easier to verify and often costs far less than internal gear work.
The term transmission repair can mean two different jobs. Some repairs replace an external pulley, cable arm, or mounting part, while others require removing and replacing the complete drive assembly.
If the cable reaches the full travel stop, the belt stays tight, the pulleys turn, and the axle still fails to drive both wheels, the transmission becomes a strong suspect. Detailed Honda transmission repair can help you compare an internal repair with replacing the complete assembly.
A noisy transmission does not always mean every gear is ruined. Low lubricant, a bent axle, loose mounting hardware, or debris near the pulley can create noise that disappears after the outside problem is corrected.
Match the symptom to the correct repair
Ask yourself, does the mower fail in every situation or only under load? A drive that works on pavement but stops in thick grass usually has slipping, weak belt tension, a worn pulley, or a transmission that can’t produce enough torque.
Use these repair choices:
- Cable adjustment: Best for excess slack with an otherwise smooth cable and complete control movement.
- Cable replacement: Best for rust, fraying, kinks, or a housing that shifts at the bracket.
- Belt replacement: Best for cracks, glazing, stretching, shredding, or repeated slipping.
- Wheel replacement: Best for stripped wheel teeth, wobble, or a damaged internal gear.
- Pulley or idler repair: Best for wobble, seized bearings, or a spring that no longer holds tension.
- Transmission replacement: Best when external parts work but the axle doesn’t transmit power.
The right part must match the mower’s model and serial information, not just the deck size or engine brand. Honda has produced multiple drive layouts, and a belt or wheel that looks close may still have the wrong width, offset, or gear pattern.
The broader Honda drive system parts category includes cables, belts, wheels, pulleys, and related hardware. Checking those pieces as a group helps prevent the classic mistake of replacing a transmission when a $20 outside part caused the trouble.
Adjust Honda Smart Drive controls
Honda Smart Drive models use a hand control that varies drive speed. The control should respond smoothly and stop the mower’s drive when released.
With the engine off and plug wire disconnected, move the Smart Drive control through its range. Check for a sticky pivot, damaged grip, loose mounting hardware, or a cable that doesn’t return fully.
A Smart Drive mower that keeps moving after release has a safety problem, not a minor annoyance. Do not run the mower until the control returns completely and the drive disengages.
A stuck control can come from grass packed around the pivot, a bent bracket, a damaged cable, or an internal drive-control fault. Clean accessible debris first, then check whether the cable moves freely without rubbing the housing.
If the mower keeps moving after the control is released, use this focused Smart Drive release test before ordering parts. The test separates a control-return problem from a transmission that remains engaged.
Important Tip: Never defeat, tie back, or bypass a drive-control return spring. The spring allows the drive to disengage when you release the handle, and bypassing it can turn a small repair into a runaway mower.
Honda Self-Propelled Mower Safety and Repair Decisions
Safe repair starts with stopping accidental blade and wheel movement before inspection, followed by a test that uses the least risky setup. A mower can have stored motion in the blade, belt, spring, or wheel even after the engine stops.
Before any inspection:
- Disconnect the spark-plug wire.
- Remove the ignition key where fitted.
- Let the muffler and engine cool.
- Wear work gloves when handling belts or sharp deck edges.
- Keep children and pets away from the work area.
- Use stable supports before lifting any part of the mower.
- Keep gasoline away from sparks, cigarettes, and hot engine parts.
Don’t reach under the deck to clear grass with your hand. A wooden tool, brush, or hose used after the plug wire is removed is a much safer choice.
If the mower has a fuel leak, a cracked fuel line, a damaged blade hub, or a bent crankshaft, stop the drive diagnosis. Fuel and blade repairs can create separate hazards, and a repair shop is the sensible choice when the fault goes beyond a simple drive part.
A practical repair sequence
Use the following sequence when the mower is safe and cool:
-
Record the symptom.
Write down whether the mower won’t move, moves slowly, pulls unevenly, makes noise, or keeps moving after release. The exact behavior points toward different parts. -
Check the control return.
Release the drive control and confirm that the cable and arm return fully. Do not start the mower if the control sticks. -
Inspect the cable path.
Follow the cable from the handle to the transmission. Look for bends, loose clips, rubbing, and frayed wire. -
Check the belt area.
Remove the cover only after the spark-plug wire is disconnected. Clean debris and inspect belt condition, routing, and pulley movement. -
Test wheel movement.
Support the mower securely and rotate each wheel by hand. Compare resistance, noise, and wobble. -
Make one adjustment or replacement.
Changing several parts at once hides the real cause and makes the repair harder to judge. -
Perform a controlled test.
Reconnect the plug wire only after every cover and fastener is installed. Start on a clear, flat surface away from people, pets, curbs, and loose objects. -
Test under light load.
Drive across short, dry grass before trying thick or wet grass. A repair that works on pavement may still slip under load.
That one-change-at-a-time approach may feel slower, but it saves money and keeps the diagnosis honest. If a new belt fixes the mower, you won’t wonder whether the transmission, cable, and wheel were replaced for nothing.
What happened during one rushed repair
I once replaced a drive belt without checking the pulley alignment, then heard a sharp chirp as the belt walked toward the edge. The real problem was a bent pulley bracket, and the replacement belt lasted only one mowing session.
That mistake taught me to spin every pulley by hand and check for wobble before installing a belt. A new part can’t stay healthy if the part guiding it is crooked.
Pro Tip: Take clear phone photos of belt routing, cable brackets, and washers before removal. A five-second photo can save twenty minutes of guessing when the workbench starts filling with small parts.
When a shop makes more sense
A professional repair is sensible when the transmission must be opened, the axle is bent, the blade hub is damaged, or the mower has a fuel or electrical fault near the repair area. It also makes sense when the complete drive assembly costs close to the mower’s usable replacement value.
A simple cable adjustment may take minutes, while transmission removal can require special pullers, careful alignment, and model-specific parts. The labor decision depends on mower age, deck condition, engine health, and whether replacement parts are easy to obtain.
I’d keep repairing a solid Honda mower with a healthy deck and engine if the problem is a cable, belt, wheel, or pulley. I wouldn’t sink major transmission money into a mower with heavy deck rust, oil burning, a cracked handle, and several unrelated failures.
Troubleshooting Honda Drive Problems by Symptom
The fastest diagnosis comes from matching the mower’s behavior to the part that controls that behavior. A symptom that appears only while turning, climbing, or pulling backward often reveals more than a general complaint such as “the self-propel doesn’t work.”
The Honda troubleshooting by symptom approach keeps the checks in a useful order. Start with what you can observe, then confirm the suspected part before spending money.
The mower won’t move forward
Check the cable arm first. If the arm barely moves, cable slack or a damaged control is likely; if the arm moves fully, inspect the belt and pulley.
A belt that is off the pulley can leave the mower completely dead while the engine and blade run normally. A stripped wheel gear can also stop one side from driving, making the mower veer or refuse to move under pressure.
The mower moves slowly or slips
Slow movement usually comes from incomplete cable engagement, belt slipping, a weak idler spring, worn pulley surfaces, or internal transmission wear. Wet grass can make a marginal drive system feel much worse because the mower needs more pulling force.
Check for belt glazing and grass packed around the pulley. If the drive improves after cleaning but fades again, the belt or pulley may still be worn.
The mower drives on one side
A single driven wheel can have a stripped internal gear, damaged teeth, packed debris, or a loose axle connection. Turn both rear wheels by hand and compare how each wheel feels.
Don’t assume the mower is turning because the transmission is bad. A damaged wheel gear can create the same steering pull, and wheel replacement is usually a simpler job.
The mower is hard to pull backward
Many self-propelled mowers resist backward movement when the drive system stays partially engaged. A stuck cable, wheel gear, axle problem, or transmission mechanism can hold the drive in place.
The Honda HRR216 rear-wheel check focuses on rear-wheel locking and helps separate normal resistance from a wheel or transmission fault. Test with the engine off and the control released before touching the wheels.
The mower makes a clicking or grinding sound
Clicking during turns can come from wheel gears, while grinding can point to a bearing, pulley, axle, or transmission gear. A noise that rises with wheel speed is more likely near the wheel or axle than inside the engine.
Clean the outside first, then rotate the wheel by hand. If the sound remains with the belt removed, the belt and engine pulley move lower on the suspect list.
The drive works cold but fades after mowing
Heat can make a worn belt slip more easily, and thick grass can expose weak transmission torque. A cable housing that shifts as the handle flexes may also lose enough travel to reduce engagement.
Check fasteners, cable routing, belt condition, and pulley alignment after the mower cools. Don’t keep mowing through repeated slipping, because heat can damage the belt and pulley surfaces.
Costs and repair value
Repair cost depends on the exact Honda model, part availability, labor rate, and whether the mower needs a single outside part or a complete drive assembly. The ranges below are planning figures, not a promise for every model or shop.
| Repair type | Typical DIY difficulty | Parts-only planning range | When it makes sense |
|---|---|---|---|
| Cable adjustment | Low | $0 | Cable is smooth and only slack is wrong |
| Drive cable replacement | Low to medium | $15 to $45 | Cable is kinked, frayed, or seized |
| Drive belt replacement | Medium | $20 to $60 | Belt is worn, stretched, or slipping |
| Rear wheel replacement | Low to medium | $20 to $70 per wheel | Gear teeth or wheel body is damaged |
| Pulley or idler repair | Medium | $25 to $90 | Pulley wobbles, binds, or loses tension |
| Transmission replacement | High | $150 to $400 or more | External parts test good but axle drive fails |
| Shop diagnosis and labor | Varies | Depends on local rate | Internal repair or multiple faults are present |
Prices change with model and location, so use the mower’s full model number before ordering. A part listed for a similar Honda may not fit the cable bracket, belt path, wheel gear, or axle spacing.
Key Takeaways:
- Start with safety, then inspect cable movement before removing drive parts.
- A mower that keeps moving after release should not be operated until the control returns fully.
- Check the belt, pulley, wheels, and axle before condemning the transmission.
- Change one part at a time so the repair teaches you what failed.
FAQs About How to Fix a Self Propelled Honda Lawn Mower
Why does my self-propelled Honda mower not move?
A self-propelled Honda mower usually fails to move because of cable slack, a dislodged or worn drive belt, a damaged pulley, a stripped wheel gear, or transmission wear. Check whether the transmission arm moves fully when the drive control is squeezed, then inspect belt seating and rear-wheel movement with the engine disabled.
How do I adjust the Honda lawn mower drive cable?
Adjust the Honda lawn mower drive cable at its cable adjuster in small steps, checking control travel after each change. Add tension when the cable has excess slack and the transmission arm doesn’t reach its stop. Stop if the mower remains engaged after release, because too much tension creates an unsafe condition.
Why does my Honda mower keep moving when Smart Drive is released?
A Honda mower keeps moving when Smart Drive is released because the control, cable, return spring, or transmission engagement mechanism may be sticking. Shut off the mower, disconnect the spark-plug wire, and confirm that the hand control and transmission arm return fully before running another test.
Can I replace a Honda mower transmission myself?
Yes, a skilled homeowner can replace a Honda mower transmission, but the job may require belt removal, axle disassembly, careful routing, and model-specific hardware. A complete transmission replacement makes more sense when the cable, belt, pulleys, wheels, and mounting parts have already passed inspection.
Why is my Honda HRR216 hard to pull backward?
A Honda HRR216 is hard to pull backward when the drive system remains partly engaged, a rear-wheel gear binds, debris blocks movement, or the transmission has internal wear. Test both rear wheels with the drive control released and the spark-plug wire disconnected, then compare wheel resistance and noise.
Is it worth repairing a self-propelled Honda mower?
Repairing a self-propelled Honda mower is usually worthwhile when the engine starts easily, the deck is sound, and the fault is a cable, belt, wheel, pulley, or bracket. A major transmission repair becomes harder to justify when the mower also has heavy rust, engine smoke, handle damage, or several failing systems.
Make the Drive Test Before Ordering Parts
A self-propelled Honda mower usually tells you where the fault lives if you watch the control, cable, belt, wheels, and axle in order. Start with the simple outside parts, because a loose cable or worn belt can imitate a costly transmission failure.
My practical choice is to clean and inspect first, adjust only in small steps, and replace one confirmed part at a time. Disconnect the spark-plug wire before every hands-on check, and don’t run the mower again until the drive disengages completely when you release the control. That short test can save money, protect your hands, and get the mower back to steady work without guesswork.