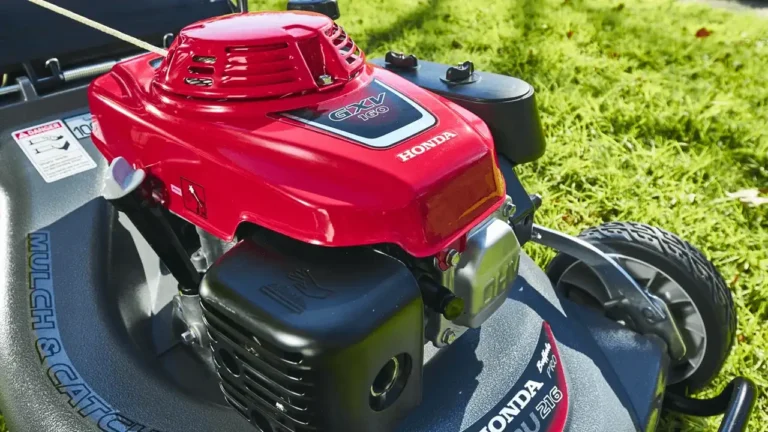
Honda Lawn Mower Troubleshooting: Find the Problem by Symptom
Honda lawn mower troubleshooting starts with the symptom, then narrows the fault through fuel, air, spark, controls, drive parts, or the cutting deck. Most problems come from stale fuel, a dirty air filter, a fouled spark plug, a blocked deck, a loose cable, or a worn belt.
Does your Honda mower crank but refuse to fire, or does the engine start and quit as soon as you engage the blade? Are you chasing a rough cut, weak self-propel drive, white smoke, or a battery that seems dead after charging?
I once rushed through a mower tune-up and reused a spark plug that looked “good enough.” The engine coughed, spat black smoke, and left me with a greasy air filter plus an afternoon of extra work. That shortcut is common, not dumb.
I wrote this guide for homeowners who want a clear path instead of a pile of guesses. You’ll get symptom-based checks, safe repair steps, model details that matter, and a point where calling a small-engine technician makes more sense.
Get the diagnosis right and you can avoid buying parts you don’t need, protect the engine from damage, and get a clean cut without fighting the machine. Skip the basic checks, and a five-minute fix can turn into a damaged carburetor, bent blade, ruined battery, or expensive shop visit.
This takes about 14 minutes to read, and you’ll finish with a practical plan for:
- Finding the reason a Honda mower won’t start.
- Separating fuel, air, spark, and compression faults.
- Fixing rough running, smoke, drive trouble, and cutting issues.
- Knowing which checks are safe at home and which repairs need a professional.
- Choosing the right replacement part by model and serial number.
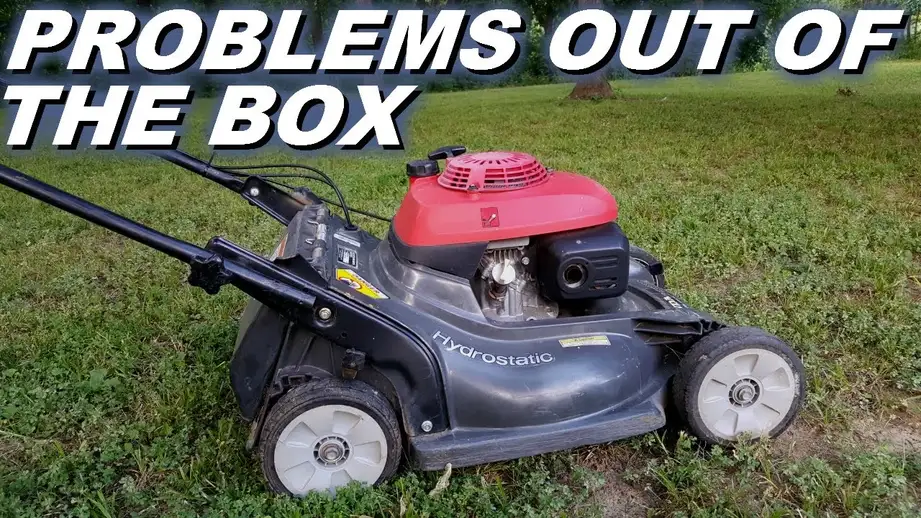
Honda Lawn Mower Troubleshooting Starts with the Symptom
Honda lawn mower troubleshooting works best when you test one system at a time instead of replacing parts at random. Start with the controls and fuel, then check airflow, spark, the blade area, and the drive system.
Before touching the mower, move it onto a flat surface outdoors. Set the parking brake if fitted, remove the ignition key on an electric model, disconnect the spark plug wire on a gasoline model, and wait for hot parts to cool.
A gasoline Honda walk-behind mower normally follows this basic chain:
- Fresh fuel reaches the carburetor.
- Air passes through a clean filter.
- The spark plug ignites the mixture.
- The engine turns with enough compression.
- The blade and drive systems transfer power correctly.
If one link fails, the symptom usually points toward that area. A pull cord that feels normal but produces no ignition points in a different direction than a cord that is suddenly locked solid.
Use this quick chart to start in the right place.
| Symptom | First checks | Likely causes | Safe next move |
|---|---|---|---|
| Engine does not crank | Blade control, fuel valve, battery or key | Control fault, dead battery, seized blade | Stop and inspect controls, then disconnect power before checking the deck |
| Engine cranks but will not start | Fuel age, spark plug, air filter | Stale fuel, fouled plug, blocked filter | Drain questionable fuel and inspect the plug |
| Engine starts, then quits | Fuel cap, carburetor, choke, air filter | Restricted vent, dirty carburetor, incorrect choke use | Test the cap vent and clean or replace service parts |
| Engine surges | Fuel flow, filter, governor linkage | Varnish in carburetor, blocked jet, air leak | Stop running if the engine races or hunts badly |
| Blue or white smoke | Oil level, mower angle, air filter | Overfilled oil, tipped mower, oil-soaked filter | Shut down, level the mower, and check oil |
| Black smoke | Air filter, choke, fuel mixture | Restricted air, choke left on, carburetor issue | Turn off choke and inspect the filter |
| Blade vibrates | Blade, adapter, crankshaft | Bent blade, loose hardware, impact damage | Disconnect the plug wire before deck inspection |
| Self-propel drive slips | Drive cable, belt, wheels | Loose cable, worn belt, packed debris | Clean the drive area and check cable travel |
| Battery mower loses power | Charge level, battery contacts, blade load | Low battery, blocked deck, worn battery | Remove the battery before inspecting the blade |
A symptom can have more than one cause. A mower that stalls in thick grass may have a dull blade, a dirty deck, low engine power, or all three working together.
Start With The Easy Checks
Check the fuel level and fuel age first on a gasoline model. Fuel that has sat through a long storage period can lose its ability to ignite cleanly, while water or debris in the tank can block the carburetor.
Inspect the operator presence control, the handle bar that must stay engaged while the engine runs. A stretched cable, damaged lever, or loose control bracket can prevent starting even when the engine itself is fine.
Look under the mower without reaching near the blade. Wet grass, packed clippings, string, and small sticks can stop the blade or make the engine labor until it stalls.
Do you need to remove the carburetor right away? Usually, no. A fresh fuel check, clean air filter, correctly gapped spark plug, and clear deck solve many common faults before carburetor work becomes necessary.
Honda engine models differ in choke design, fuel shutoff parts, oil capacity, air filters, and starting systems. The engine family code and mower model number matter more than the color of the machine, so record those details before ordering anything.
Match The Repair To The Symptom
A no-start condition needs a different path than a mower that starts but runs rough. The guide on Honda no-start diagnosis covers model-specific starting checks, especially when the engine turns over but never catches.
Rough running often points to fuel delivery, air restriction, or a governor problem. If the engine surges, blows smoke, or loses power under load, use the steps in Honda rough-running fixes after the basic fuel and filter checks.
The best diagnostic habit is simple: change one thing, then test the mower. If you replace a plug, drain fuel, clean the deck, and adjust the cable all at once, you won’t know which repair solved the problem.
- Start with controls, fuel, air, and the deck before buying parts.
- Disconnect the spark plug wire or battery before reaching under the mower.
- Use the model and engine numbers before ordering service parts.
- A symptom can come from two faults, especially during heavy mowing.
Honda Mower Engine Problems: No Start, Stalling, Smoke, and Power Loss
A Honda mower engine that will not start, stalls, smokes, or loses power usually has a fuel, air, spark, or compression problem. A careful sequence keeps a small fault from turning into a long repair.
When The Engine Will Not Start
Before testing spark, remove the spark plug wire and inspect the wire boot for cracks or looseness. Spark testing creates ignition voltage, so keep fuel containers closed, work outdoors, and use a proper spark tester rather than holding the plug against the engine with your hand.
Check the starting sequence listed on the mower’s control panel. Some Honda mowers use an automatic choke, while others need a specific blade-control or throttle position, and forcing the wrong sequence can flood the engine.
A flooded engine often smells strongly of fuel. Let the mower sit in a ventilated outdoor area, keep ignition sources away, and avoid repeated pulling until excess fuel has evaporated.
Inspect the spark plug after the engine is cool:
- A dry plug can mean fuel is not reaching the cylinder.
- A wet plug can mean flooding or weak ignition.
- Heavy black deposits suggest a rich mixture, restricted air, or prolonged low-speed running.
- A damaged insulator or worn electrode calls for replacement.
- A plug with the wrong gap can create hard starting and misfires.
Use the plug type and gap listed for the exact engine model. Guessing from a similar Honda engine can give you the wrong reach or heat range, and that can cause poor ignition or engine damage.
Fuel should look clean and smell like normal fresh gasoline. Drain fuel into an approved container if it looks cloudy, contains sediment, or smells sour, then handle disposal according to local rules.
Never pour gasoline onto soil, into a drain, or into household trash. Fuel vapors can travel farther than you expect, so keep the container away from heaters, pilot lights, cigarettes, and electrical sparks.
When The Engine Starts Then Dies
A mower that starts and dies often has restricted fuel flow or an air problem. Remove the fuel cap briefly only as a test if the cap vent may be blocked, and stop if fuel spills or vapors build up.
A blocked fuel cap vent can create a vacuum in the tank. The engine runs for a short time, then starves as fuel stops flowing, leaving you with a mower that acts as if the carburetor is failing.
The carburetor meters fuel and air into the engine. Old gasoline can leave varnish inside the small passages, while dirt can block the main jet and make the mower quit under load.
Carburetor cleaning can be a reasonable home repair if the bowl and gasket are accessible. Take photos before removing linkages, protect your eyes from cleaner, and avoid spraying solvent onto rubber parts, painted surfaces, or electrical connectors.
If the carburetor has a damaged float, leaking gasket, stuck needle, or corrosion, replacement may be more sensible than repeated cleaning. I’d rather install the correct service part once than spend a sunny Saturday poking wire through tiny passages and still have a mower that quits.
A mower that dies only after the blade is engaged may have a blocked deck or a blade that is too hard to turn. Disconnect the spark plug wire, tip the mower with the air cleaner facing upward when the design allows, and clear the deck with a wooden tool.
When The Engine Runs Rough Or Surges
A governor controls engine speed as the load changes. If the governor spring or linkage is bent, loose, or installed incorrectly, the engine may speed up and slow down repeatedly, especially in thick grass.
Never bend governor parts to make the engine run faster. Overspeed can damage the engine and create a serious blade hazard, so a technician should handle a damaged linkage or uncertain adjustment.
A dirty air filter limits oxygen and can make the engine run rich. Foam filters may need washing and oiling according to the engine instructions, while paper filters usually need replacement rather than washing.
Black smoke usually means too much fuel or too little air. Turn the choke off once the engine warms, inspect the filter, and check whether the mower was recently tipped with the air cleaner side downward.
Blue smoke often points to engine oil entering the combustion chamber. Overfilling, tipping the mower incorrectly, worn rings, or a breather problem can cause that symptom.
White smoke after tipping can clear once the excess oil burns off, but continuous smoke deserves attention. Shut the engine down if smoke is heavy, oil is leaking onto hot parts, or the engine speed changes on its own.
I once cleaned a mower deck while the engine was still warm and rushed the reassembly. The first pull started a cloud of dusty clippings and made me realize the filter cover was not seated, a small reminder that clean parts still need correct assembly.
When The Engine Loses Power
Power loss under load can come from a dull blade, wet grass, a clogged deck, poor fuel flow, restricted air, or low engine speed. Start with the blade and deck because they’re easy to inspect and often get blamed on the engine.
A dull blade tears grass instead of slicing it. Torn grass creates a ragged surface, turns pale at the tips, and can make the mower work harder because the blade spends more time pushing through each stem.
Use the correct blade for the deck width and mower model. The blade must be balanced and installed with the cutting edge facing the right direction, with the mounting hardware tightened to the manufacturer’s specification.
Do not sharpen a blade while it is mounted on the mower. Remove the spark plug wire first, wear gloves while handling the blade, clamp the blade securely, and keep your fingers away from the cutting edge.
A blade that is badly bent or cracked should be replaced. Grinding away large amounts of metal can throw the balance off, causing vibration that damages the crankshaft or deck.
If the engine bogs only in tall, wet grass, raise the cutting height and overlap passes less. Cutting more than about one-third of the grass height at once can overload a walk-behind mower, especially when the turf is damp.
Honda Mower Drive, Blade, Battery, and Control Faults
Honda mower drive and cutting problems usually come from cable adjustment, packed debris, worn belts, damaged blades, or excessive load. Battery models add a second group of checks involving charge level, contacts, safety controls, and electronic protection.
Self-Propelled Drive Problems
A self-propelled mower uses a control cable, transmission or drive unit, wheels, and often a belt to move the machine. If the engine runs normally but the mower won’t move, inspect those parts in that order.
Before lifting the mower or touching the drive system, remove the spark plug wire on a gasoline model or remove the battery on an electric model. Never rely on the stop lever alone.
Start with the drive control. Squeeze the drive bail and watch whether the cable moves the actuator at the transmission or wheel assembly.
A loose cable may not pull the drive clutch far enough. A cable that is too tight can keep the drive engaged, make the mower hard to push, or cause wheel rotation when the control is released.
Clean grass from the wheels and drive housings. Packed clippings can stop a wheel from turning or hide a damaged gear, and spraying a heavy stream of water into bearings can wash out lubricant.
A slipping drive belt may look shiny, cracked, stretched, or covered with grass dust. Belt access varies by model, so use the mower’s service information before removing covers or changing pulley positions.
If the transmission makes grinding noises, locks one wheel, or leaks lubricant, stop using the drive. A new cable won’t repair internal gear damage.
The steps in self-propel drive repair help separate a cable fault from a belt, wheel, or transmission problem. I’d start there before buying a complete drive assembly, since the full assembly is often the most expensive guess.
Cutting, Bagging, And Mulching Problems
Uneven cutting usually comes from an uneven deck, incorrect height settings, a bent blade, low tire pressure, or mowing conditions. Check the mower on a flat surface before adjusting anything.
Use a straight edge across the blade or deck area only after the blade is secured and the ignition source is disconnected. A deck that is bent from hitting a curb can make height settings look correct while the blade sits at an angle.
The cutting height should match the grass type and season. Very low mowing can scalp high spots, while very high settings can leave long strands that fold over and make the lawn look uneven.
Poor bagging can come from a full bag, wet grass, a blocked discharge chute, a dull blade, or an incorrect blade type. Empty the bag before it becomes packed tight, because airflow drops when clippings seal the fabric.
Mulching needs a suitable blade and a closed or properly fitted discharge area. Heavy clumps under the deck usually mean the grass is wet, too tall, or being cut too aggressively.
The guide to Honda cutting problems is useful when the mower runs well but leaves strips, misses patches, clogs the bag, or vibrates during cutting. Those symptoms point to the deck system more often than the ignition system.
Battery Mower Faults
A battery Honda mower may not run because the battery is empty, the pack is too hot or cold, the contacts are dirty, the safety key is missing, or the blade is overloaded. Remove the battery before inspecting the deck or connectors.
Charge the battery with the correct charger and allow a hot pack to cool in a dry area. Do not use a swollen, cracked, leaking, or unusually hot battery.
Inspect the battery contacts for grass, moisture, bent metal, or corrosion. Wipe light dirt away with a dry cloth, and don’t insert metal tools into the contact area.
If indicator lights flash, record the pattern before removing the battery. Light codes vary by model, and the pattern may point to temperature protection, a communication fault, a charging problem, or a motor overload.
A battery mower that shuts down in thick grass may be protecting the motor. Raise the deck, clear the chute, reduce travel speed, and use a sharp blade before assuming the battery has failed.
The steps in Honda battery troubleshooting cover power, charging, light codes, and sudden shutdowns. Battery faults deserve patience because repeated hard resets or incorrect chargers can create a costly problem.
Controls And Safety Interlocks
A safety interlock prevents the engine or blade from operating under unsafe conditions. Common examples include a blade-control lever, a safety key, a handle switch, and a seat or brake switch on some larger machines.
Never bypass an interlock with tape, wire, or a homemade jumper. The control may look annoying when the mower won’t start, but defeating it can let the blade run while you’re near the deck.
Check whether the handle is fully opened, the key is inserted, and the control lever moves freely. A bent handle or damaged cable can keep the switch from reaching its operating position.
If the engine stops when you release the handle, that behavior may be normal. If the engine stops while the handle is held correctly, inspect the cable and switch, then stop using the mower if the control feels loose or inconsistent.
Important Tip: Take a photo of cable routing before removing a control cover. A cable that crosses the wrong side of a bracket may operate backward or stay under tension.
Honda Mower Parts, Service, and Repair Decisions
The right Honda mower part depends on the mower model, engine model, serial number, deck size, and sometimes the production range. Matching by appearance alone is risky because similar handles, filters, blades, belts, and cables may not interchange.
Record the identification label before searching for a replacement. Write down the full model code, serial number, engine family, deck width, and the part’s shape or measurements.
The information in Honda mower parts explains how to match parts by model and serial number. That step can prevent the classic wrong-part headache, where a filter looks nearly identical but won’t seal or a blade hole fits loosely.
Common service parts include:
- Spark plugs and plug wires.
- Air filters and foam pre-filters.
- Fuel filters, fuel lines, and tank caps.
- Carburetor gaskets, bowls, and complete carburetors.
- Blades, blade adapters, and mounting hardware.
- Drive cables, belts, wheels, and transmission parts.
- Battery packs, chargers, switches, and safety keys.
Avoid mixing hardware from different blade systems. A bolt that seems close may have the wrong thread, shoulder, washer, or length, and the blade can loosen or contact the deck.
A Practical Maintenance Schedule
Regular maintenance prevents many troubleshooting jobs. Follow the exact service intervals for the mower and engine, since oil type, filter care, spark plug replacement, and battery storage can vary by model.
At each mowing session, brush grass from the deck, check the blade for damage, inspect the control cable, and look for loose hardware. These quick checks catch trouble while the clues are still easy to spot.
After several mowing sessions, inspect the air filter, blade sharpness, drive wheels, and bag or chute. A clean deck improves airflow and reduces the load on the engine or motor.
At the end of the mowing season, gasoline models need fuel planning. Use fresh fuel during storage, follow the engine guidance for stabilizer, and run the mower only in a safe outdoor area when the instructions call for it.
Battery models need a dry, moderate-temperature storage area. Keep the battery at the charge level recommended for storage, and don’t leave it in the mower if moisture, freezing temperatures, or unauthorized use could damage the pack.
The routine in Honda mower maintenance lays out gas and battery service tasks in a useful schedule. I’d rather spend a few minutes brushing out a deck than spend a whole morning diagnosing a mower that overheated under a blanket of wet clippings.
When A Repair Should Stop
Stop home troubleshooting if the fuel tank, crankcase, or battery pack is damaged. Fuel leaks, oil leaks near hot surfaces, swollen batteries, and strong electrical odors can create fire risks.
A professional should handle suspected low compression, a bent crankshaft, internal transmission damage, governor faults, repeated carburetor flooding, or electrical faults that continue after basic checks.
Do not keep running a mower that vibrates heavily, throws metal sounds, races uncontrollably, or loses a blade fastener. Shut it down, disconnect the ignition source, and move it away from children and pets.
A repair shop can also make sense when the correct part costs nearly as much as a dependable replacement mower. The comparison in best Honda mower options can help you judge whether repair, replacement, or a simpler model fits your yard and budget.
- Match parts by full model and serial information, not by color or appearance.
- A clean deck and sharp, balanced blade prevent many power complaints.
- Never bypass a safety interlock or keep using a mower with severe vibration.
- Repair makes sense when the fault is clear and the part is available at a fair cost.
A Simple Diagnostic Order for Your Next Mowing Day
A good troubleshooting order prevents repeat work and keeps the repair focused. Write down what the mower does, what changed recently, and whether the fault appears cold, hot, under load, or only with the blade or drive engaged.
Use this sequence:
- Move the mower outdoors onto a flat, dry surface.
- Remove the battery or spark plug wire before touching the blade or deck.
- Check the controls, safety key, fuel level, and obvious leaks.
- Inspect the deck, blade, chute, wheels, and drive cable.
- Check fuel quality, oil level, air filter condition, and spark plug condition.
- Test one repair at a time.
- Run the mower briefly without grass, then test it under a light load.
- Stop and seek service if the symptom becomes more severe.
Why test without grass first? A mower that runs smoothly with no load but dies in turf points toward blade resistance, deck blockage, cutting height, or engine power under load.
If the engine runs poorly even with the blade disengaged, focus on fuel, air, ignition, compression, and governor operation. That split saves a lot of blind part swapping.
Keep removed parts in a small tray and label cables with masking tape. A phone photo takes seconds and can save an hour of trying to remember which spring went where.
Common Troubleshooting Mistakes
Using starting fluid repeatedly can mask a fuel problem and create a fire risk. It doesn’t repair a blocked carburetor, bad fuel line, or stuck float, so use a proper diagnosis instead.
Tipping a mower with the carburetor or air filter facing downward can send oil into the filter and intake. That creates smoke, hard starting, and a new filter bill.
Over-tightening blade hardware can damage threads, while under-tightening can let the blade loosen. Use the manufacturer’s torque specification when available and replace damaged hardware.
Cleaning a paper air filter with compressed air can open holes in the filter media. A filter that looks clean may still leak fine dust into the engine, so replacement is often the safer choice.
Adjusting the carburetor mixture without knowing the model can create an overly rich or lean condition. Modern Honda engines may have limited user adjustment, and some settings are meant for service technicians.
Buying a complete carburetor, transmission, or battery before checking a cable, plug, filter, or deck is an expensive habit. Start with the cheapest likely cause that matches the symptom, then move deeper only when the test supports it.
FAQs About Honda Lawn Mower Troubleshooting
Why won’t my Honda lawn mower start after winter?
A Honda lawn mower often fails to start after winter because old gasoline has degraded, the carburetor passage is restricted, the spark plug is fouled, or the air filter is dirty. Drain questionable fuel, inspect the plug and filter, and follow the correct starting procedure before removing the carburetor.
Why does my Honda lawn mower start and then stop?
A Honda lawn mower that starts and then stops commonly has restricted fuel flow, a blocked fuel cap vent, a dirty carburetor, or an air filter problem. A mower can also quit when a clogged deck or dull blade creates too much load after the blade engages.
Why is my Honda mower blowing white smoke?
White smoke from a Honda mower usually means oil entered the combustion area after overfilling or tipping the mower incorrectly. Shut the engine off, place the mower level, check the oil level, and arrange service if smoke continues or oil leaks near hot engine parts.
Why does my Honda self-propelled mower lose drive?
A Honda self-propelled mower can lose drive because the control cable is loose, the belt is worn, grass is packed around the wheels, or the transmission has internal damage. Remove the ignition source before inspection, then check cable movement and wheel freedom before ordering parts.
Why does my Honda mower leave uneven grass?
A Honda mower leaves uneven grass when the blade is dull or bent, the deck is damaged, the wheels sit at different heights, or the grass is too wet or tall. Check blade balance, deck condition, tire or wheel height, and cutting height on a flat surface.
Can I use any Honda mower blade as a replacement?
No, a Honda mower blade must match the mower model, deck width, mounting hole pattern, offset, and approved blade design. A blade that mounts loosely, sits backward, or has the wrong balance can cause vibration, poor cutting, deck damage, or a serious safety hazard.
Get Your Honda Mower Back to Reliable Work
Honda lawn mower troubleshooting gets much easier when the symptom leads the inspection. Start with safe basics, test one change at a time, and let the model number guide every part decision.
My practical choice is to repair a clear fault such as a plug, filter, cable, blade, belt, or dirty deck before shopping for another mower. I’d stop for fuel leaks, severe vibration, uncontrolled engine speed, damaged batteries, or internal engine and transmission problems.
Your next step is simple: write down exactly what happens, disconnect the ignition source, and inspect the part tied most closely to that symptom. A calm, careful check usually beats a rushed parts order, and your mower will reward you with a cleaner cut and fewer surprises.