How to Change Spark Plug on Honda Lawn Mower: Tools and Steps
To change the spark plug on a Honda lawn mower, turn off the engine, let it cool, disconnect the spark plug cap, and remove the old plug using a 13/16-inch (21 mm) spark plug socket on models that specify this size. Check the replacement plug’s type and electrode gap, thread it into the cylinder head by hand, tighten it to the correct specification, and reconnect the cap.
Replacing a spark plug is a routine maintenance task that can help restore reliable starting and smooth engine operation. Most Honda walk-behind gasoline mowers have one spark plug, and replacement usually requires only a few basic tools. However, different Honda engines may use different plugs, so checking the mower’s model-specific owner’s manual is essential.
An incorrect spark plug, improper electrode gap, or overtightened threads can cause problems. Following the correct installation procedure helps prevent unnecessary damage to the engine.
In this article, I explain how to change spark plug on Honda lawn mower models step by step, including locating the plug, choosing a compatible replacement, checking the gap, and tightening it correctly. I also cover Honda HRN216, HRR216, and HRX217 considerations, replacement intervals, troubleshooting, and common mistakes to avoid.
How to Change Spark Plug on Honda Lawn Mower Step by Step
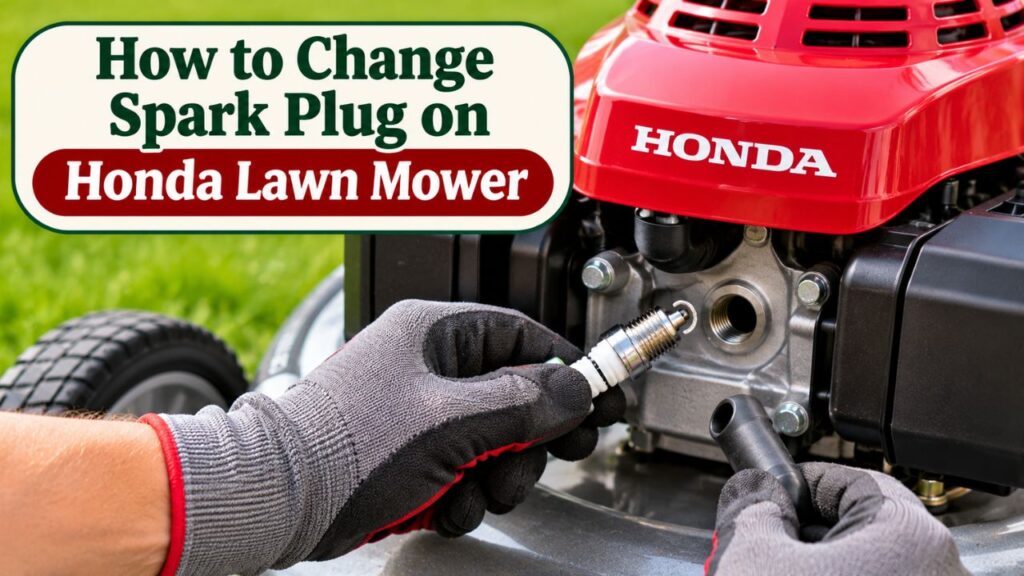
Changing the spark plug on most Honda gasoline walk-behind mowers follows the same basic process.
Quick Spark Plug Replacement Steps
- Park the lawn mower on a level surface.
- Stop the engine and allow it to cool completely.
- Turn the fuel valve off if equipped.
- Locate the spark plug and remove its rubber cap.
- Clean dirt and grass debris from around the plug.
- Use the correct spark plug socket to unscrew the old plug.
- Inspect the old plug for wear, deposits, or damage.
- Verify the replacement plug’s part number and electrode gap.
- Thread the new spark plug into the engine by hand.
- Tighten it according to the owner’s manual.
- Reattach the spark plug cap securely.
- Start the mower outdoors and check engine operation.
These steps apply to many Honda-powered walk-behind mowers, but the exact plug specification and tightening requirements depend on the engine.
The Honda HRX217 owner’s manual provides detailed instructions for spark plug inspection and replacement, including the recommended gap and tightening method.
Important: Never remove or install a spark plug while the engine is running or hot. Disconnecting the plug cap before maintenance helps prevent accidental starting.
What Tools Do You Need to Change a Honda Lawn Mower Spark Plug?
You don’t need a large tool collection for this job.
However, using the correct equipment makes removal and installation easier.
Tools and Materials
| Tool or Material | Purpose |
| Correct replacement spark plug | Replaces the worn or damaged plug |
| 13/16-inch (21 mm) spark plug socket | Removes the plug on many Honda mower engines |
| Ratchet wrench | Turns the spark plug socket |
| Socket extension | Helps reach the plug when space is limited |
| Spark plug gap gauge | Measures the electrode gap |
| Torque wrench | Tightens the plug accurately |
| Soft brush or clean cloth | Removes dirt around the plug |
| Safety gloves | Protects hands during maintenance |
| Safety glasses | Protects eyes from debris |
Most Honda walk-behind mower manuals specify a 13/16-inch spark plug wrench, but you should confirm the tool size for your particular engine.
Do You Need a Special Spark Plug Socket?
A spark plug socket is preferable to an ordinary deep socket.
Many spark plug sockets include an internal insert or retaining mechanism that helps hold the plug during removal.
This is useful when the plug sits in a recessed or difficult-to-reach area.
Use a socket that fits the plug’s hex correctly.
Do You Need a Torque Wrench?
A torque wrench is recommended when the owner’s manual provides a tightening specification.
Correct torque helps ensure that the spark plug’s sealing washer seats properly without damaging the cylinder-head threads.
If a torque wrench isn’t available, some Honda manuals provide an alternative tightening-angle method.
That method must match the particular spark plug and engine.
Where Is the Spark Plug on a Honda Lawn Mower?
On most Honda gasoline walk-behind mowers, the spark plug is installed in the engine’s cylinder head.
You can identify it by looking for a thick ignition wire connected to a rubber spark plug cap.
The cap fits over the exposed terminal of the plug.
How to Locate the Spark Plug
- Stand beside the mower with the engine switched off.
- Look around the front or side of the engine’s cylinder head.
- Find the thick ignition cable leading to a rubber cap.
- Follow the cable to where the cap connects to the engine.
- The spark plug is directly underneath that cap.
The exact location varies by engine and mower design.
Honda HRN216 Spark Plug Location
On gasoline-powered HRN216 mowers, the spark plug is accessible from the engine’s cylinder-head area.
Look for the ignition wire and rubber cap.
The spark plug is connected beneath it.
Use the correct manual for your mower version if the location isn’t immediately visible.
Honda HRR216 Spark Plug Location
On many HRR216 mowers, the spark plug is located near the front portion of the engine.
It is covered by a black rubber spark plug cap.
The cap must be removed before accessing the plug with a socket.
Honda HRX217 Spark Plug Location
On HRX217 gasoline mowers, the spark plug is located on the engine’s cylinder head beneath the spark plug cap.
Honda’s owner’s manual includes an illustration showing the cap and plug.
What if You Cannot Find the Spark Plug?
Don’t remove random engine covers or electrical components.
Check the parts-and-controls diagram in your owner’s manual.
Honda provides official instructions for identifying the engine components.
You can find model-specific documentation through the Honda lawn mower owner’s manuals directory.
Note: Honda battery-powered electric mowers do not have gasoline-engine spark plugs. This procedure applies to gasoline-powered models.
Step 1: Turn Off the Honda Lawn Mower and Let It Cool
Safety comes first.
Before touching the spark plug, make sure the engine cannot start unexpectedly.
Shut Off the Engine
Release the blade-control lever or use the appropriate stop control.
Wait until the engine and all moving components have stopped.
Allow the Engine to Cool
The cylinder head, muffler, and surrounding engine components can become extremely hot during operation.
Wait until the engine has cooled before beginning maintenance.
Avoid touching the muffler or exhaust components while they are hot.
Turn Off the Fuel Valve
If your Honda mower has a fuel shutoff valve, move it to the OFF position.
This helps reduce the possibility of fuel leakage during maintenance.
Not every mower has the same fuel-control arrangement.
Keep the Mower Upright
Changing the spark plug usually does not require tipping the lawn mower.
Keep it on level ground unless your owner’s manual specifically directs otherwise.
Tilting a mower incorrectly can cause fuel or engine oil to enter areas where it doesn’t belong.
Prevent Accidental Starting
Before removing the spark plug, disconnect the ignition cap.
On electric-start gasoline models, follow any additional battery or ignition-isolation instructions in the owner’s manual.
Never work near the blade or ignition components while the engine could start unexpectedly.
Step 2: Disconnect the Spark Plug Cap
The spark plug cap is the rubber boot connected to the ignition cable.
It covers the exposed spark plug terminal.
How to Remove the Cap
Hold the rubber boot firmly.
Pull it straight away from the spark plug.
If it is tight, use a gentle twisting motion while pulling.
Avoid pulling directly on the ignition wire.
Why You Shouldn’t Pull the Wire
The ignition cable contains an electrical conductor and internal connections.
Pulling the cable instead of the boot can damage those connections.
This may cause intermittent ignition problems or a complete loss of spark.
What if the Cap Won’t Come Off?
Check whether you’re gripping the rubber boot rather than the wire.
Gently work the cap loose.
Avoid using excessive force or sharp tools that could damage the insulation.
If the cap appears cracked or deteriorated, inspect it and consider professional replacement.
Step 3: Clean Around the Spark Plug
Before removing the plug, clean the surrounding area.
Grass clippings, dust, and other debris can collect around the cylinder head.
When the spark plug is removed, the opening leads into the combustion chamber.
Loose debris falling into the cylinder can damage internal components.
How to Clean the Area
Use a soft brush or clean cloth to remove visible dirt.
If appropriate, use low-pressure air while wearing eye protection and directing debris away from the spark plug opening.
Don’t blow dirt into the engine.
Why Cleaning Matters
Debris can interfere with the sealing surface or fall into the cylinder.
Removing it before loosening the plug helps protect the engine.
Keep the spark plug installed while cleaning the surrounding area.
Only remove it after the area is reasonably clean.
Step 4: Remove the Old Spark Plug
Once the engine is cool and the spark plug cap is disconnected, you can remove the plug.
Use the Correct Socket
Fit the spark plug socket over the hexagonal portion of the plug.
Many Honda mower engines use a 13/16-inch (21 mm) spark plug wrench.
Attach the ratchet.
Turn Counterclockwise
Turn the plug counterclockwise to loosen it.
Use steady pressure.
Avoid sudden movements that could slip and damage nearby components.
Finish Removing It by Hand
Once the plug turns freely, remove the wrench and continue unscrewing it by hand if accessible.
Lift the plug away carefully.
What if the Spark Plug Is Stuck?
Don’t apply excessive force.
A spark plug can become difficult to remove because of corrosion, deposits, or damaged threads.
Forcing it may damage the cylinder head.
If it won’t loosen with reasonable effort, stop and seek advice from a qualified small-engine technician.
Protect the Open Spark Plug Hole
Don’t allow dirt, tools, or loose materials to enter the opening.
Avoid pulling the starter rope while the spark plug is removed.
Keep the engine protected until the new plug is ready to install.
Step 5: Inspect the Old Spark Plug
The condition of the removed spark plug can provide clues about engine operation.
However, plug appearance alone doesn’t prove a specific engine problem.
Spark Plug Condition Chart
| Spark Plug Appearance | Possible Meaning | Recommended Action |
| Light tan or gray deposits | Often consistent with normal combustion | Check condition and service interval |
| Dry black soot | Possible rich fuel mixture, restricted air intake, or extended low-speed operation | Replace or service plug and investigate persistent fouling |
| Wet with gasoline | Possible flooding or failure to ignite fuel | Check starting procedure and ignition |
| Oily deposits | Possible oil entering the combustion chamber | Investigate if recurring |
| Worn or rounded electrodes | Normal wear or extended service | Replace plug |
| Cracked ceramic insulator | Physical damage | Replace immediately |
| Damaged sealing washer | Poor sealing condition | Replace plug |
| Severely overheated or damaged tip | Possible combustion or specification problem | Inspect engine and verify plug type |
Can You Clean and Reuse the Old Plug?
Sometimes.
If the plug is otherwise in good condition and the owner’s manual permits reuse, light deposits may be removed carefully.
However, replacement is generally preferable when:
- Electrodes are worn.
- The ceramic insulator is cracked.
- The plug is severely fouled.
- The sealing washer is damaged.
- The scheduled replacement interval has been reached.
Cleaning won’t restore worn electrode material or repair a damaged insulator.
Step 6: Choose the Correct Honda Lawn Mower Spark Plug
Choosing the correct replacement is one of the most important steps.
Honda gasoline mower engines do not all use the same spark plug.
The correct type depends on the engine, mower model, and sometimes the production version.
Honda Spark Plug Specifications
The following examples are documented in Honda manuals.
| Honda Model or Engine | Spark Plug Example | Important Note |
| HRR216 models covered by manual 00X31VL0 D030 | NGK BPR5ES | Verify the exact mower version |
| HRX217HZA covered by manual 00X31VH7 L020 | NGK BPR5ES | Follow the serial-specific manual |
| GCV160/GCV190 engine manual 00X31-Z8B-0240 | NGK BPR5ES for applications other than pressure washers | Confirm the equipment application |
| Certain older HRX217 configurations | NGK BP6ES or BPR6ES | Use the matching older mower manual |
These are examples, not a universal compatibility chart.
An older Honda mower manual may specify a different plug from a newer version.
Why Does Spark Plug Type Matter?
Spark plugs differ in several characteristics:
- Thread diameter.
- Thread reach.
- Heat range.
- Electrode design.
- Resistor configuration.
- Required electrode gap.
Installing the wrong plug can cause poor operation or engine damage.
Is NGK BPR5ES the Same as BPR6ES?
No.
Although the part numbers are similar, they represent different heat-range specifications.
The plugs should not be treated as interchangeable without an approved application reference.
Use the exact plug listed for your engine or an explicitly approved equivalent.
How to Confirm the Correct Spark Plug
Check three sources:
- Your mower’s exact model and serial number.
- The spark plug specification in its owner’s manual.
- A reliable replacement-parts listing for that engine.
The Honda HRN owner’s manual directory and the Honda HRX owner’s manual directory provide documentation for different model and serial-number ranges.
Key Takeaway: Don’t buy a spark plug based only on the words “Honda lawn mower.” Match the exact engine specification.
Step 7: Check the Honda Lawn Mower Spark Plug Gap
The spark plug gap is the distance between the center electrode and the ground electrode.
The correct gap helps the ignition system produce a reliable spark under normal engine operating conditions.
What Is the Honda Lawn Mower Spark Plug Gap?
Many Honda gasoline walk-behind mower manuals specify:
0.028–0.031 inch (0.7–0.8 mm)
For example, Honda’s HRR216 and HRX217 manuals list this range.
However, some older engine manuals use slightly different inch rounding, and other engine designs may require different specifications.
Always verify the gap in your owner’s manual.
How to Measure the Gap
Use a suitable spark plug gap gauge or feeler gauge.
Insert the gauge between the center electrode and the ground electrode.
The correct thickness should pass through with slight resistance.
What if the Gap Is Too Small?
Carefully bend the ground electrode outward using an appropriate spark plug gapping tool, if adjustment is permitted for that plug design.
Do not pry against the center electrode.
What if the Gap Is Too Large?
Carefully move the ground electrode inward, again using a suitable tool and following the plug manufacturer’s instructions.
Check the gap again.
Do New Spark Plugs Come Pre-Gapped?
Many replacement plugs are supplied with a preset gap.
However, the preset value may not match your Honda engine’s requirement.
The gap can also change if a plug is mishandled during shipping.
Inspect the plug and verify its gap before installation.
Can You Adjust Every Spark Plug?
Not all electrode designs should be adjusted in the same way.
Certain fine-wire or specialty plugs may be damaged by improper gapping.
Follow the manufacturer’s instructions for the exact plug.
Step 8: Install the New Spark Plug by Hand
After confirming the plug type and gap, begin installation.
Inspect the Threads
Check that the spark plug threads appear clean and undamaged.
Make sure the engine’s spark plug opening is free from loose dirt.
Start Threading by Hand
Place the plug into the cylinder head.
Turn it clockwise by hand.
It should begin threading smoothly.
Continue until the sealing washer reaches the cylinder-head seating surface.
Why Hand-Threading Is Important
The cylinder head has threads that can be damaged by incorrect installation.
Starting the spark plug with a ratchet can make cross-threading harder to detect.
If the plug binds or feels unusually tight during the first turns, stop.
Back it out and check alignment.
Never force the plug into the cylinder head.
Should You Add Anti-Seize Compound?
Do not automatically apply anti-seize compound or oil to the spark plug threads.
Thread lubrication changes friction and can affect the relationship between applied torque and clamping force.
Follow the Honda manual and spark plug manufacturer’s instructions.
Unless they specify otherwise, install the plug according to the stated dry-thread procedure.
Step 9: Tighten the Honda Lawn Mower Spark Plug Correctly
Once the plug is seated by hand, tighten it according to the engine’s specifications.
Correct tightening is necessary to maintain sealing and avoid cylinder-head damage.
Honda Spark Plug Torque
Several Honda mower manuals, including the HRX217HZA documentation, specify:
14 ft-lb (20 N·m)
However, this isn’t guaranteed to be the correct torque for every Honda engine.
Confirm the specification before applying it.
Tightening a New Spark Plug
For Honda manuals that specify the conventional gasket-seat method:
After the new plug’s sealing washer first seats against the cylinder head, tighten it approximately ½ additional turn.
This compresses the new sealing washer.
Use this method only where it matches the manual and plug design.
Tightening a Used Spark Plug
For the same Honda manual instructions, a previously used plug generally requires approximately ⅛–¼ additional turn after seating.
Its sealing washer has already been compressed, so it doesn’t require the same amount of tightening as a new plug.
Should You Use Torque or Angle?
Use the specified torque if you have a suitable torque wrench and the manual provides that specification.
Otherwise, follow the model-specific angle method when it is explicitly provided.
Do not apply both the full specified torque and an additional ½ turn afterward. They are alternative installation methods, not two separate steps.
What Happens if the Spark Plug Is Too Loose?
A loose plug may:
- Allow combustion gases to leak.
- Overheat.
- Cause poor engine performance.
- Damage the cylinder head.
What Happens if You Overtighten It?
Overtightening can strip threads in the cylinder head.
It can also damage the spark plug or sealing components.
Thread repair may require professional engine service.
Important: Honda warns against both undertightening and overtightening spark plugs. Stop if the plug does not seat or tighten normally.
Step 10: Reconnect the Spark Plug Cap
After tightening the new plug, reconnect the ignition cap.
How to Reattach It
Hold the rubber boot.
Align it with the exposed spark plug terminal.
Push the cap firmly onto the plug until fully seated.
Depending on the cap design, you may feel or hear it engage.
Check the Connection
The cap should remain securely attached.
Avoid leaving it partially connected.
A loose ignition connection can cause misfires or prevent the engine from starting.
Inspect the Cable
Look for:
- Cracked insulation.
- Loose connections.
- Damaged rubber.
- Burn marks.
- Unusual wear.
If the cable or boot is damaged, replacement may be necessary.
Don’t attempt to repair ignition insulation using improvised materials.
Step 11: Test the Honda Lawn Mower
Once the spark plug is installed and the cap is secure, check the mower’s operation.
Before Starting
Make sure:
- All tools are removed from the engine area.
- The spark plug cap is fully installed.
- The mower is upright and stable.
- No gasoline has spilled.
- The oil level is appropriate.
- The fuel valve is in the correct operating position.
- All guards and safety controls are properly installed.
Start the Engine Outdoors
Move the mower to a safe, well-ventilated outdoor area.
Keep people away from the cutting area.
Start the mower using its normal procedure.
Never run a gasoline engine inside a garage or other enclosed space because exhaust contains carbon monoxide.
Check Engine Operation
A properly functioning engine should start and run according to its normal operating characteristics.
Watch for:
- Difficult starting.
- Repeated misfiring.
- Unusual noises.
- Excessive vibration.
- Abnormal exhaust smoke.
- Unexpected stalling.
What if the Mower Doesn’t Start?
Turn off the engine controls before inspecting anything.
Check whether the spark plug cap is fully connected.
Verify that the replacement plug matches the specification.
If the plug is correct and properly installed, another problem may be preventing the engine from starting.
Avoid repeatedly cranking or pulling the starter without investigating the cause.
How Often Should You Change a Honda Lawn Mower Spark Plug?
Replacement intervals depend on the mower model and engine.
Many Honda residential mower manuals recommend replacing the spark plug:
Every 150 operating hours or every 2 years.
For example, Honda’s HRR216 and HRX217 manuals include that interval.
However, some other Honda mower manuals specify different intervals.
The HRC216 commercial mower manual, for example, specifies a 200-hour spark plug replacement interval.
Honda Spark Plug Maintenance Schedule
| Maintenance Situation | Recommended Action |
| Before a mowing season | Inspect if required by the maintenance schedule or if starting is difficult |
| Plug has light deposits but remains serviceable | Inspect gap and condition |
| Electrodes are worn | Replace |
| Ceramic insulator is cracked | Replace |
| Plug is severely fouled | Replace and investigate the cause |
| After 150 hours or 2 years | Replace on models specifying that interval |
| Commercial or other Honda models | Follow the individual owner’s manual |
Should You Replace the Spark Plug Every Year?
Annual replacement isn’t mandatory for every Honda mower.
If the manual specifies a longer interval and the plug is functioning properly, replacing it every year may be unnecessary.
However, seasonal inspection can help identify wear, damage, or fouling.
Does a New Spark Plug Improve Fuel Efficiency?
Replacing a worn or fouled plug may restore normal combustion and engine performance.
However, installing a new plug in an engine already operating properly doesn’t guarantee a measurable fuel-efficiency improvement.
The plug is one part of the engine’s ignition system.
Does a New Spark Plug Make Starting Easier?
It can.
A worn electrode, incorrect gap, or fouled plug may reduce ignition reliability.
Replacing the defective plug can improve starting.
However, fuel delivery, air intake, ignition components, and compression can also affect starting.
Signs Your Honda Lawn Mower Spark Plug Needs Replacing
Spark plug problems can produce several symptoms.
However, no single symptom proves that the plug is defective.
1. The Engine Is Hard to Start
A worn or fouled spark plug may struggle to ignite the fuel-air mixture.
You may need several pulls on the recoil starter.
However, stale fuel, carburetor problems, and improper starting procedures can produce similar symptoms.
2. The Engine Misfires
Intermittent ignition may cause uneven operation.
The mower may stumble or run roughly.
A spark plug with an excessive gap or damaged electrode is one possible cause.
3. The Engine Stalls
An ignition problem can cause stalling.
However, restricted fuel flow, carburetor problems, or other engine faults can also be responsible.
Don’t assume every stall requires a new plug.
4. The Mower Loses Power
Weak or inconsistent ignition may contribute to poor performance.
Check the plug along with the air filter, fuel condition, and other maintenance items.
5. The Plug Has Heavy Carbon Deposits
A black, sooty plug may indicate incomplete combustion or an overly rich mixture.
Replacing it may temporarily restore operation.
However, recurring fouling requires further investigation.
6. The Electrode Is Worn
Electrode wear can increase the gap over time.
A severely worn electrode is a clear reason to replace the plug.
7. The Insulator Is Cracked
A cracked ceramic insulator can interfere with proper ignition and electrical insulation.
Replace the plug rather than trying to repair it.
Honda HRN216, HRR216, and HRX217 Spark Plug Replacement
The basic replacement steps are similar across these Honda gasoline mower series.
However, spark plug types and maintenance schedules can vary by model and production version.
How to Change a Spark Plug on Honda HRN216
- Stop the engine and allow it to cool.
- Locate the spark plug cap on the cylinder head.
- Disconnect the cap.
- Remove dirt from the surrounding area.
- Unscrew the plug using the correct socket.
- Install the specified replacement plug.
- Check the gap according to the manual.
- Tighten the plug correctly.
- Reconnect the cap.
- Test the engine outdoors.
Consult the owner’s manual that matches the HRN216 model and serial-number range.
How to Change a Spark Plug on Honda HRR216
Many HRR216 models use an NGK BPR5ES spark plug.
Honda’s HRR216PKA manual specifies:
- Spark plug: NGK BPR5ES.
- Gap: 0.028–0.031 inch (0.7–0.8 mm).
- Spark plug wrench: 13/16 inch (21 mm).
- Torque: 14 ft-lb (20 N·m).
- Replacement: Every 150 hours or 2 years.
These are documented specifications for that manual, not a guarantee for every HRR216 version.
Follow the same removal and installation procedure described earlier.
How to Change a Spark Plug on Honda HRX217
Honda HRX217 models have been produced in multiple configurations.
Some manuals specify NGK BPR5ES.
Certain older manuals identify NGK BP6ES or BPR6ES as acceptable plugs.
For example, the Honda HRX217HZA owner’s manual linked earlier specifies BPR5ES and a gap of 0.028–0.031 inch.
The steps include:
- Allow the engine to cool.
- Disconnect the spark plug cap.
- Clean around the plug.
- Remove the old plug.
- Check the replacement gap.
- Install it by hand.
- Tighten it to the manual’s specification.
- Reconnect the cap.
What About Honda GCV160 and GCV190 Engines?
Honda GCV160 and GCV190 engines have been used in various types of outdoor power equipment.
The Honda GCV160/GCV190 engine owner’s manual specifies NGK BPR5ES for applications other than pressure washers and NGK BPR6ES for pressure washer applications.
That manual lists a gap of approximately 0.028–0.030 inch (0.70–0.80 mm).
Check the mower manufacturer’s instructions as well as the Honda engine manual.
Key Takeaway: The engine model and the specific manual are more reliable than choosing a spark plug based only on the mower series name.
What to Do if Your Honda Lawn Mower Won’t Start After Changing the Spark Plug
If the mower won’t start after replacement, begin with simple checks.
Check the Spark Plug Cap
Make sure the rubber cap is fully attached to the plug terminal.
An incomplete connection may prevent proper ignition.
Confirm the Replacement Plug
Verify the part number against the exact engine specification.
Don’t assume that visually similar plugs are equivalent.
Check the Electrode Gap
An incorrect gap may affect ignition reliability.
Measure it using a suitable gauge.
Check the Installation
Confirm that the spark plug was threaded correctly and tightened according to the manual.
Do not keep tightening it in an attempt to solve a starting problem.
Check the Fuel
Old or contaminated gasoline is a common cause of difficult starting.
Verify that the fuel supply and any fuel shutoff valve are in the proper operating condition.
Inspect the Air Filter
A badly restricted air filter can affect engine performance.
Inspect and service it according to the mower’s maintenance schedule.
Consider Carburetor Problems
A mower that has been stored with old fuel may have clogged carburetor passages.
A new spark plug won’t correct restricted fuel flow.
Check Other Ignition Components
The ignition coil, spark plug lead, engine stop circuit, and other components may be involved.
If basic checks don’t identify the problem, professional diagnosis is appropriate.
Avoid Unsafe Spark Testing
Don’t hold a disconnected plug or bare ignition wire by hand while pulling the starter.
Ignition systems can generate high voltage.
Testing around gasoline vapors can also create a fire hazard.
Use an approved diagnostic method or have the mower inspected by a qualified technician.
Can You Clean a Honda Lawn Mower Spark Plug Instead of Replacing It?
Sometimes, but cleaning is not always worthwhile.
If the plug has only light deposits and remains within its service interval, inspection and cleaning may be permitted by the engine manual.
However, Honda recommends replacing plugs that show damaged insulation, worn electrodes, or unsuitable sealing-washer conditions.
When Cleaning May Be Appropriate
Cleaning may be reasonable if:
- The electrodes are not significantly worn.
- The ceramic insulation is intact.
- The plug isn’t badly fouled.
- The sealing washer remains serviceable.
- The owner’s manual allows continued use.
When Replacement Is Better
Replace the plug if it is:
- Cracked.
- Chipped.
- Severely worn.
- Heavily fouled.
- Incorrect for the engine.
- Beyond its scheduled replacement interval.
Will Cleaning Fix a Fouling Problem Permanently?
Not necessarily.
If the plug repeatedly becomes oily or carbon-coated, the engine may have an underlying problem.
Cleaning the plug won’t correct improper fuel mixture, oil entry into the cylinder, or other engine faults.
How Much Does It Cost to Change a Honda Lawn Mower Spark Plug?
Spark plug replacement is generally a relatively inexpensive maintenance job when performed at home.
The total cost depends on whether you already own the necessary tools.
DIY Replacement Costs
Possible expenses include:
- Correct replacement spark plug.
- Spark plug socket.
- Gap gauge.
- Torque wrench, if needed.
If you already have the tools, the replacement plug may be the only material expense.
Professional Replacement
A small-engine repair shop may charge for labor in addition to the spark plug.
The final cost depends on local labor rates and whether other maintenance or diagnostics are required.
Is Professional Service Necessary?
Not always.
A mechanically confident owner can generally replace a spark plug by following the correct manual.
However, professional help is recommended when:
- The plug is seized.
- The cylinder-head threads appear damaged.
- The replacement will not thread smoothly.
- The engine has persistent ignition problems.
- Fuel or oil leaks are present.
- The mower still will not run after basic checks.
Common Mistakes When Changing a Honda Lawn Mower Spark Plug
Using the Wrong Spark Plug
Different Honda mower engines can require different plugs.
Always confirm the specification.
Removing the Plug While the Engine Is Hot
The cylinder head and muffler can cause burns.
Allow the engine to cool.
Forgetting to Disconnect the Spark Plug Cap
Disconnect the cap before beginning maintenance.
This is an important precaution against accidental starting.
Pulling the Ignition Wire Instead of the Cap
Pulling the wire can damage its internal connections.
Grip the rubber boot.
Letting Dirt Fall Into the Engine
Clean around the plug before removing it.
Protect the opening from debris.
Forgetting to Check the Gap
A new plug may not have the exact gap required by your engine.
Verify it before installation.
Starting the Plug With a Ratchet
Beginning installation with a wrench can hide cross-threading.
Start the plug by hand.
Overtightening the Spark Plug
Excessive torque can damage cylinder-head threads.
Follow the correct torque or tightening-angle method.
Applying Anti-Seize Without Checking Instructions
Thread lubricants affect tightening friction.
Do not add them automatically.
Failing to Reconnect the Cap
A loose or disconnected ignition cap can prevent the mower from starting.
Make sure it is securely seated.
Assuming Every Starting Problem Is a Spark Plug Problem
Fuel, air intake, ignition, and engine condition can all affect starting.
A new plug won’t fix every fault.
Using an Unverified Generic Specification
The correct plug type, gap, and torque can differ between engines.
Use documentation matching the exact mower or engine.
How to Maintain a Honda Lawn Mower Spark Plug
Proper maintenance can help prevent avoidable starting problems.
Follow the Maintenance Schedule
Replace the plug at the interval specified in your mower manual.
Don’t assume every Honda engine has the same schedule.
Keep the Engine Clean
Remove excessive grass clippings and debris from the engine’s cooling areas.
Avoid forcing water into the spark plug area or electrical components.
Use Fresh, Appropriate Fuel
Old or contaminated fuel can contribute to starting and running problems.
Follow Honda’s fuel recommendations and storage procedures.
Maintain the Air Filter
A dirty air filter may contribute to an excessively rich fuel mixture.
Inspect and service the air filter according to the owner’s manual.
Avoid Improper Spark Plug Installation
Correct threading, gap, and tightening are important for reliable service.
Never force a replacement plug into the cylinder head.
Inspect When Problems Appear
If the mower begins misfiring or becomes difficult to start, inspect the plug as part of a broader diagnostic process.
Don’t repeatedly replace spark plugs without investigating recurring fouling.
Conclusion
Learning how to change spark plug on Honda lawn mower models is a useful maintenance skill that can help keep a gasoline-powered mower starting and running reliably.
The process involves stopping and cooling the engine, disconnecting the spark plug cap, removing the old plug, checking the replacement’s type and gap, and installing it carefully.
Many Honda walk-behind mower manuals specify a spark plug gap of approximately 0.028–0.031 inch (0.7–0.8 mm). Several also specify a tightening torque of 14 ft-lb (20 N·m). However, these values must be verified against the exact mower or engine manual.
I recommend using the correct spark plug, cleaning the area before removal, starting the replacement by hand, and avoiding excessive tightening.
If the mower continues to start poorly after replacement, inspect the fuel system, air filter, and other ignition components rather than assuming the new plug is defective.
With proper installation and routine maintenance, a correctly specified spark plug can support dependable ignition throughout the mowing season.
FAQs About How to Change Spark Plug on Honda Lawn Mower
How Do You Change a Spark Plug on a Honda Lawn Mower?
Turn off the engine, allow it to cool, and disconnect the spark plug cap.
Clean the area, remove the old plug with the correct socket, and inspect the replacement plug’s type and gap.
Thread the new plug by hand, tighten it according to the manual, reconnect the cap, and test the mower outdoors.
What Size Spark Plug Socket Does a Honda Lawn Mower Use?
Many Honda gasoline walk-behind mowers use a 13/16-inch (21 mm) spark plug wrench.
However, the correct socket depends on the engine and spark plug.
Confirm the required size before removing the plug.
What Spark Plug Does a Honda Lawn Mower Take?
Many Honda mower engines use NGK BPR5ES.
However, certain older models or other Honda engine applications specify different plugs, including BP6ES or BPR6ES.
Check the exact mower or engine manual before purchasing a replacement.
What Is the Spark Plug Gap on a Honda Lawn Mower?
Many Honda walk-behind mower manuals specify 0.028–0.031 inch (0.7–0.8 mm).
However, some manuals give slightly different ranges.
Always use the specification for your particular engine.
How Tight Should a Honda Lawn Mower Spark Plug Be?
Several Honda mower manuals specify 14 ft-lb (20 N·m).
Some also provide tightening-angle instructions of approximately ½ turn after seating for a new plug or ⅛–¼ turn for a reused plug.
Use the method specified for your engine rather than applying both.
How Often Should You Replace a Honda Lawn Mower Spark Plug?
Many Honda residential mower manuals recommend replacement every 150 operating hours or 2 years.
Other Honda engines may have different intervals.
Inspect the plug and follow the maintenance schedule for your mower.
Can You Change a Honda Lawn Mower Spark Plug Yourself?
Yes.
For many Honda gasoline walk-behind mowers, spark plug replacement is a straightforward maintenance task.
You need the correct plug, a suitable socket, and a gap gauge.
Follow the model-specific instructions and safety precautions.
Do You Need to Remove the Engine Cover to Change the Spark Plug?
Usually not.
Many Honda walk-behind mower spark plugs are accessible without removing major engine covers.
However, access varies by model.
Check the owner’s manual rather than removing components unnecessarily.
Do New Honda Lawn Mower Spark Plugs Need Gapping?
Check the gap even when the replacement plug is described as pre-gapped.
The preset gap may not match the engine specification.
Use a suitable gauge and follow the plug manufacturer’s adjustment instructions.
What Happens if the Honda Lawn Mower Spark Plug Gap Is Wrong?
An incorrect gap can affect ignition performance.
Possible symptoms include difficult starting, misfiring, or uneven running.
Measure and adjust the gap according to the engine’s specification.
Can a Bad Spark Plug Stop a Honda Lawn Mower From Starting?
Yes.
A damaged, severely fouled, or incorrectly gapped spark plug can prevent reliable ignition.
However, old gasoline, fuel-system problems, a faulty ignition component, or other mechanical issues can also cause starting failure.
Why Won’t My Honda Lawn Mower Start After Replacing the Spark Plug?
Possible causes include an improperly connected spark plug cap, an incorrect replacement plug, an unsuitable electrode gap, or an unrelated engine problem.
Check the installation first.
If the mower still won’t start, investigate fuel and ignition conditions.
Can I Reuse an Old Honda Lawn Mower Spark Plug?
Sometimes.
A plug in good condition may be serviceable if it remains within the maintenance interval and the manual permits reuse.
Replace it if the electrodes are worn, the insulation is cracked, or it is badly fouled.
Is NGK BPR5ES the Same as BPR6ES?
No.
They are different heat-range specifications.
Use the plug required for your exact Honda engine.
Don’t substitute one for the other unless an approved parts reference specifically permits it.
Can I Change the Spark Plug Without a Torque Wrench?
Some Honda manuals provide a tightening-angle method for gasket-style spark plugs.
For example, certain manuals specify approximately ½ turn after seating for a new plug.
However, that method is model-specific.
Follow your manual, and use a torque wrench when the correct specification is available.
Does Replacing the Spark Plug Make a Honda Lawn Mower Run Better?
It can when the old plug is worn, fouled, damaged, or incorrectly gapped.
Replacing a defective plug may restore normal ignition and starting performance.
However, replacing a properly functioning plug does not guarantee increased power or fuel efficiency.