How to Maintain a Honda Battery Lawn Mower
A Honda battery lawn mower needs a clean deck, a sharp blade, a healthy battery, and a dry storage spot. Check the mower before each use, clean it after mowing, and follow a regular charging and blade-care routine to keep cutting power steady.
Have you noticed shorter run time, ragged grass tips, or a mower that sounds strained in thick turf? Are you trying to avoid damaging the battery while still getting a clean cut without hauling the mower to a repair shop?
I once rushed through cleanup after mowing damp grass and left clippings packed around the deck and discharge opening. The next cut felt sluggish, and scraping out the wet mat took much longer than a proper five-minute cleanup would have taken. That mistake is common, not dumb.
I wrote this guide for homeowners who want a practical Honda battery mower maintenance routine without a pile of jargon. The goal is to show you what to check, what to clean, how to charge the battery, and when a repair needs professional help.
If you get the routine right, you’ll gain longer battery life, better airflow, straighter cuts, and fewer surprise shutdowns. Skip the basics, and grass buildup, a dull blade, or poor storage can turn an easy Saturday chore into a noisy, frustrating slog.
This article takes about 11 minutes to read, and it’ll help you:
- Build a quick pre-mow and post-mow inspection routine.
- Charge and store the battery without abusing it.
- Clean the deck, battery compartment, wheels, and controls safely.
- Spot blade, motor, battery, and charger problems early.
- Decide when a Honda battery mower needs service instead of another home fix.
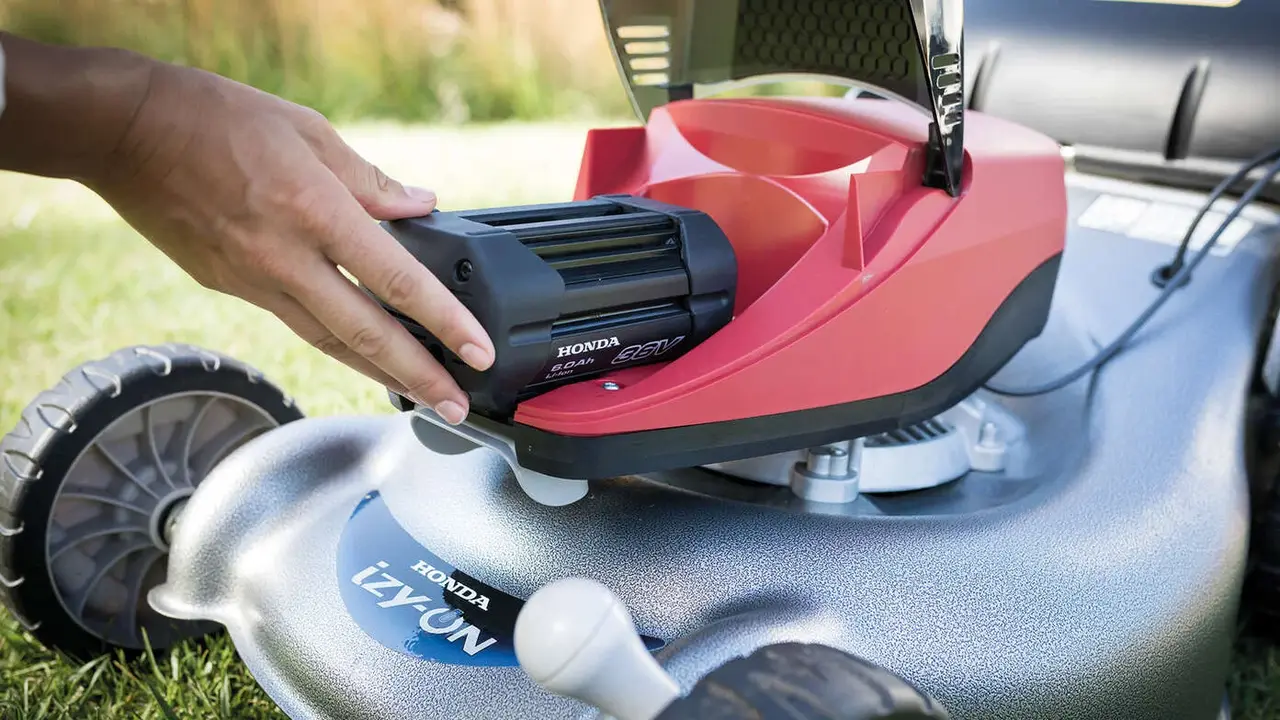
How to Maintain A Honda Battery Lawn Mower
To maintain a Honda battery lawn mower, inspect the machine before mowing, remove grass after every use, charge the battery according to its label, sharpen the blade regularly, and store the mower clean and dry.
A battery mower doesn’t have an engine oil system, spark plug, fuel filter, or carburetor, so the routine is different from gas equipment. The moving parts still need attention, and the electrical parts need more care around water, heat, impact, and poor storage.
Use this simple order:
- Inspect the mower before each cut. Check the blade area, wheels, handle, grass bag, discharge chute, battery cover, and safety controls.
- Remove the battery before cleaning or handling the blade. Keep the mower switched off, disconnect the battery, and wait until every moving part stops.
- Mow with a sharp, balanced blade. A dull blade tears grass and makes the motor work harder.
- Brush away loose clippings after mowing. Let damp buildup dry only if removing it right away would require touching an unsafe area.
- Charge the battery in a cool, dry place. Use the charger meant for that battery system, not a random substitute.
- Store the mower upright or in its normal parked position. Keep the battery separate if the owner’s manual calls for battery removal.
A short routine beats a heroic repair session. Five minutes after mowing can prevent blocked airflow, rusty fasteners, wheel drag, and a battery compartment full of damp clippings.
| Maintenance task | How often | What you’re checking | Why it matters |
|---|---|---|---|
| Pre-mow inspection | Every use | Blade, controls, wheels, cover, chute | Catches loose or unsafe parts |
| Brush off clippings | Every use | Deck, wheels, bag, discharge area | Reduces buildup and airflow problems |
| Battery and charger check | Every use | Cracks, heat damage, dirt, moisture | Protects electrical parts |
| Blade inspection | Every 10 to 20 mowing hours | Sharpness, bends, chips, balance | Keeps the cut clean and motor load lower |
| Deck cleaning | Every few uses | Packed grass under the deck | Prevents drag and blocked discharge |
| Wheel and handle check | Monthly during use | Loose hardware, drag, cracks | Keeps handling steady |
| Deep seasonal check | Before storage and before spring use | Battery condition, fasteners, corrosion | Reduces first-use trouble |
The exact service schedule depends on your model, mowing frequency, grass type, and storage conditions. A small yard with dry grass may need less cleanup than a large lawn with wet, dense growth, but the safety checks still belong before every use.
Battery Charging, Storage, and Electrical Care
The battery should be charged with the correct Honda charger in a dry, ventilated area, then stored away from heat, freezing moisture, and physical damage.
Start with the battery label and the owner’s manual because Honda battery mower systems can use different battery types, chargers, and operating instructions. The battery model matters more than the mower’s paint color or the shape of the plug.
A safe charging routine looks like this:
- Turn the mower off and remove the battery if the design allows it.
- Inspect the battery casing, terminals, charger, and cord.
- Wipe away dry dust with a clean, dry cloth.
- Place the battery and charger on a hard, dry surface with open air around them.
- Connect the approved charger and watch for unusual heat, smell, smoke, swelling, or error lights.
- Stop charging if the battery or charger behaves strangely.
- Let the battery cool after mowing before charging if the manual calls for a cooling period.
- Unplug the charger when the charging cycle finishes if the instructions require it.
A warm battery after use isn’t automatically a problem, but excessive heat deserves attention. A battery that is too hot to comfortably handle, swollen, cracked, leaking, or giving off a sharp chemical odor should not go back into the mower or charger.
If you need the correct charging sequence for a particular pack, this Honda battery charging guide covers battery identification before the charger gets connected. That step matters because a charger designed for one battery family may be unsafe for another.
How storage affects battery life
Battery storage is a major part of mower maintenance, not an afterthought. A damp shed, hot attic, or unheated area with repeated freezing and thawing can be rough on batteries, chargers, and plastic housings.
Before storing the battery:
- Clean the outside with a dry or barely damp cloth, never by soaking it.
- Keep terminals free from grass, dirt, and metal objects.
- Avoid leaving the battery loose in a toolbox with wrenches or screws.
- Store the pack in the temperature range listed by the manual.
- Check the charge level recommended for seasonal storage.
- Keep the battery away from direct sun, heaters, and open flames.
Don’t wrap a warm battery in a blanket or place it in a sealed plastic tub right after use. Trapped heat and moisture can make a small storage problem worse.
Important Tip: Mark the battery, charger, and mower model on a small piece of tape inside the storage cabinet. That tiny note saves guesswork when several cordless tools share the same shelf.
I once stored a battery in a crowded workshop corner where a metal tool could press against the terminals. Nothing dramatic happened, but the arrangement was asking for trouble, so I moved the pack into a clean plastic tray with no loose metal nearby. A simple storage change often gives you more protection than an expensive accessory.
Charging problems that need attention
The charger light pattern belongs to your exact mower and battery system, so don’t guess from a different model. A battery that refuses to charge may have a dirty contact, a damaged charger, a temperature lockout, a worn battery, or an electrical fault.
Stop using the battery or charger if you notice:
- A cracked housing or damaged insulation.
- Swelling, leaking, smoke, or a chemical smell.
- Repeated overheating during normal charging.
- Burn marks around the contacts.
- A cord that becomes hot, frayed, or loose.
- Error lights that remain after the battery cools and the contacts are clean.
Never pry open a sealed battery pack. Battery cells can hold a dangerous amount of energy, and an internal fault needs trained service rather than a kitchen-table repair.
Cleaning the Deck, Battery Compartment, and Controls
Clean a Honda battery mower with the battery removed, the mower powered off, and moisture kept away from the motor housing, battery contacts, charger, and control switches.
Grass clippings hold water, plant sap, and soil against metal and plastic. That sticky layer can block discharge, increase drag, hide loose hardware, and create corrosion around fasteners.
Follow this cleaning process:
- Park on a firm, level surface.
- Switch off the mower and remove the battery.
- Disconnect the grass bag and empty it.
- Wait for the blade to stop completely.
- Wear work gloves before handling areas near the blade.
- Brush loose clippings from the deck, wheels, chute, and bag frame.
- Use a plastic scraper for packed grass, keeping hands away from the blade edge.
- Wipe the housing and controls with a damp cloth, not a hose.
- Dry the mower before reinstalling the battery.
- Check that the battery compartment and terminals are clean and dry.
The underside of the deck often needs the most attention, but it also carries the most risk. Don’t reach under the mower while the battery is installed, even if the control handle isn’t engaged.
If you want a cleaning sequence focused on the deck and battery area, this Honda battery mower cleaning guide explains where clippings collect and how to keep water away from electrical parts. The same approach works well for routine cleanup after a damp morning cut.
Why hosing the mower is a bad shortcut
A hose may push grass off quickly, but water can reach switches, wiring, bearings, battery contacts, and motor openings. A mower can appear dry on the outside while moisture remains trapped inside a housing.
A brush, plastic scraper, shop towel, and small soft brush usually do the job with less risk. If the deck is badly packed, remove the grass in layers rather than forcing a screwdriver into a tight space.
Pro Tip: Clean the discharge chute before the clippings turn into a hard, green brick. Fresh grass lifts away much easier than dried material that has baked in the sun.
Blade care and cutting performance
The blade is the part that directly shapes the cut, and its condition affects battery demand. A sharp blade slices grass; a dull or bent blade batters it and can make the mower sound strained.
Remove the battery before inspecting the blade. Wear gloves, avoid touching the cutting edge, and follow the mower manual for blade removal, bolt direction, tightening method, and any required holding tool.
Look for:
- A rounded cutting edge.
- Nicks from stones or hidden metal.
- A bend near the center or tip.
- Cracks, deep rust pits, or missing material.
- Heavy grass or dirt stuck to one side.
- Vibration that wasn’t present before.
A small nick may be repairable by a qualified mower service shop, but a cracked, badly bent, or heavily worn blade deserves replacement. I’d rather replace a questionable blade than gamble on a fast-spinning piece of steel under the deck.
A blade can be sharp and still be wrong if it’s out of balance. Vibration shakes the mower, stresses fasteners, makes the handle unpleasant to hold, and can point to a larger problem.
Wheels, handle, bag, and controls
Clean each wheel and check that it rolls without grinding or wobbling. Grass packed around an axle can make one wheel drag, which forces you to push harder and may make the mower pull to one side.
Check the handle for cracks and loose joints, then test the safety control according to the manual before mowing. A handle that folds unexpectedly or a control that doesn’t stop the blade as designed needs service before the next cut.
The grass bag also affects airflow. A clogged bag may look empty while its fabric pores are sealed with fine dust, so brush or wash it only in the way the manual allows and let it dry fully before use.
Mowing Habits That Reduce Wear
Good mowing technique lowers motor load, protects the blade, and gives the battery a more predictable run time.
Cutting grass too tall in one pass is hard on any mower. If the lawn has grown several inches beyond its normal height, raise the deck and remove less grass, then make another pass later if needed.
Use these habits:
- Mow when grass is dry enough to avoid clumping.
- Walk at a steady pace instead of pushing hard into thick growth.
- Slow down near heavy grass, but don’t force the mower through a stalled blade.
- Keep the blade height suited to the grass and season.
- Remove sticks, wire, stones, and toys before mowing.
- Overlap passes slightly so strips of tall grass don’t remain.
- Stop if the mower vibrates, smells hot, or makes a new grinding sound.
What happens if the mower suddenly loses power in tall grass? Stop, release the control, remove the battery, and clear the deck only after the blade has stopped and the electrical connection is removed. Repeated overloads can point to wet grass, a dull blade, blocked airflow, or a mechanical problem.
Deck height and grass stress
A very low deck setting can scalp uneven ground and increase the amount of grass entering the deck at once. A higher setting usually reduces load and leaves more leaf surface for the grass to recover, though the correct height depends on your grass type and yard conditions.
Avoid cutting more than the mower can handle in one pass. A steady hum is normal; repeated surging, abrupt slowdowns, or shutdowns mean the mower is being pushed too hard or needs inspection.
Pro Tip: Make the first pass around the lawn’s edge at a moderate height, then adjust your pace based on the sound and discharge. The mower should move through the grass instead of chewing through a clogged tunnel.
Routine Service Schedule and Common Fixes
A simple schedule keeps small mower problems from turning into battery, blade, or motor trouble.
Use the chart as a starting point, then give priority to the owner’s manual for your exact Honda model.
| Mower symptom | Likely cause | First safe check | Next move |
|---|---|---|---|
| Short run time | Dense grass, dull blade, cold battery, aging pack | Inspect blade and mowing conditions | Charge correctly and request battery service if the issue continues |
| Ragged grass tips | Dull or damaged blade | Inspect the cutting edge | Sharpen or replace the blade |
| Heavy vibration | Unbalanced, bent, or damaged blade | Remove battery and inspect blade | Stop mowing and service the blade |
| Weak discharge | Wet grass, packed deck, full bag | Clean deck and bag | Mow when grass is drier and reduce cutting height changes |
| Wheel drag | Grass around axle or damaged wheel | Roll each wheel by hand with battery removed | Clean, tighten, or replace the affected part |
| Charger won’t start | Wrong connection, dirty contacts, heat lockout, fault | Check label, contacts, and temperature | Stop if damage or overheating appears |
| Mower shuts off in thick grass | Overload, blockage, blade issue | Remove battery before clearing | Clean, inspect blade, and reduce mowing load |
The table gives you a starting point, not permission to ignore repeated faults. A mower that keeps shutting down on ordinary grass may need electrical testing, motor service, or a battery capacity check.
For a broader service plan that compares gas and battery tasks, this Honda mower maintenance schedule helps place battery checks, blade work, and seasonal storage into one routine. The battery version skips oil and fuel work, but it still needs regular inspection and cleaning.
Model differences worth knowing
Honda battery mowers can differ in deck design, drive system, controls, battery location, and discharge setup. A self-propelled model may need extra attention around drive wheels, cables, switches, and transmission controls compared with a push mower.
Model reviews can help you sort out those differences before you buy parts or change your routine. A Honda HRN-BV review focuses on that model’s features and limits, while a Honda HRX-BE review is useful if you’re comparing a different battery mower design.
Don’t assume a blade, battery, charger, or bag fits just because the brand name matches. Match the part number and model information printed on the mower or battery, then check the manual before ordering.
When to Repair, Replace, or Call A Professional
Home maintenance is suitable for cleaning, inspection, basic blade care, and simple storage tasks, but electrical faults and damaged battery packs need trained service.
Stop using the mower and arrange service when you find:
- A battery that is swollen, cracked, leaking, smoking, or unusually hot.
- A charger with damaged wiring, burn marks, or repeated fault codes.
- A motor housing that rattles, grinds, or smells burned.
- A blade shaft that wobbles after blade replacement.
- Persistent vibration after the blade is clean and correctly installed.
- Safety controls that fail to stop the blade.
- Melted plastic, exposed wiring, or water inside an electrical housing.
Don’t test a suspected electrical fault by repeatedly reconnecting the battery. That can turn a small contact problem into a much more expensive failure.
A repair shop can check battery condition, charger output, motor operation, wiring, switch function, blade balance, and drive components with the right equipment. I’d call for help sooner rather than later if the mower has electrical damage, because guessing around high-energy battery systems is a poor trade for saving one service visit.
Key Takeaways:
- Remove the battery before cleaning, clearing clippings, or handling the blade.
- Keep the deck, chute, wheels, bag, and battery compartment dry and free of buildup.
- Charge with the approved charger in a cool, dry, open area.
- Replace or service damaged blades, batteries, chargers, and safety controls.
- Use the owner’s manual for model-specific battery, blade, and storage instructions.
FAQs About How to Maintain A Honda Battery Lawn Mower
How often should I clean a Honda battery lawn mower?
Clean a Honda battery lawn mower after every use by brushing away loose grass from the deck, wheels, chute, and bag. Give the underside a deeper cleaning every few mowing sessions or whenever clippings pack together. Remove the battery first, keep water away from electrical parts, and let the mower dry before storage.
Can I wash a Honda battery lawn mower with a hose?
No, a hose can push water into the motor housing, control switches, wiring, battery contacts, and bearings. A dry brush, plastic scraper, and damp cloth are safer choices for most Honda battery mowers. If the mower gets wet, remove the battery and let every exposed area dry before reconnecting power.
How often should I sharpen the blade?
Sharpen the blade when the grass tips look torn, the mower struggles in normal conditions, or the cutting edge feels rounded during a careful inspection. Many homeowners check the blade every 10 to 20 mowing hours, but rocky soil and hidden debris can shorten that interval. Replace blades with cracks, severe bends, or deep damage.
Should I leave the battery in the mower?
The battery can stay in the mower only when the owner’s manual permits it and the mower is stored in a dry, protected place. Removing the battery is often safer for long storage because it protects the pack from moisture, accidental activation, and temperature swings. Never store a loose battery beside metal tools.
Why does my Honda battery mower keep stopping?
A Honda battery mower may stop because the blade is blocked, grass is too wet or tall, airflow is restricted, the battery is too hot, or the battery has a fault. Turn the mower off, remove the battery, and inspect the deck and blade. Repeated shutdowns on normal grass need professional diagnosis.
Can I use any charger with the mower battery?
No, use the charger approved for the exact Honda battery system and model. Chargers can differ in voltage, charging controls, connector design, and battery chemistry. A charger that fits physically may still be unsafe, so match the part information and follow the mower manual rather than relying on appearance.
A Simple Maintenance Routine You Can Stick With
Honda battery mower care doesn’t need to become a weekend project. A pre-mow inspection, careful post-mow cleanup, correct charging, and seasonal blade check cover most of the work that keeps the mower pleasant to use.
My practical choice is to keep a brush, plastic scraper, gloves, and dry cloth beside the mower, not buried in a toolbox. That makes the right habit easy when you’re tired and the grass clippings are still fresh.
Start with the next mowing session: remove debris from the lawn, inspect the battery and blade, clean the deck afterward, and charge the battery in a dry place. Do that consistently, and you’ll protect the mower’s cutting quality, battery system, and your own peace of mind.