How to Maintain Honda Lawn Mower: A Complete Maintenance Guide
To maintain a Honda lawn mower, check the engine oil, air filter, cutting blades, fuel, and safety controls before mowing, then clean the deck and grass bag afterward. Gas-powered models also need scheduled oil changes, spark-plug inspections, fuel-system care, and proper preparation for seasonal storage. A sharp, balanced blade and a clean air filter help the mower cut evenly without unnecessary engine strain.
Maintenance intervals depend on the specific model. For example, many Honda HRN216 gas mowers require their first oil change after five operating hours or one month, followed by changes every 50 hours or six months. Some other Honda models use different schedules, and battery-powered mowers don’t need engine oil, gasoline, or spark plugs.
Always stop the mower, allow it to cool, and disable accidental starting before touching the cutting deck or service parts. Follow the owner’s manual for tipping direction, oil capacity, replacement components, and blade-bolt tightening specifications.
In this guide, I explain how to maintain Honda lawn mower engines, filters, blades, wheels, cables, and fuel systems step by step. You’ll also learn when to perform each task, how to store the mower, which jobs need professional service, and how maintenance differs for battery models.
How to Maintain Honda Lawn Mower: 10 Essential Steps
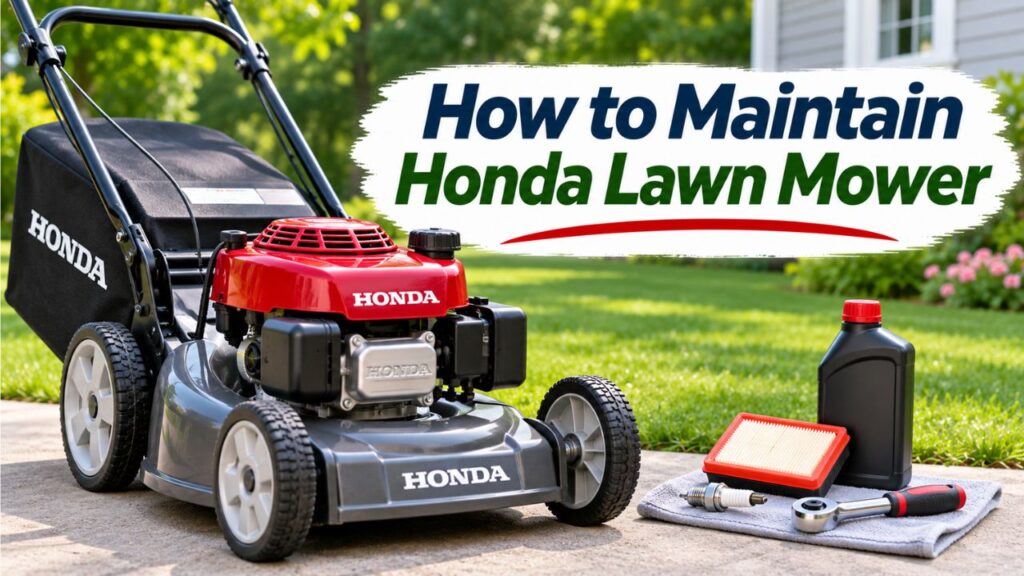
Regular maintenance involves inspecting the mower, replacing worn components, keeping the engine properly lubricated, and preventing dirt from accumulating around important parts.
These ten tasks cover the main maintenance requirements for many Honda gasoline-powered walk-behind lawn mowers.
| Maintenance Task | General Recommendation |
| Check engine oil | Before each use |
| Inspect air filter | Before each use |
| Inspect blades | Before each use |
| Clean mower deck | After mowing as needed |
| Change engine oil | According to model schedule; often every 50 hours or 6 months |
| Service air filter | According to schedule; more frequently in dust |
| Inspect spark plug | Commonly every 100 hours or annually on HRN216 models |
| Inspect wheels and drive controls | Regularly and whenever performance changes |
| Check grass bag and safety controls | Before each use |
| Prepare fuel system for storage | Before extended inactivity |
These are general maintenance guidelines, not a universal Honda service schedule.
The exact intervals vary among HRN, HRR, HRX, HRC, HRS, and other Honda-powered mower models.
Honda’s official lawn mower maintenance and support page provides model-specific resources and access to owner’s manuals.
Before Starting Any Maintenance
Follow these safety precautions:
- Move the mower to a stable, well-ventilated work area.
- Turn off the engine and wait until all moving parts stop.
- Allow the engine, muffler, and other hot components to cool.
- Disconnect the spark plug cap on a gasoline mower to prevent accidental starting.
- Turn the fuel valve OFF if the mower has one.
- Wear sturdy gloves when working near the cutting blades.
- Use the correct tools and follow model-specific instructions.
For a battery-powered Honda mower, remove the battery or otherwise disable the electrical power source as directed in its manual.
Never reach beneath a mower while its engine or motor can start.
If you need to tip a gasoline mower, follow the owner’s manual for the correct direction. Honda commonly specifies keeping the carburetor and air-filter side upward.
Key Takeaway: Safe maintenance begins with stopping the machine, disabling accidental starting, and checking the instructions for the exact mower model.
Step 1: Check the Engine Oil Before Every Use
Engine oil lubricates the internal moving parts of a gasoline-powered Honda lawn mower.
Running an engine with insufficient oil can cause premature wear, overheating, and serious damage.
Checking the oil takes only a short time.
How to Check Honda Lawn Mower Oil
- Park the mower on a firm, level surface.
- Stop the engine and allow the oil to settle.
- Locate the oil filler cap and dipstick.
- Remove the dipstick and wipe it clean.
- Reinsert it according to your model’s instructions.
- Remove it and read the oil level.
- Add the specified oil if the level is low.
- Recheck the level and secure the cap.
On many Honda mower engines, the dipstick is inserted without screwing it into the filler neck when measuring oil.
However, you should confirm the correct checking procedure in your owner’s manual.
How Much Oil Should a Honda Lawn Mower Have?
The required quantity depends on the engine.
For example, Honda lists approximately 0.42 U.S. quart (0.41 liter) as the oil capacity for its GCV170 engine.
Other Honda engines may have different capacities.
Do not assume every Honda mower uses the same amount.
The correct method is to follow the model-specific capacity and confirm the level using the dipstick.
Signs of Low Engine Oil
Potential warning signs include:
- An oil level below the recommended mark
- Unusual engine noise
- Excessive heat
- Oil leakage
- Engine operation that suddenly becomes abnormal
However, some engines may experience oil-related damage without obvious early symptoms.
Regular inspection is more reliable than waiting for a warning sign.
Key Takeaway: Checking the oil before mowing helps prevent avoidable engine damage. Use the specified oil and do not overfill.
Step 2: Change the Engine Oil at the Correct Interval
Oil changes are among the most important maintenance tasks for gasoline Honda lawn mowers.
Over time, engine oil can accumulate contaminants and lose some of its desirable properties.
How Often Should You Change Honda Lawn Mower Oil?
For many HRN216 models, Honda specifies:
- First oil change: After 5 operating hours or the first month
- Subsequent changes: Every 50 operating hours or 6 months
- Heavy load or high temperatures: More frequent changes, sometimes every 25 operating hours
Use whichever time or hour limit occurs first, according to the applicable manual.
These intervals are model-specific. Some Honda engines and mowers use different schedules.
What Oil Does a Honda Lawn Mower Take?
SAE 10W-30 four-stroke engine oil is commonly recommended for many Honda gasoline mower engines across a broad temperature range.
Honda typically specifies an appropriate API service classification, such as SJ or later, depending on the engine manual.
Other viscosity grades may be appropriate in certain climates.
Honda’s engine support and owner’s manual resources provide the information needed to confirm the correct oil.
Use four-stroke engine oil that meets your engine’s specifications.
Do not substitute ordinary two-stroke oil.
How to Change Honda Lawn Mower Oil
- Review the oil-change instructions for your exact model.
- Run the mower outdoors briefly if instructed so the oil becomes warm and drains more easily.
- Stop the engine and let hot components cool enough to work safely.
- Turn the fuel valve OFF if equipped.
- Disconnect the spark plug cap.
- Clean the area around the oil filler.
- Position a suitable oil collection container.
- Drain the old oil using the method specified in the manual.
- Return the mower to its normal operating position.
- Add the recommended fresh oil gradually.
- Check the dipstick and adjust to the specified level.
- Secure the oil filler cap and inspect for leaks.
Some Honda mowers drain oil through the filler neck when tipped in the correct direction.
Other equipment may use a different procedure.
A suitable oil extractor may also be useful when compatible with the engine and approved by the manufacturer’s instructions.
What Should You Do With Used Engine Oil?
Collect the used oil in a suitable, sealed container.
Take it to an authorized oil recycling or collection facility.
Never pour used oil onto the ground, into a drain, or into household trash.
Can You Overfill a Honda Lawn Mower With Oil?
Yes.
Excess oil can cause operating problems and may enter the air-cleaner housing on some engines.
Follow the specified capacity and dipstick reading.
Key Takeaway: On many HRN216 mowers, change oil after the first five hours and then every 50 hours or six months. Always verify the schedule for your exact model.
Step 3: Clean or Replace the Air Filter
The air filter prevents dust, grass particles, and other debris from entering the engine.
A dirty filter can restrict airflow and contribute to poor performance.
A damaged or improperly installed filter can allow contaminants into the engine.
How to Check the Honda Lawn Mower Air Filter
- Stop the engine and let it cool.
- Locate the air-cleaner housing.
- Release the cover clips or fasteners.
- Remove the filter carefully.
- Inspect it for dirt, tears, deformation, or excessive clogging.
- Clean or replace it using the correct model-specific procedure.
- Check that the housing is clean.
- Reinstall the filter securely.
- Close the cover.
Many Honda GCV engines use a dry paper air filter.
A dry paper filter may be cleaned by gently tapping it to remove loose debris, when the manual permits that method.
Do not soak a dry paper filter in water or oil unless the manufacturer specifically instructs you to do so.
Some other engine models use foam elements that have different maintenance procedures.
How Often Should You Clean the Air Filter?
Honda recommends checking the filter before each use.
Many HRN216 schedules include an initial air-filter cleaning around 25 hours, with later service intervals based on operating hours.
Dusty conditions require more frequent attention.
Honda’s fuel-system maintenance recommendations emphasize keeping the filter clean because dirt entering the carburetor can create starting and running problems.
When Should You Replace the Air Filter?
Replace it when:
- The filter is torn or damaged.
- The sealing surface is deformed.
- It is heavily clogged.
- Cleaning no longer restores its condition.
- The specified replacement interval is reached.
Many HRN216 manuals call for replacement around 150 hours or two years, whichever comes first.
However, intervals vary.
Use a replacement part that fits and seals correctly.
Key Takeaway: Inspect the air filter before every mowing session and service it more frequently when mowing dusty areas.
Step 4: Inspect and Maintain the Cutting Blades
Sharp cutting blades help produce an even lawn.
Dull blades tear or shred grass instead of cutting it cleanly.
They may leave ragged brown tips across the lawn.
How to Tell if Honda Lawn Mower Blades Are Dull
Common signs include:
- Ragged grass tips
- Browning shortly after mowing
- Uneven cutting
- Stray grass strands
- Increased vibration
- Visible blade nicks
These symptoms can have other causes, so inspect the blades and mower condition rather than assuming dullness is always responsible.
Honda’s blade-sharpening guidance explains that worn blades can damage grass appearance and recommends regular inspection.
How Often Should You Sharpen the Blades?
Inspect blade condition before mowing.
Sharpen when cutting quality declines or inspection shows that the cutting edges are dull.
The frequency depends on:
- Mowing hours
- Grass conditions
- Sand and dust
- Stones and debris
- Blade design
- Accidental impacts
Blades used in sandy or debris-filled areas may dull faster.
How to Maintain the Blades Safely
For an initial inspection:
- Stop the engine completely.
- Disconnect the spark plug cap or remove the battery as applicable.
- Follow the correct procedure for accessing the underside.
- Wear heavy-duty protective gloves.
- Inspect for cracks, bending, chips, and excessive wear.
- Have the blade sharpened and balanced if appropriate.
- Replace the blade if structurally damaged.
- Reinstall components according to the manufacturer’s specifications.
A blade must be balanced after sharpening.
An unbalanced blade can increase vibration and contribute to wear.
Can You Sharpen Honda Twin Blades?
Some Honda lawn mowers use dual-blade cutting systems.
These blades are designed to work together.
Their orientation, spacing, and hardware are important.
Use the model-specific Honda instructions for sharpening, replacing, and installing both blades.
Do not assume that a generic single-blade procedure applies to a Honda dual-blade system.
When Should You Replace a Blade Instead of Sharpening It?
Replace a blade that is:
- Bent
- Cracked
- Severely chipped
- Excessively worn
- Heavily corroded
- Otherwise structurally damaged
Sharpening cannot repair structural damage.
Use an appropriate replacement part and the specified installation torque.
If you lack the tools or experience to handle the blades safely, use a qualified servicing dealer.
Key Takeaway: Sharp, properly balanced blades improve cut quality. Damaged blades should be replaced rather than repeatedly sharpened.
Step 5: Clean the Mower Deck After Use
Grass clippings, dust, soil, and moisture can accumulate around the mower deck.
Heavy buildup may affect airflow, cutting performance, and corrosion resistance.
Regular cleaning helps keep the machine in better condition.
How to Clean a Honda Lawn Mower Deck
- Stop the engine.
- Wait until the blade stops completely.
- Allow hot components to cool.
- Disconnect the spark plug cap or remove the battery.
- Turn the fuel valve OFF on applicable gasoline models.
- Follow the owner’s manual for the correct access or tipping direction.
- Remove accessible grass buildup using an appropriate scraper or stiff brush.
- Wipe the deck and accessible surfaces.
- Allow any cleaned areas to dry before storage.
Never use your bare hands to clear a clogged mower deck.
Honda specifically recommends stopping the engine, disconnecting the spark plug cap, and using a stick rather than your hands when clearing a deck obstruction.
Can You Wash a Honda Lawn Mower With Water?
It depends on the model and the part being cleaned.
For gasoline models, limited washing may be permitted under the owner’s manual instructions.
However, water entering the air intake, carburetor, muffler, or certain mechanical components can cause problems.
Avoid directing high-pressure water toward the engine, bearings, cables, or electrical parts.
Battery-powered mowers may have stricter cleaning requirements.
For many electric models, a brush and lightly damp cloth are safer than spraying the machine.
Always follow the specific owner’s manual.
How to Clean the Grass Bag
Remove grass clippings after mowing.
Inspect the bag for tears, loose seams, and blocked mesh.
If the manual permits washing, clean the bag and let it dry completely before reinstalling or storing it.
A blocked or damaged grass bag may reduce collection performance.
Should You Clean the Mower After Every Use?
A quick inspection and removal of significant grass buildup after each use is a good habit.
A more thorough cleaning may be needed when mowing damp grass or heavy growth.
Key Takeaway: Keeping the mower deck and grass bag clean helps maintain cutting performance and reduces buildup, but cleaning methods must match the mower’s design.
Step 6: Inspect and Replace the Spark Plug
The spark plug ignites the fuel-air mixture inside a gasoline engine.
Over time, deposits and electrode wear can affect ignition performance.
A defective plug may contribute to difficult starting or uneven running.
How Often Should You Check the Spark Plug?
Many Honda HRN216 maintenance schedules specify:
- Spark plug inspection: Approximately every 100 hours or annually
- Spark plug replacement: Approximately every 150 hours or two years
These intervals are examples, not universal Honda specifications.
Check the exact schedule for your mower.
How to Inspect the Spark Plug
- Stop the engine and allow it to cool.
- Disconnect the spark plug cap.
- Clean loose dirt from around the spark plug.
- Remove the plug using the appropriate socket.
- Inspect the insulator and electrodes.
- Check for damage or excessive deposits.
- Measure the electrode gap if instructed.
- Replace or service the plug according to the manual.
- Reinstall it using the correct tightening procedure.
- Reconnect the spark plug cap.
Do not use a random replacement plug based only on its physical appearance.
What Spark Plug Does a Honda Lawn Mower Use?
Different engines use different plugs.
For example, some Honda HRN216 models specify an NGK BPR5ES spark plug.
However, that doesn’t mean every Honda mower uses the same component.
Check the engine model and owner’s manual before purchasing a replacement.
Signs of a Worn Spark Plug
Possible symptoms include:
- Hard starting
- Rough engine operation
- Intermittent misfiring
- Loss of performance
- Visible plug damage
However, these symptoms may also result from stale fuel, a dirty air filter, carburetor problems, or other faults.
Replacing the spark plug won’t solve every starting problem.
Key Takeaway: Inspect the spark plug at the prescribed interval and use only the type and gap specified for your engine.
Step 7: Maintain the Fuel System
Fuel maintenance is particularly important for gasoline Honda lawn mowers.
Stale gasoline can leave deposits in the carburetor and interfere with starting or smooth operation.
These problems often appear after the mower has been stored for several weeks or months.
What Gasoline Should You Use?
Honda recommends regular unleaded gasoline suitable for the engine.
Its general guidance permits gasoline containing up to 10% ethanol.
Do not use E15, E85, or gasoline containing more than 10% ethanol in a Honda lawn mower unless Honda specifically approves it for the particular equipment.
Follow the octane requirements in the owner’s manual.
How to Keep Fuel Fresh
Use these practices:
- Purchase fuel from a reputable source.
- Store it in an approved gasoline container.
- Keep the container tightly closed.
- Protect it from direct sunlight and excessive heat.
- Avoid storing large amounts of gasoline unnecessarily.
- Keep dirt and water out of the fuel system.
- Follow Honda’s storage guidance when the mower will be unused.
Should You Use Fuel Stabilizer?
A compatible fuel stabilizer can help preserve fresh gasoline during certain storage periods.
However, stabilizer does not restore fuel that has already deteriorated.
Honda provides different recommendations for shorter and longer storage periods.
For many gasoline Honda mower models:
| Storage Duration | General Honda Fuel-Care Guidance |
| Regular use | Use fresh, approved gasoline |
| Around 3–4 weeks without use | Prevent fuel from remaining in the carburetor, where applicable |
| 30–90 days | Use an appropriate stabilizer and follow the specified carburetor procedure |
| More than 90 days | Prepare to remove fuel from the system according to the manual |
Honda’s official fuel recommendations explain these storage procedures in more detail.
Should You Leave Fuel in the Tank Over Winter?
For extended seasonal storage, follow the model-specific procedure.
Honda recommends draining the entire fuel system for gasoline mower storage exceeding 90 days in its general lawn mower fuel guidance.
Fuel handling creates fire and vapor hazards.
Work outdoors, away from flames or sparks, using suitable containers and proper disposal methods.
If you are not comfortable draining fuel safely, have a qualified technician prepare the mower for storage.
What Are the Signs of Stale Fuel?
Possible symptoms include:
- Engine starts and quickly stalls
- Difficult starting after storage
- Rough running
- Surging engine speed
- Reduced performance
These symptoms are not exclusive to fuel problems.
Avoid randomly adjusting the carburetor before checking basic maintenance items.
Key Takeaway: Fresh fuel and proper storage preparation are among the best ways to prevent common Honda mower starting problems.
Step 8: Inspect Wheels, Drive System, and Cables
Honda self-propelled mowers have additional mechanical components that require attention.
Depending on the model, these may include drive cables, wheel gears, transmissions, and control mechanisms.
How to Check the Wheels
Inspect the wheels for:
- Cracks or damage
- Excessive looseness
- Debris around the axles
- Uneven rotation
- Worn tread
- Difficulty adjusting cutting height
Remove accessible grass and dirt without damaging seals or bearings.
How to Maintain a Self-Propelled Honda Mower
Some Honda mowers use systems such as Smart Drive, Select Drive, or other self-propulsion mechanisms.
Check that the mower moves smoothly when the drive control is operated.
Look for:
- Delayed drive engagement
- Unusual noises
- Excessive cable slack
- Wheel slipping
- Uneven propulsion
- Failure to disengage correctly
Some cables can be adjusted using procedures described in the owner’s manual.
However, transmission and drive repairs may require specialized tools or technical knowledge.
Should You Lubricate the Wheels?
Only where the model’s maintenance schedule specifies lubrication.
Some components use sealed bearings or particular grease types.
Do not apply random lubricants to belts, clutches, friction surfaces, or other parts.
For mower models requiring pinion-gear lubrication, use the appropriate grease and service procedure.
When Should You Seek Professional Service?
Have the mower inspected if:
- The drive does not disengage correctly.
- Wheels lock or behave unpredictably.
- The transmission produces unusual noises.
- A safety-control cable fails.
- The drive mechanism needs internal repair.
Key Takeaway: Regularly check wheels, drive operation, and cables. Follow the model’s instructions for adjustment and lubrication.
Step 9: Inspect the Safety Controls and Grass Bag
Safety systems must work correctly before the mower is used.
Many walk-behind Honda mowers use an engine-stop lever, blade-control mechanism, or another control designed to stop the cutting system.
The exact arrangement varies by model.
What Should You Check Before Mowing?
Inspect:
- Engine-stop or blade-control operation
- Control levers
- Cables
- Rear discharge shield
- Grass bag
- Bag attachment frame
- Cutting-height adjusters
- Visible blade hardware
- Loose or damaged components
The rear shield should not be missing or damaged.
The grass bag should attach securely when used.
What if the Blade Doesn’t Stop Correctly?
Stop using the mower.
A blade-control or engine-stop system that does not function correctly is a safety issue.
Honda recommends authorized servicing when blade-control operation is not correct.
Do not bypass safety controls or continue mowing with a malfunctioning mechanism.
Why Inspect the Grass Bag?
A damaged grass bag may release grass clippings or debris unexpectedly.
Check for worn fabric, torn mesh, damaged seams, and broken mounting components.
Replace damaged parts with compatible replacements.
Key Takeaway: Inspect safety controls and guarding before every use. A malfunctioning safety mechanism requires repair before mowing.
Step 10: Clean the Engine Cooling Areas
Most gasoline Honda walk-behind mower engines use air cooling.
Grass clippings, leaves, and dust can accumulate around engine covers and cooling-air openings.
Obstructed airflow may contribute to overheating.
How to Maintain Engine Cooling
With the engine stopped and cool:
- Inspect the external cooling-air openings.
- Remove accessible grass and debris.
- Clean dust from the engine exterior using a suitable brush or cloth.
- Check for obvious obstructions near the cooling shroud.
- Avoid forcing water into the engine.
- Follow the manual for any deeper cleaning procedures.
Do not remove protective engine shrouds unnecessarily.
Internal cooling-fin cleaning and repairs may require appropriate service knowledge.
What Causes a Honda Mower to Overheat?
Possible causes include:
- Blocked cooling airflow
- Low engine oil
- Excessively heavy grass load
- Incorrect engine operation
- Mechanical problems
If the mower shows signs of serious overheating, stop operating it and investigate the cause.
Key Takeaway: Keeping the engine’s cooling-air pathways clear supports normal operating temperature and reliable performance.
Honda Lawn Mower Maintenance Schedule by Hours
Honda maintenance intervals vary by mower and engine.
The following schedule is based on common gasoline Honda HRN216 maintenance requirements and is useful as an example.
Example HRN216 Maintenance Schedule
| Service Interval | Typical Tasks |
| Before each use | Check oil, air filter, blades, guards, grass bag, and safety controls |
| First 5 hours or first month | Change engine oil |
| First 25 hours | Clean the air filter |
| Every 50 hours or 6 months | Change engine oil and service the air filter |
| Every 100 hours or annually | Inspect the spark plug and perform other scheduled checks |
| Every 150 hours or 2 years | Replace spark plug and air filter as specified |
| Every 2 years | Inspect fuel lines and replace if necessary |
| Before extended storage | Clean mower and follow fuel storage procedure |
Service may be needed earlier under dusty conditions, high temperatures, or heavy loads.
Other Honda mower series may use different schedules.
How to Track Mower Operating Hours
Some mowers have an hour meter.
For equipment without one, keep a simple maintenance record.
For example:
| Date | Estimated Hours | Maintenance Performed |
| April 5 | 5 | First oil change |
| May 10 | 25 | Air filter cleaned |
| July 12 | 50 | Oil changed and filter inspected |
| October 20 | 100 | Spark plug inspection and seasonal service |
These are illustrative entries rather than an official schedule.
A record helps you avoid forgetting maintenance, especially when the mower is used frequently.
Key Takeaway: Use operating hours and calendar time together. Follow whichever service limit occurs first when your owner’s manual specifies both.
How to Maintain a Honda Lawn Mower During the Mowing Season
Routine seasonal maintenance can be divided into a few simple stages.
Before Every Mowing Session
- Check engine oil.
- Inspect the air filter.
- Look for visible blade damage.
- Confirm safety controls work.
- Check the grass bag and rear shield.
- Remove rocks, branches, and debris from the mowing area.
- Inspect for fuel leaks.
- Make sure the mower is generally in safe operating condition.
After Every Mowing Session
- Stop the engine and let it cool.
- Remove excessive grass buildup.
- Empty the grass bag.
- Check the deck for obstructions.
- Inspect for visible damage.
- Turn the fuel valve OFF if applicable.
- Store the mower in a dry location.
Every Few Weeks
Depending on use:
- Examine the blade cutting edges.
- Check wheel movement.
- Inspect control cables.
- Clean the air filter if needed.
- Review the next scheduled service.
Midseason Maintenance
At the appropriate operating-hour interval:
- Change the engine oil.
- Service the air filter.
- Inspect the spark plug if due.
- Check mower controls.
- Look for unusual vibration or wear.
Key Takeaway: A short inspection before and after each mowing session can prevent small problems from becoming expensive repairs.
How to Prepare a Honda Lawn Mower for Winter Storage
Seasonal storage is particularly important for gasoline-powered mowers.
Fuel deterioration and moisture-related corrosion can create starting problems when spring arrives.
Step 1: Clean the Mower Thoroughly
Remove grass clippings and debris from the deck.
Clean the exterior.
Empty and dry the grass bag.
Use only cleaning methods permitted for your model.
Step 2: Service the Engine Oil
Check whether an oil change is due.
Some Honda manuals recommend changing engine oil before extended storage.
Follow the model-specific instructions.
Step 3: Prepare the Fuel System
Determine how long the mower will be unused.
For gasoline mowers stored longer than 90 days, Honda’s general fuel guidance recommends removing fuel from the entire system.
For shorter storage periods, Honda provides stabilizer and carburetor-management procedures.
Follow the exact instructions for your fuel system.
Step 4: Inspect the Spark Plug
Check the plug if its service interval is due.
Some older Honda manuals describe additional engine preservation procedures for prolonged storage.
Use these only when appropriate for the engine model.
Step 5: Inspect the Blades
Check for damage and excessive wear.
Have the blades sharpened or replaced if necessary.
This may reduce maintenance work when mowing resumes.
Step 6: Check Wheels and Controls
Inspect the wheels, cables, and visible hardware.
Arrange necessary repairs before the next mowing season.
Step 7: Store in a Dry Location
Store the mower in a covered, dry, well-ventilated area.
Protect it from excessive moisture and corrosion.
Keep fuel-containing equipment away from ignition sources and follow the manufacturer’s fuel-storage safety instructions.
Avoid storing the mower where children can access or operate it.
Step 8: Check the Mower Before Spring Use
When the next mowing season begins:
- Inspect the equipment.
- Verify the oil level.
- Check the air filter and spark plug.
- Add suitable fresh fuel.
- Inspect the blade and controls.
- Start the engine outdoors.
- Confirm normal operation before mowing.
Key Takeaway: Proper fuel preparation, cleaning, inspection, and dry storage reduce the chance of difficult starting after winter.
How to Maintain a Honda Battery-Powered Lawn Mower
Battery-powered Honda mowers require a different maintenance routine.
Models such as the HRN-BV and certain HRX-BV or HRC-BE configurations do not need gasoline-engine oil changes, spark plugs, or carburetor service.
However, blade, deck, control, and battery maintenance remain important.
Battery Mower Maintenance Checklist
| Component | Recommended Care |
| Battery | Inspect for damage and follow charging instructions |
| Battery terminals | Keep clean and dry |
| Charger | Use a compatible approved charger |
| Cutting blades | Inspect and maintain as specified |
| Mower deck | Remove grass and debris |
| Wheels | Inspect for damage and free movement |
| Controls | Check correct operation before use |
| Storage | Keep equipment and batteries under recommended conditions |
Remove the Battery Before Maintenance
Always disable the mower and remove the battery when directed by the owner’s manual before working near the blades or underside.
Honda’s spring mower maintenance guidance emphasizes removing the battery before inspection.
How to Maintain the Battery
Use the charger specified for the battery system.
Keep battery terminals clean and dry.
Avoid physical damage, excessive heat, and improper charging conditions.
For storage, follow the battery’s specified temperature and charge-level instructions.
Do not assume the best storage charge level is identical for every battery chemistry or model.
How to Clean a Battery-Powered Honda Mower
Use a brush, scraper, or lightly damp cloth as appropriate.
Keep water away from electrical connectors, battery compartments, and sensitive components.
Do not use a high-pressure washer unless the manufacturer’s instructions explicitly permit it.
Do Battery Mowers Need Blade Sharpening?
Yes.
Battery-powered mowers still rely on cutting blades.
Inspect and maintain them according to the mower’s requirements.
A damaged or unbalanced blade may affect cutting quality and equipment operation.
Key Takeaway: Battery-powered Honda mowers eliminate gasoline-engine maintenance, but blade inspection, cleaning, battery care, and safety checks remain essential.
Common Honda Lawn Mower Problems and Maintenance Solutions
Regular maintenance can help prevent many common mower problems.
However, some symptoms require diagnosis or professional repair.
Honda Lawn Mower Troubleshooting Chart
| Problem | Possible Causes | First Maintenance Checks |
| Mower won’t start | Stale fuel, spark plug issue, air filter problem | Check fuel, filter, plug, and controls |
| Starts then stalls | Fuel delivery or carburetor problem | Check fuel freshness and air filter |
| Engine runs rough | Dirty filter, fuel problem, ignition issue | Inspect filter, fuel, and plug |
| Excessive vibration | Damaged blade, loose components, mechanical damage | Stop immediately and arrange inspection |
| Uneven grass cutting | Dull blades, deck buildup, uneven height settings | Inspect blades and cutting-height adjustments |
| Mower difficult to push | Wheel or drive-system problem | Inspect wheels and propulsion mechanism |
| Excessive grass buildup | Wet grass, clogged deck, unsuitable mowing conditions | Clean deck and adjust mowing conditions |
| Engine overheats | Cooling obstruction, low oil, heavy loading | Stop and inspect oil and cooling openings |
| Self-propel system fails | Cable, wheel, or transmission problem | Check controls and seek service if needed |
Why Does My Honda Lawn Mower Start and Then Stop?
A common cause is stale fuel or fuel-system contamination.
Other possibilities include a clogged air filter or carburetor problem.
Start with basic checks.
If the issue continues, professional diagnosis may be necessary.
Why Does My Honda Mower Leave Strips of Uncut Grass?
Possible causes include:
- Worn or dull blades
- Heavy grass buildup
- Incorrect cutting height
- Mowing too quickly
- Uneven ground
- Damaged cutting components
Honda recommends checking blade condition and mower operating practices when cut quality declines.
What if the Mower Suddenly Vibrates Strongly?
Stop using it immediately.
Strong vibration can indicate blade damage, imbalance, loose hardware, or damage to rotating components.
A significant impact with a rock or other hard object can also cause mechanical damage.
Do not continue mowing until the problem is identified and corrected.
Key Takeaway: Begin troubleshooting with basic maintenance checks, but stop using the mower when abnormal vibration, fuel leaks, or safety-control failures occur.
Common Honda Lawn Mower Maintenance Mistakes
Avoiding improper maintenance is just as important as performing regular service.
Running the Engine With Low Oil
Insufficient lubrication can damage internal engine parts.
Check the oil level before mowing.
Using the Wrong Engine Oil
Use the oil viscosity and service classification recommended for the engine.
Don’t assume all small engines require the same oil.
Overfilling the Oil
Too much oil can cause operating problems.
Confirm the correct level after filling.
Ignoring the Air Filter
A neglected filter may restrict airflow or allow contaminants into the engine.
Check it regularly.
Using Old Gasoline
Stale fuel can leave deposits in the fuel system.
Follow Honda’s storage guidance.
Sharpening Damaged Blades
Bent, cracked, or excessively worn blades should be replaced rather than sharpened.
Failing to Balance Blades
An unbalanced blade may create vibration and additional component wear.
Use a qualified technician if you cannot sharpen and balance safely.
Tipping the Mower in the Wrong Direction
Incorrect tipping may allow oil or gasoline to enter the air cleaner or other parts.
Follow your exact model’s instructions.
Using a Pressure Washer Improperly
High-pressure water may damage components or force moisture into areas that should remain dry.
Use appropriate cleaning methods.
Skipping Safety-Control Checks
A mower with defective blade-stop or engine-stop controls should not be operated.
Storing the Mower With Untreated Fuel
Long-term fuel deterioration can cause starting problems.
Prepare the fuel system before extended storage.
Using Incorrect Replacement Parts
Spark plugs, filters, blades, and hardware vary by model.
Choose parts that match the mower’s exact specifications.
Key Takeaway: The most damaging maintenance mistakes often involve incorrect oil, stale fuel, neglected blades, improper tipping, and unsafe repairs.
When Should You Take a Honda Lawn Mower to a Service Dealer?
Many basic maintenance tasks can be completed by owners with the correct instructions and tools.
However, some problems are better handled professionally.
Consider qualified service for:
- Significant engine vibration
- Bent crankshafts
- Internal engine repairs
- Carburetor rebuilding
- Valve-clearance adjustment
- Transmission problems
- Failed blade-stop mechanisms
- Complex drive-control adjustments
- Persistent fuel leaks
- Electrical or battery-system damage
- Problems that continue after routine maintenance
Some repairs require diagnostic equipment or specialized knowledge.
A servicing dealer can also help identify the correct replacement parts.
Keep a record of oil changes, filters, spark plugs, blades, and significant repairs.
This helps with long-term maintenance planning.
Conclusion
Learning how to maintain Honda lawn mower equipment begins with a consistent routine rather than waiting for mechanical problems to appear.
For gasoline-powered Honda mowers, the most important tasks include checking engine oil, inspecting the air filter, maintaining sharp cutting blades, using fresh gasoline, and following the correct oil-change and spark-plug schedule.
Cleaning the deck, checking wheels and drive controls, and inspecting safety mechanisms are also essential.
Many HRN216 models require an initial oil change after five hours or one month, followed by changes every 50 hours or six months. However, service intervals differ across Honda models, so the owner’s manual remains the primary reference.
Before long-term storage, prepare the fuel system, clean the equipment, and protect it from moisture.
Battery-powered Honda mowers require less engine-related maintenance, but their batteries, blades, decks, and safety controls still need regular attention.
Most importantly, stop using the mower if it develops excessive vibration, unsafe blade operation, fuel leaks, or other potentially dangerous symptoms.
With the correct maintenance schedule, suitable replacement parts, and proper storage, a Honda lawn mower can remain dependable and deliver consistent cutting performance over many mowing seasons.
FAQs About How to Maintain Honda Lawn Mower
How Often Should I Service My Honda Lawn Mower?
Inspect the oil, air filter, blades, grass bag, and safety controls before each use. For many HRN216 models, change the oil after the first five hours or month and then every 50 hours or six months. Other maintenance tasks follow separate intervals. Always use the schedule for your specific mower.
How Often Should I Change the Oil in a Honda Lawn Mower?
Many Honda HRN216 models require their first oil change after five operating hours or one month. Subsequent oil changes are commonly required every 50 hours or six months. Heavy use or high temperatures may require more frequent changes. Some other Honda models have different schedules.
What Type of Oil Does a Honda Lawn Mower Use?
Many Honda four-stroke lawn mower engines recommend SAE 10W-30 engine oil meeting the specified API service category. However, oil viscosity and capacity depend on the engine model and operating temperatures. Check the owner’s manual before adding oil.
How Often Should You Change a Honda Lawn Mower Air Filter?
Check the filter before every use. Clean or replace it according to the model-specific schedule and more often in dusty conditions. Many HRN216 models specify periodic cleaning and replacement at approximately 150 hours or two years, but intervals vary by engine and equipment.
How Often Should You Sharpen Honda Lawn Mower Blades?
Inspect the blades before mowing and sharpen when they become dull or produce ragged grass cuts. The required frequency depends on mowing hours, grass conditions, sand, and accidental impacts. Bent, cracked, or excessively damaged blades should be replaced rather than sharpened.
Can I Leave Gas in My Honda Lawn Mower Over Winter?
Honda recommends special fuel preparation for storage lasting more than 30 days. For storage exceeding 90 days, its general gasoline mower guidance recommends draining the fuel system. Follow the exact owner’s manual and handle fuel safely outdoors.
How Do I Maintain a Honda Self-Propelled Lawn Mower?
In addition to engine and blade maintenance, inspect the wheels, drive-control cables, and propulsion system. Remove debris from wheel areas, check that the drive engages and disengages correctly, and follow model-specific lubrication requirements. Transmission and safety-control repairs may require professional service.
Do Honda Battery Lawn Mowers Need Regular Maintenance?
Yes. Battery-powered Honda mowers do not need gasoline-engine oil changes, spark plugs, or carburetor maintenance, but they still require blade inspection, deck cleaning, wheel checks, and battery care. Remove the battery before servicing and follow the manufacturer’s charging and storage instructions.